1. Home
  2. Events
  3. How to Manually Refund Event Purchases

How to Manually Refund Event Purchases

Event Invoices are refunded automatically by the system when a contact withdraws their ticket purchase. As such, there will be no ‘Add Refund’ button on most Event Invoices from your Administrator Dashboard while the Event’s Registration Window is still open.

Instead, you must Impersonate the contact and withdraw their ticket for them: the refund will then process automatically.
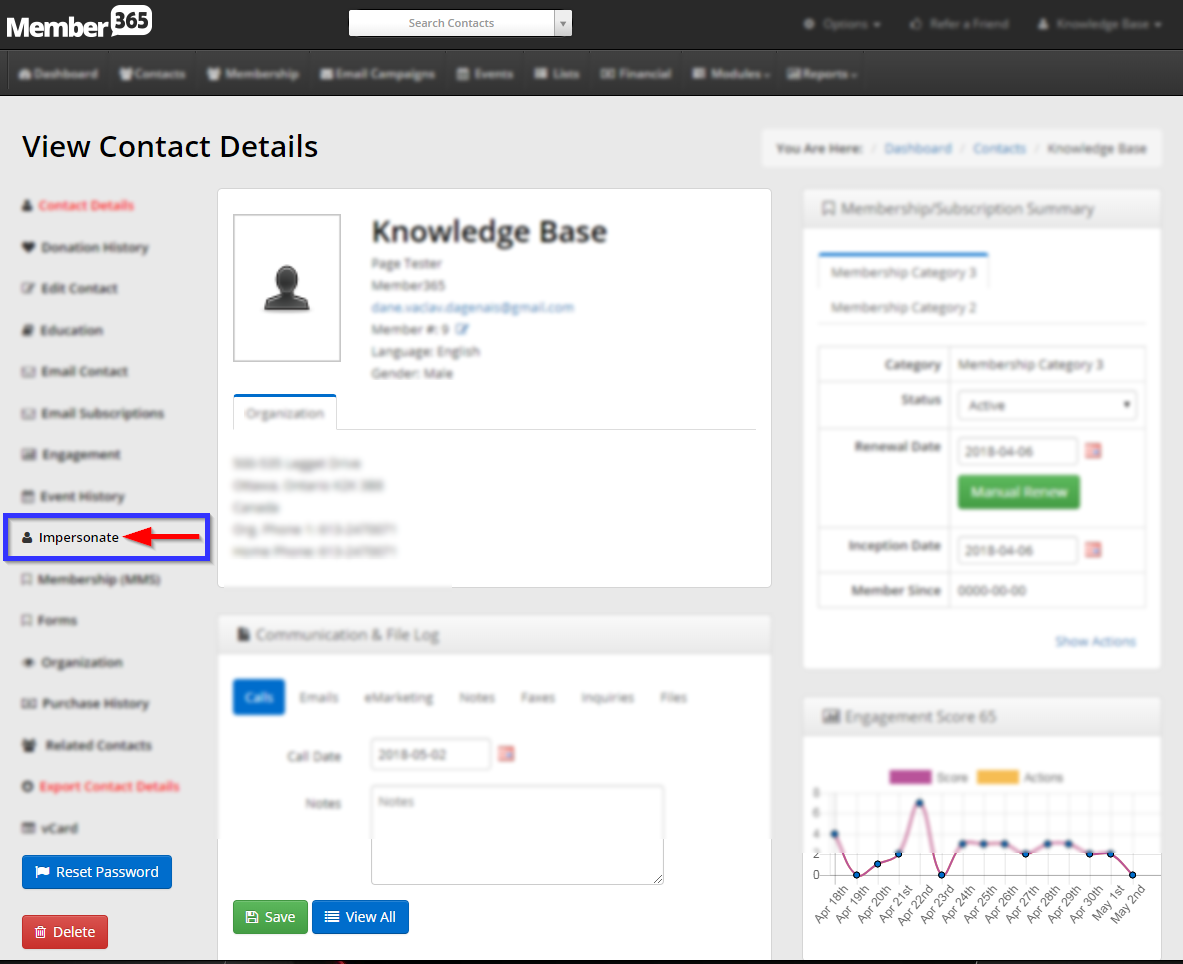
Note

We recommend waiting at least two days before refunding an Event Invoice.

If you withdraw an Event Ticket too quickly – before the initial purchase has been confirmed on your Payment Gateway – the system will not add any funds to your Contact’s Credit Card. Instead, they will receive an email about a cheque and you would need to sort out the balance offline.

As such, we recommend waiting two days after a purchase before your withdraw the Event Ticket of a registrant, so that you can be confident that their Credit Card will see the automatic refund!

1. Type the name or email of the contact you wish to refund in the search bar at the top of the page. Click their entry when they appear.

2. Click the ‘Impersonate’ button from the left-hand side of the Contact Record. You will be logged into your Member Portal as this contact.

If the ‘Impersonate’ button is not present, then the contact does not have Member Portal access. Read here to learn more.

Upon impersonating the contact, we will access their Event Registrations and remove the ticket(s) to be refunded.

3. From the bar at the top of the page, click ‘Events’, then click ‘My Event Registrations’ from the drop-down menu that appears.

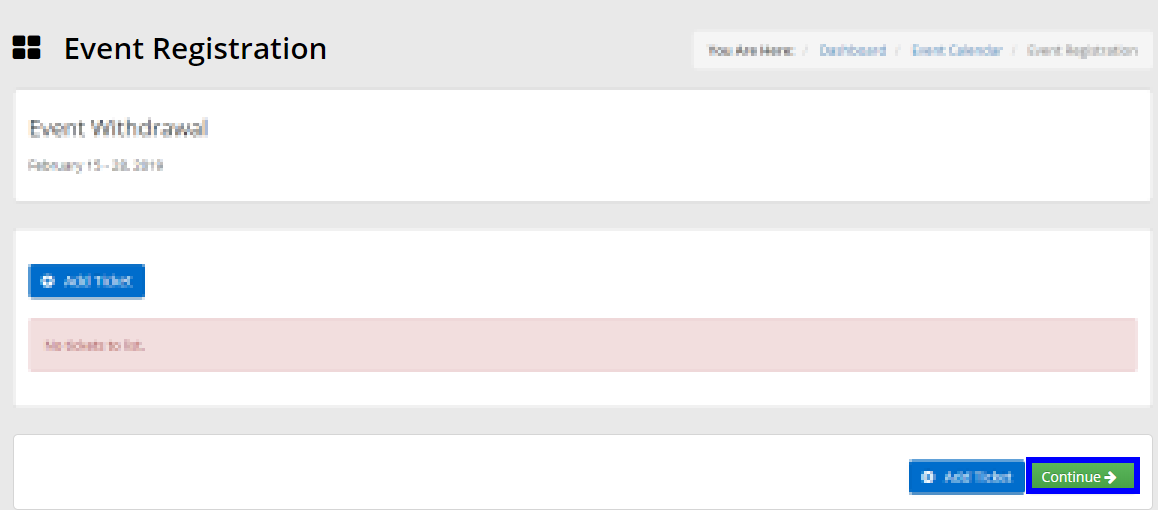
4. Locate the Event Ticket you wish to remove from the list of Upcoming Events, then click the ‘Withdraw/Modify’ button.

If the registration date for your Event has passed, or if you are not able to modify the reservation, you may need to edit your Event’s settings and re-open the registration window temporarily. This Knowledge Base article outlines how you can re-open a closed event.

5. Click ‘Remove‘ next to any ticket you wish to refund. When asked if you really want to remove the ticket, click ‘Confirm’.

If the ticket is unassigned, you will need to click the trash icon on the left instead.

Image indicating the trash icon on the left for a ticket purchase, that needs to be used if the ticket is unassigned.

After clicking ‘Confirm’ when prompted, the rest of the process is the same.

6. When you are satisfied with the tickets that you have removed, click ‘Continue’ at the bottom of the page to proceed to the refund screen.

Image showing the 'Continue' button at the bottom of the ticket page for an event registration.

7. The payment confirmation screen will appear. Assuming your event has no Withdrawal Fees that exceed amount of the refund, you’ll be able to simply click the ‘Process Refund’ button at the bottom of the page.

If the Event does have a Withdrawal Fee, and if that Withdrawal fee totals more than the refund itself, you’ll actually be prompted to pay on behalf of the contact at this step.

If you do not want a Withdrawal Fee charged, then you will need to disable it temporarily in your Event Settings before starting this process.

If your contact paid by cash or check, then you will need to issue them a refund offline, then mark the invoice as refunded from the CRM.

If your contact paid for this event by credit card, they will be refunded automatically by the system.

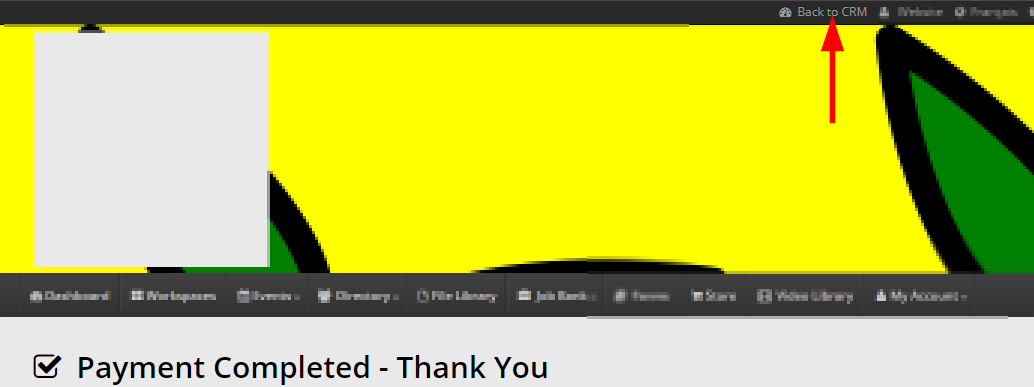
8. You should be taken to the confirmation screen, and from here you can click ‘Back to CRM’ at the top of the page to return to your Administrator Dashboard.

Image showing the payment confirmation screen, with an arrow pointing to the "Back to CRM" button at the top of the page.


Congratulations, you now know how to refund an Event Purchase in Member365!


Was this article helpful?

Related Articles