This article will show you how to send emails to Event Registrants, and how to send promotional emails to contacts who have not yet registered for the Event.
Event Reminders
Event Reminders are managed within the settings for the Event itself. You can schedule the exact day you want an Event Reminder to send; an email will deliver to all event registrants who are registered for the Event on that day.
Contacts who have not yet registered will not receive Event Reminders.
Consult this Knowledge Base article to learn more.
Event Promotional Emails
Member365 facilitates the creation of custom mailing lists based on Event Registration status. You can create a mailing list of all contacts who have registered for your event – or a list of all contacts who have not registered – and send your emarketing to each list appropriately.
Emailing Contacts Not Registered to an Event
1. From the Member365 Administrator Dashboard, click ‘Lists’ at the top of the page.
![]()
2. On the page that follows select ‘Create a Custom List’ and name your new list as necessary. Choosing whether this list is visible to other administrators is up to you.

3. From the list of filters, click ‘Events’.
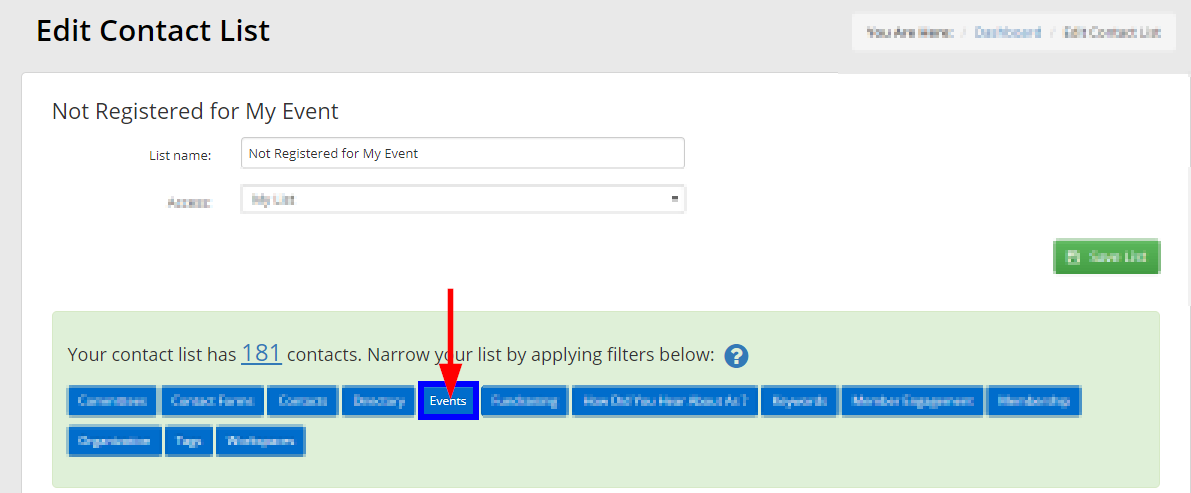
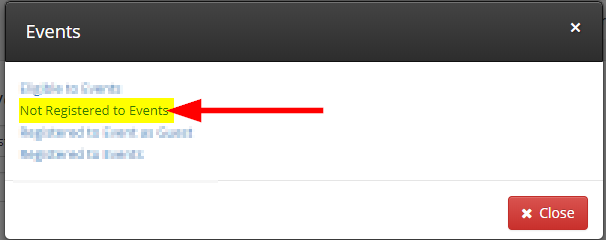
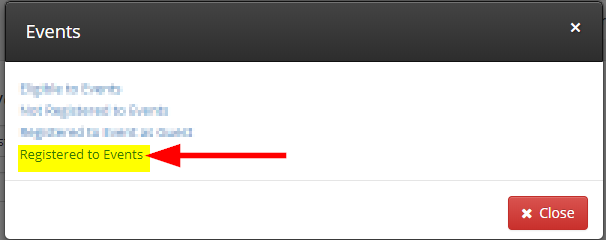
4. When prompted, select the option for ‘Not Registered to Events’.
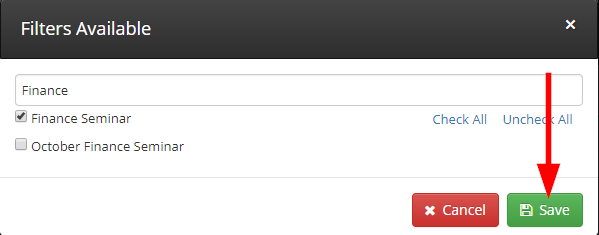
5. Locate the Event in question, using the search bar if necessary, and check the box beside its name. Click ‘Save’ to confirm.
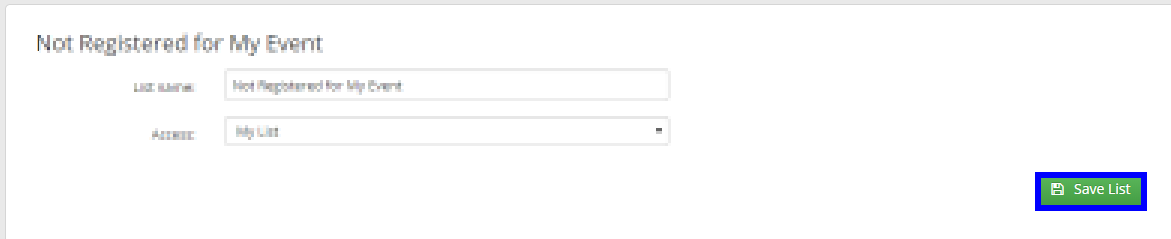
6. Add any other necessary filters, then click ‘Save List’ to confirm all changes.
Emailing Contacts Registered for an Event
You may want two separate lists: one for all contacts not registered for the event, and one for all contacts who are registered for the event.
This list is created by repeating Step 1 through Step 6 above.
Simply choose ‘Registered to Events’ instead when you get to Step 4.
Building the Event Promotional Emails
Now that we have a list of Event Registrants, and a list of contacts not yet registered for the Event, we can build the promotional emails themselves.
7. Click ‘Email Campaigns’ from the bar at the top of the page.
![]()
8. On the page that follows, click ‘Create’ next to ‘Campaign Management’.

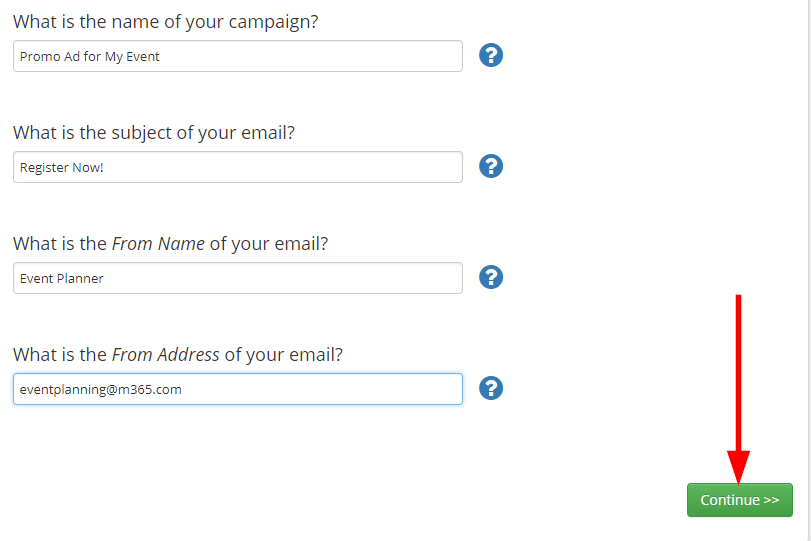
9. Specify the campaign name, subject line, sender name, and from address as necessary. Click ‘Continue’.
10. Build the email campaign. Consult this Knowledge Base article if you are unfamiliar with the campaign editor. Click ‘Save & Continue’ when you are satisfied.

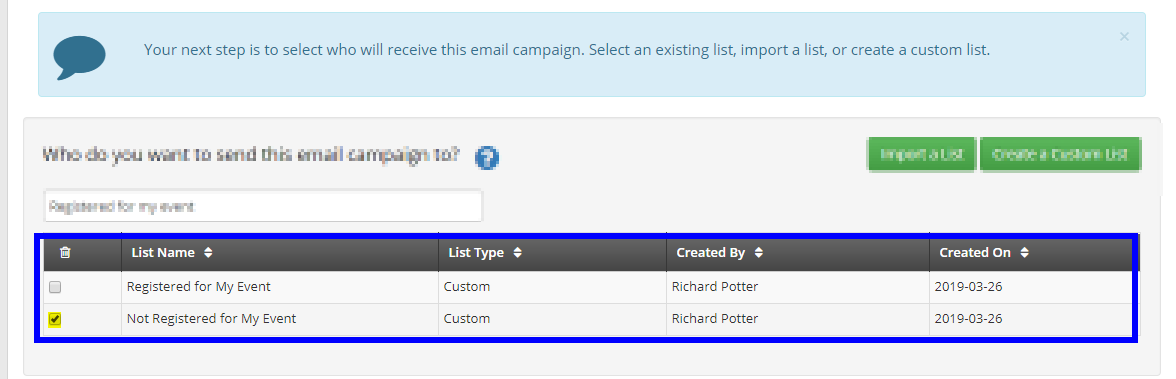
11. Choose your list when prompted to select recipients.
12. Click ‘Continue’ at the bottom of the page when you are satisfied to proceed to the delivery options.

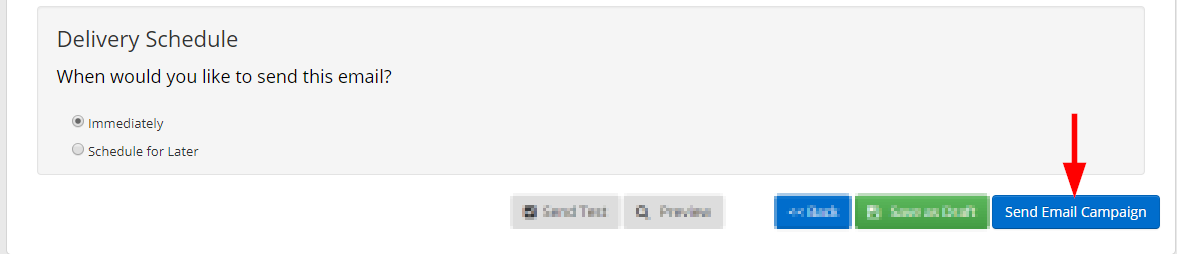
13. Either choose to send your campaign Immediately, or schedule it for a specific day. Click ‘Send Email Campaign’ (or ‘Schedule Email Campaign’) to queue your eblast for delivery.
Congratulations, you now know how to advertise your Event within Member365!