This article will show you how to remove a Contact from an Organization’s Group Membership.
Administrators and Primary Contacts can remove Contacts from a Group Membership in Member365.
Method 1: As An Administrator
The following steps will show you how to remove contacts from a Group Membership as an Administrator.
Access the Organization Record
1. From the Member365 Administrator Dashboard, type the name or email of the contact you wish to remove in the search bar at the top of the page.

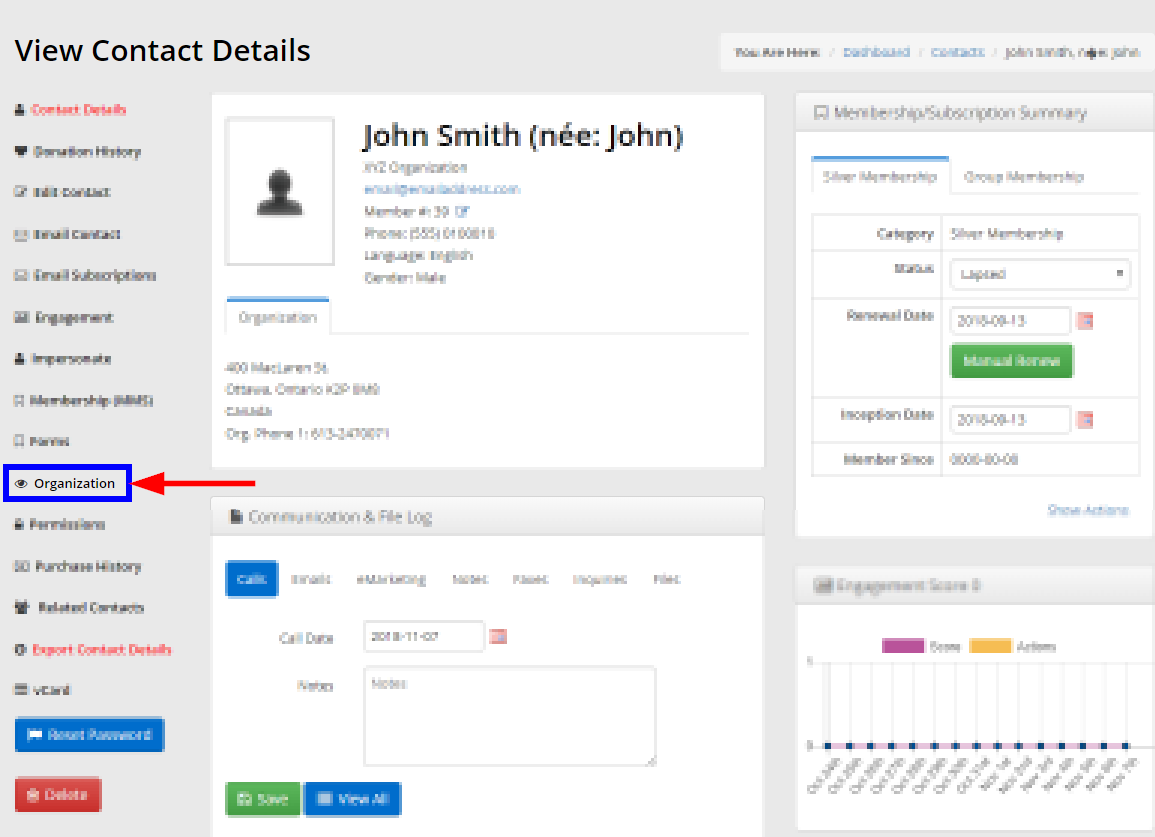
2. Click the contact’s name from the results that appear.

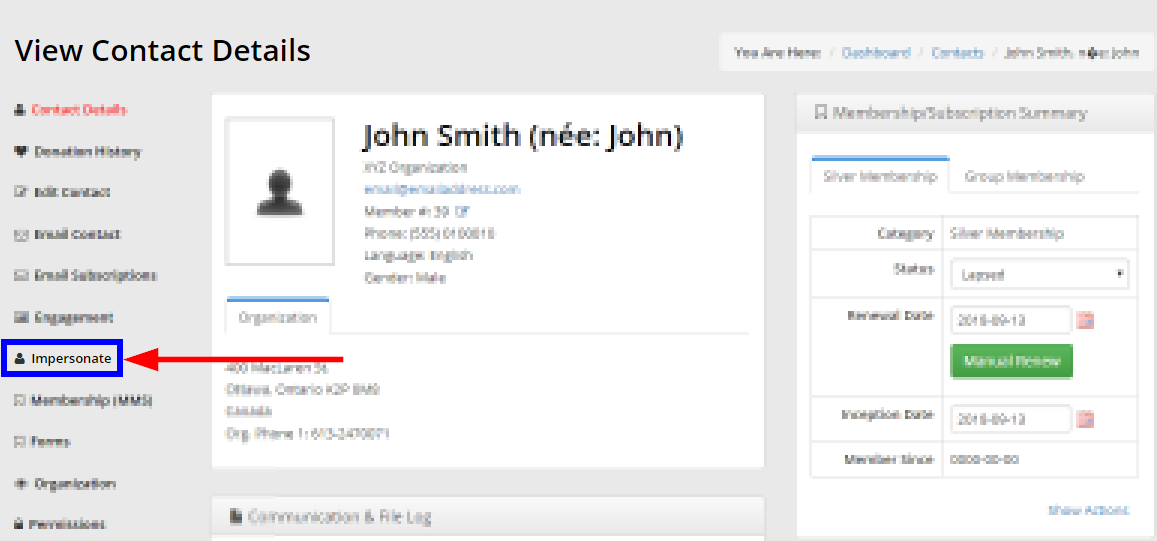
3. On the Contact Record, click ‘Organization’ on the left of the screen.
Delete the Employee Account
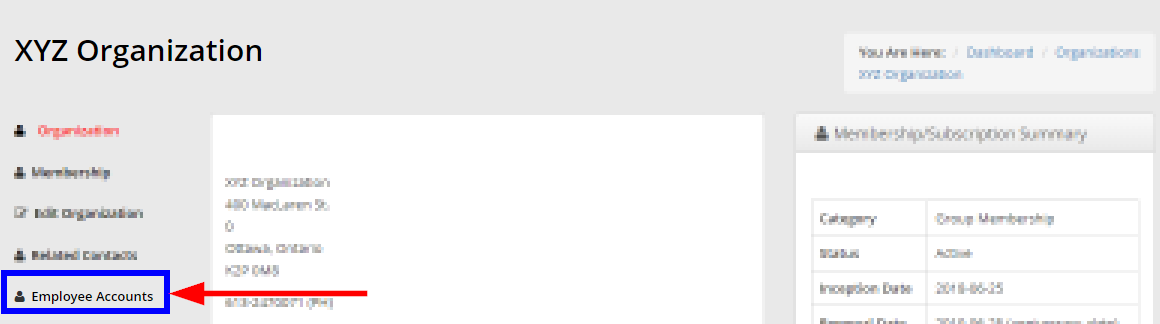
4. Click ‘Employee Accounts’ on the left of the page.
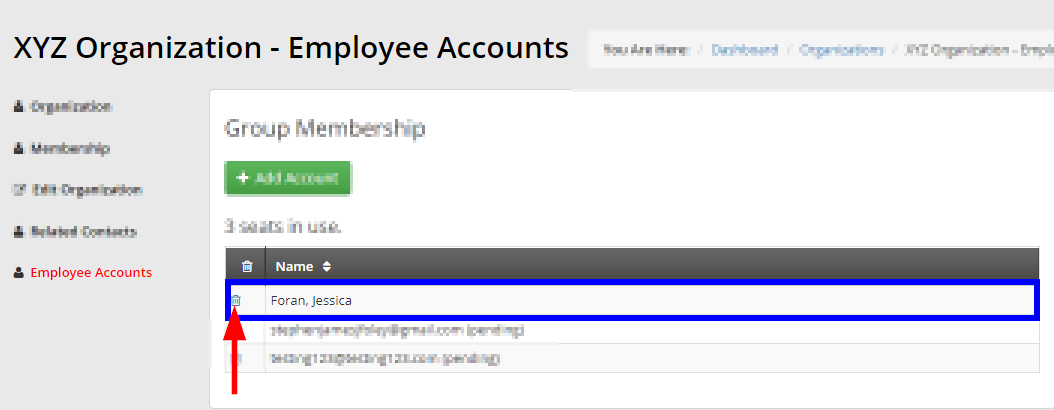
5. Find the Contact in the list, then click the trash icon next to their name or email to delete their Employee Account.
Method 2: Through the Impersonate Tool
The following steps use the Impersonate tool to replicate how a Primary Contact would remove contacts from the Group Membership themselves.
Impersonating the Primary Contact
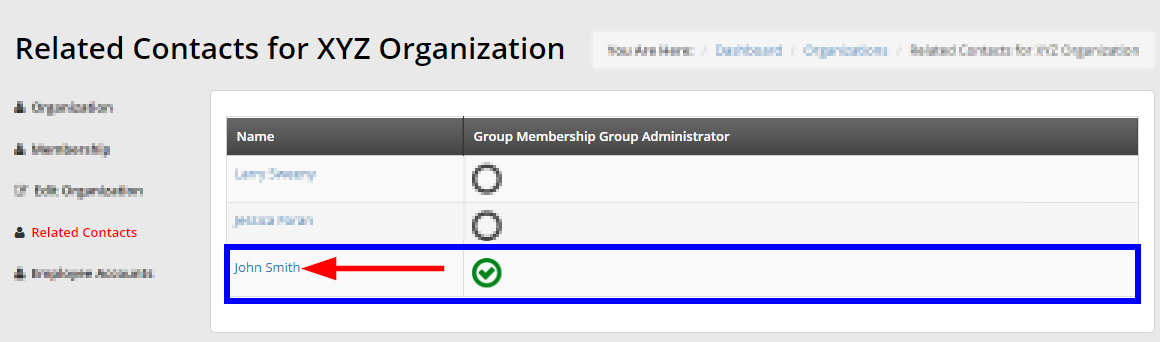
1. Consult this Knowledge Base article to determine the Primary Contact for an Organization’s Group Membership.
2. From the Related Contacts page, click the name of the Organization’s Primary Contact.
3. From the Contact Record, click ‘Impersonate’ on the left side of the page.
Deleting Employee Accounts
4. Now that you are Impersonating the member, click ‘My Account’ on the bar at the top of the screen.
![]()
5. Click ‘Employee Accounts’ from the drop-down menu that appears.

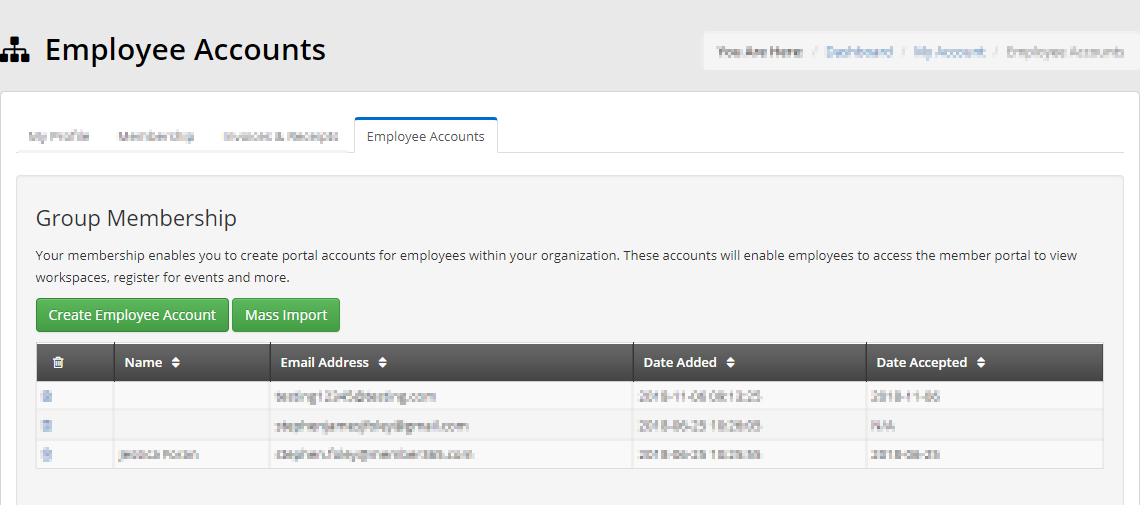
6. The following page will display any Group Memberships for which the member is a Primary Contact. In our example, we are Impersonating the Primary Contact for a membership named ‘Group Membership’.
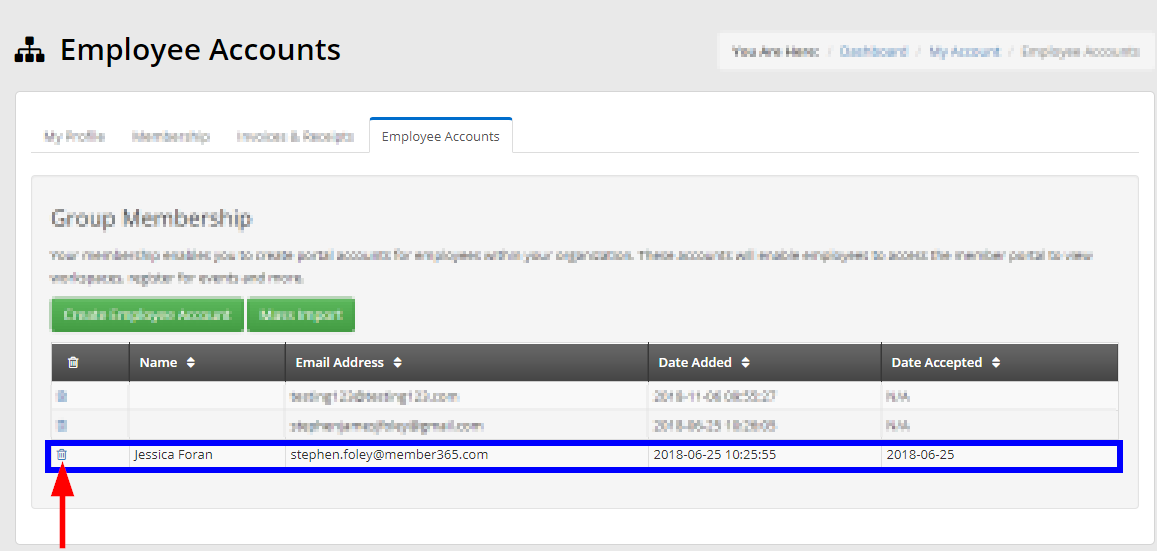
7. Locate the contact you wish to remove from the Group Membership, then click the trash icon next to their name or email.
8. When you are done, click the ‘Back to CRM’ link at the very top of the screen to return to the Administrator Dashboard.
![]()
Congratulations, you can now remove Contacts from a Group Membership!