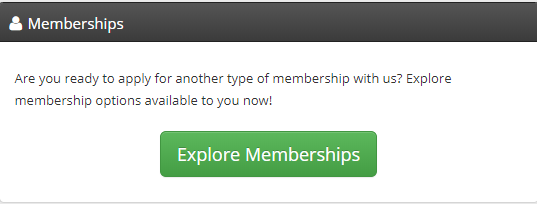
On the Member Portal, there is a button labeled ‘Explore Memberships’. When a Member clicks ‘Explore Memberships’, they will see a list of your Membership Categories and the corresponding application links.
Can you hide which Membership Categories appear through this button? Yes! Continue reading to learn how to hide a Membership Category from the portal.
Access The Membership Category
For each Membership Category, you have the ability to choose which of your other Categories its Members can and cannot see upon clicking ‘Explore Memberships’ on their Portal Dashboard.
1. From the Member365 Administrator Dashboard, click ‘Membership’ from the bar at the top of the screen.

2. On the page that follows, click ‘Manage’ next to ‘Membership Categories’.

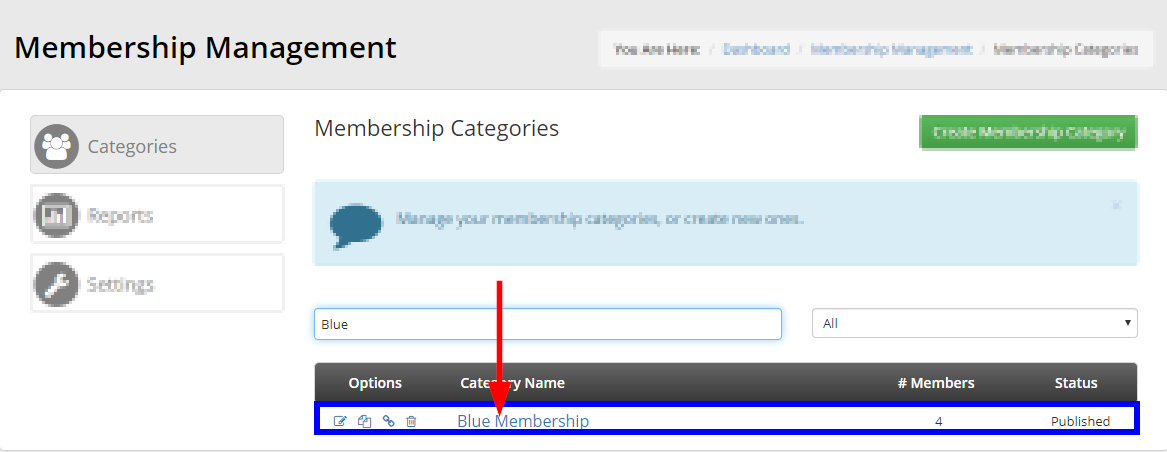
3. Locate the Membership Category you are configuring, using the search bar if necessary, then click its name.
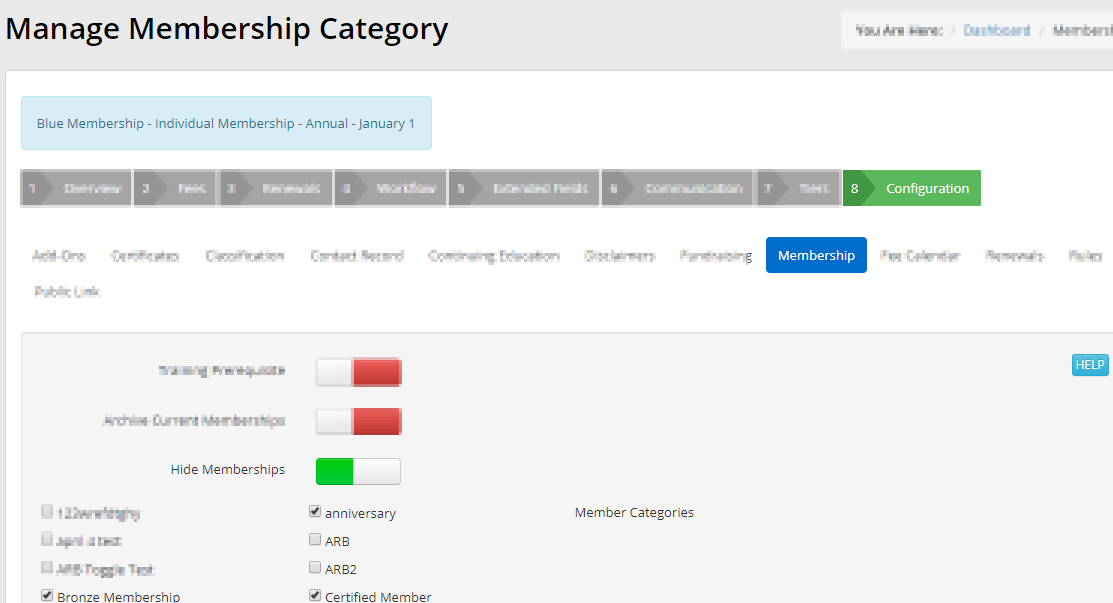
Choose which Categories are Visible
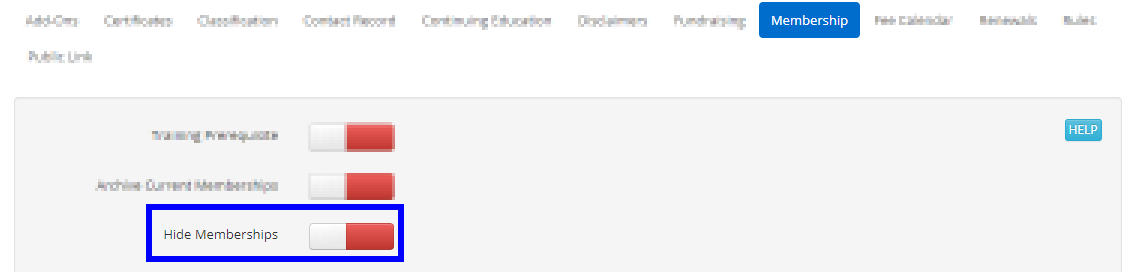
You can now configure which subset of Memberships will display to Members of this Category.
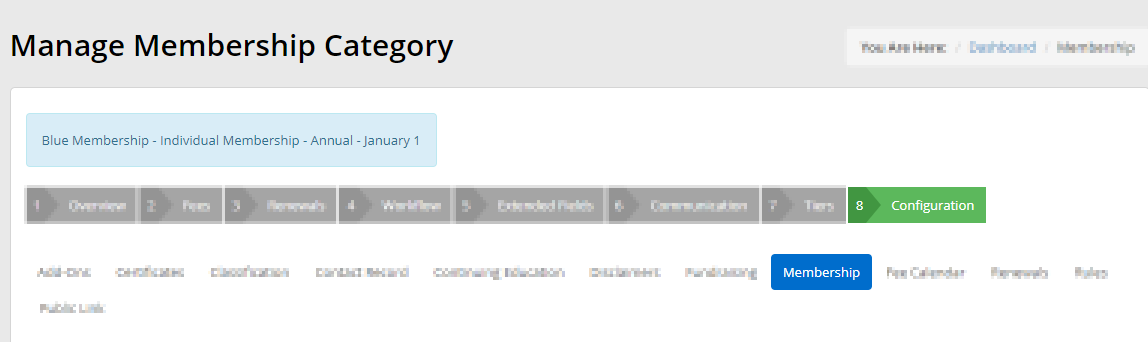
4. Click the ‘Configuration’ tab, then click the ‘Membership’ sub-tab.
5. Locate the ‘Hide Memberships’ toggle.
6. Remember to always click ‘Publish’ at the bottom of the page to save your changes.

Congratulations, you now know how to control which Membership Categories will be visible to your Members upon exploring their Member Portals, and which will not!