List builder allows you to create a filtered list of employees that are attached to an organization membership. The employee account filters you can sort by are as follows:
Employee Account – The contacts that are attached to an organization membership
Employee Account Status – The status (Active/Lapsed/Archived) of the membership that is attached to the primary contact of the organization membership.
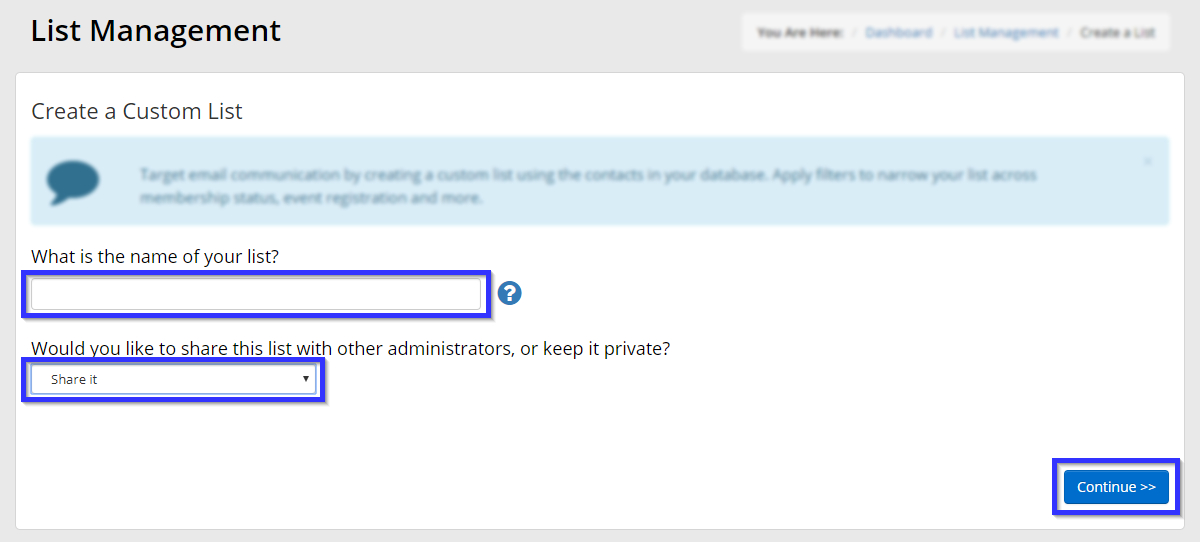
Creating a List for Employee Accounts
- Log in to your Member365 Administrator Dashboard.
- On the top bar, click ‘Lists. ‘

- Click ‘Create a Custom List‘ to create a list. To configure an existing one, click its name or the pencil icon next to its name.

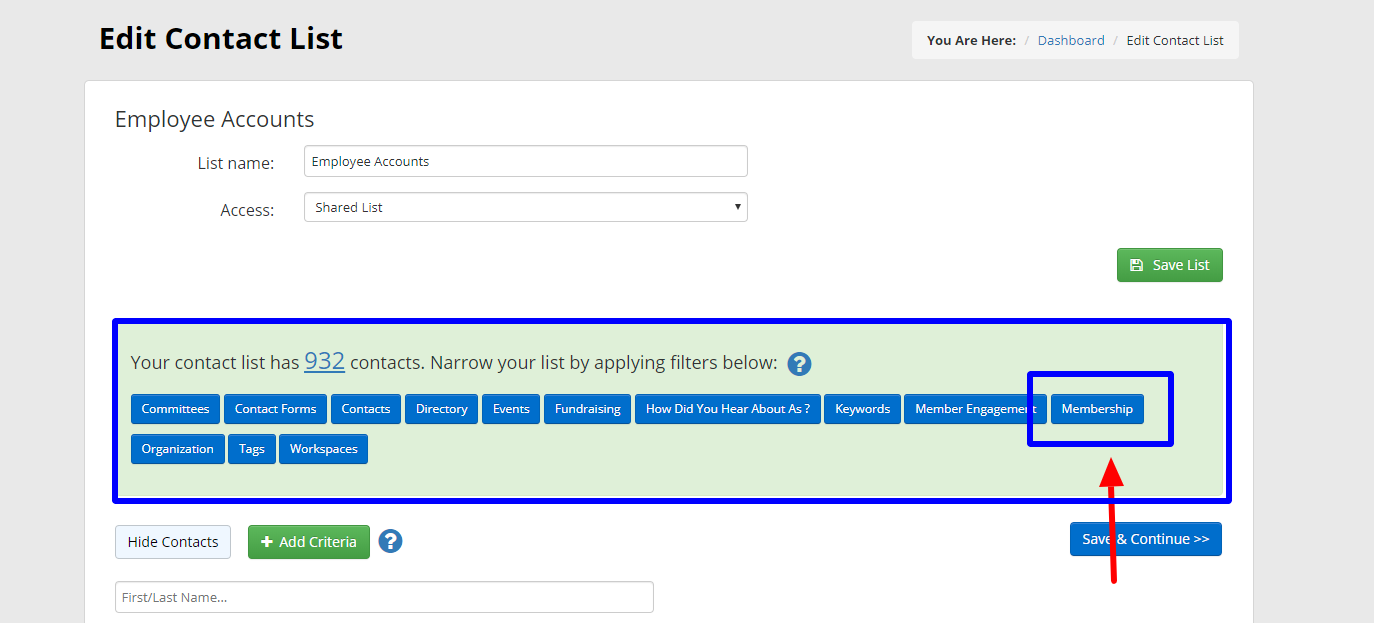
If you are configuring an existing list, the other icons may prove useful: the five icons allow you to either export the list as a spreadsheet, edit it, tag the users in it, send the contact list in an email, or delete the list, in that order.
- Enter a name for your list, select who can access it, and click ‘Continue. ‘
Setting List Criteria to Employee Account
By default, the list will display all of your contacts. Pick one of the criteria below to add a new filter and reduce the size of this list.
In this example, we will be filtering the list to include only Employee Accounts.
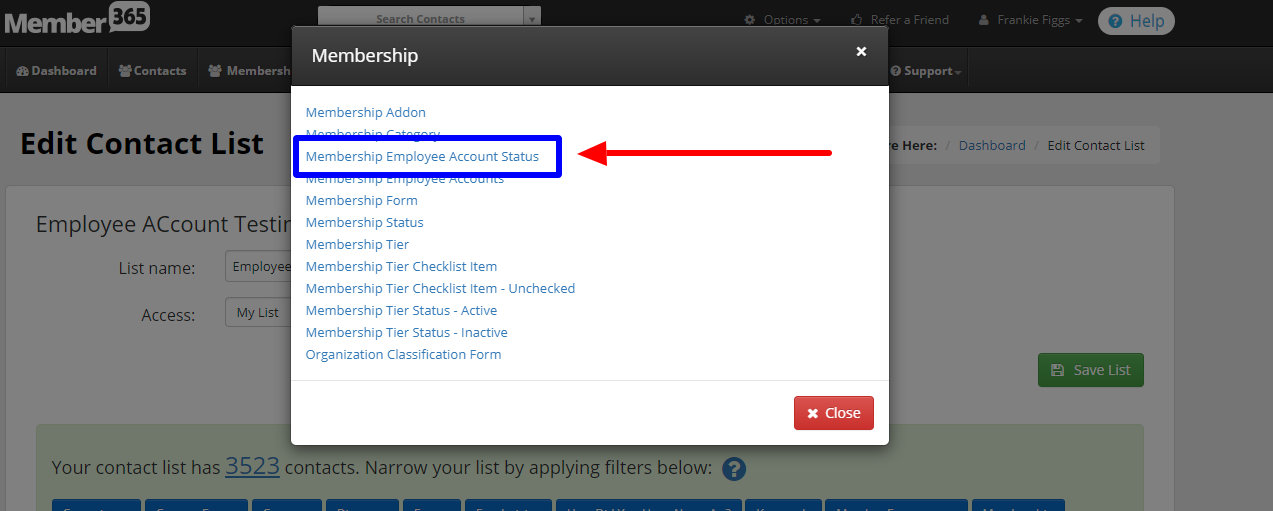
- Click the ‘Membership‘ button in the indicated area.
- In the window that appears, click ‘Employee Account. ‘
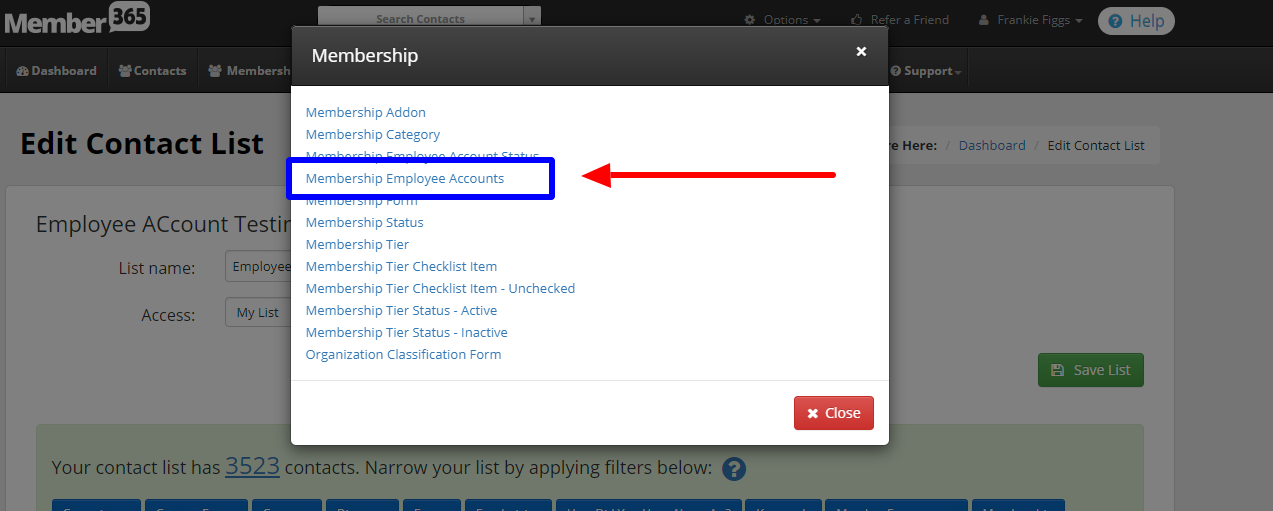
- Check the box next to the Membership category you want to filter by. If you wish to include multiple categories, you can check off more than one.
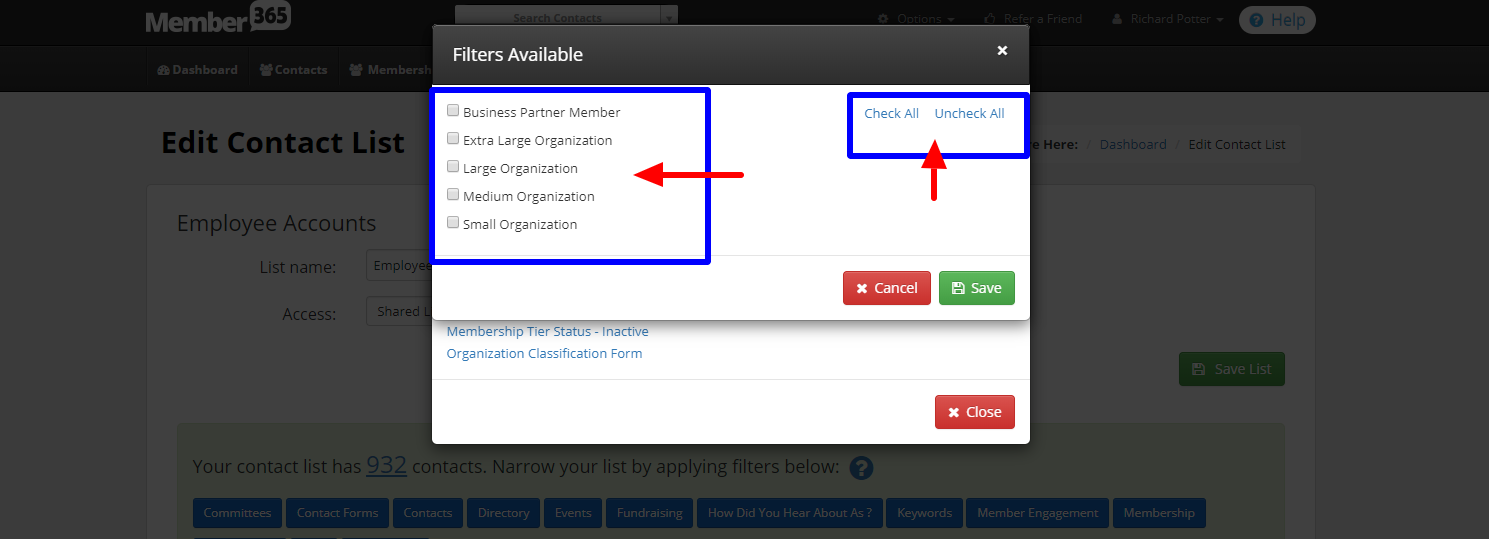
The list will be reduced to include only the contact records that satisfy your criteria. Click the pencil icon next to a criterion to edit it, and click the trash bin icon to remove it.
In this example, there is no “status” filter applied yet so that the list would include active, lapsed and archived employee members of the selected categories. Please proceed to Step 2 on how to implement a status.
Adding Second Criteria Employee Status to Employee Accounts
- With your first filter in place, click the ‘Membership‘ button in the indicated area.
- In the window that appears, click ‘Employee Account Status. ‘
- Check the box next to ‘Active. ‘ When you are done selecting all of the statuses you wish to include in the list, click ‘Save. ‘
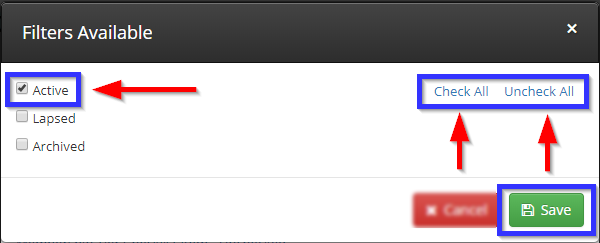
The list will be reduced to include only the contact records that satisfy your criteria. Click the pencil icon next to a criterion to edit it, and click the trash bin icon to remove it.
In this example, your list would now include only active employee accounts of the memberships selected.
When adjusting your filter criteria, the contact list at the bottom of the page will be updated to reflect the members included.