If the filters in the List Builder Module are not specific enough, you can create your own.This article will show you how to create a custom filter for your list, that you can populate with Contacts on a case-by-case basis.
For example, if you have ever wanted to add a singular Contact to a preexisting List, this article will show you how!
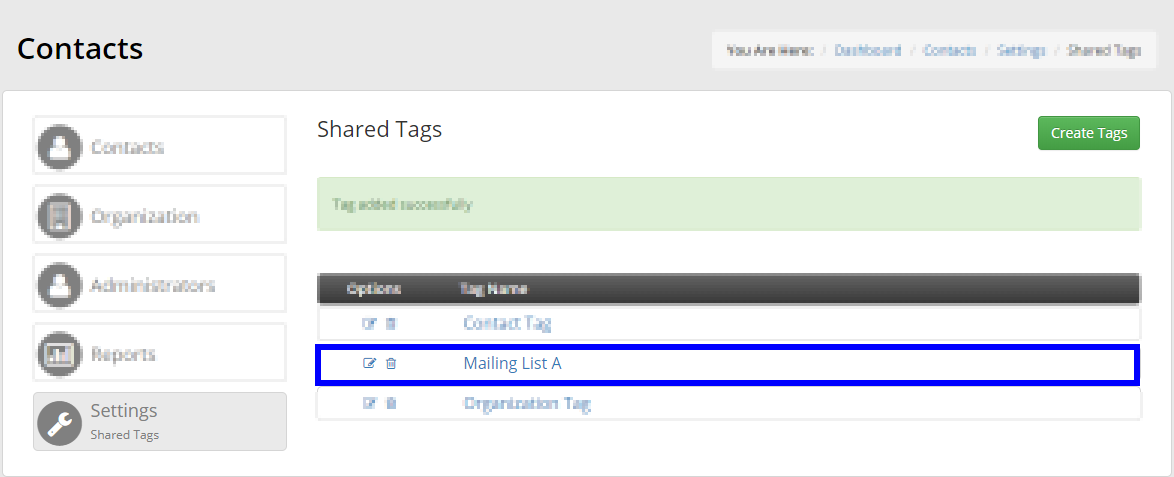
Create a Contact Tag
We will use Contact Tags to serve as our Custom List Filter. The first step will be to create a Contact Tag that is specific to the List you intend to populate. Give your new Contact Tag a name that indicates which list you’re using it for.
Tag your Chosen Contacts
To select Contacts on a case-by-case basis for your List, we will assign them to our new Contact Tag!
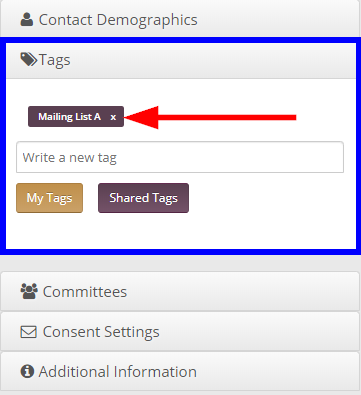
You can assign any Contact to any tag, regardless of Membership Category, Membership Status, or any other field. As such, the set of Contacts who have this new tag can be as unique and as specific as you need!
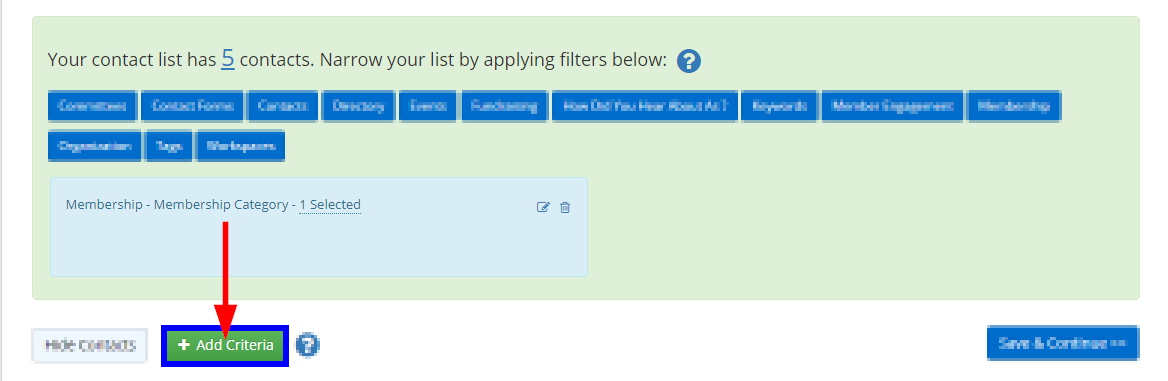
Add Custom Contacts to List
We can now add everyone we’ve tagged – whether it was one Contact or several Contacts – to our List!
1. From the Member365 Administrator Dashboard, click ‘Lists’ at the top of the page.
![]()
2. Locate the List you are populating, using the search bar if necessary, then click its name.

3. Click ‘Add Criteria’.
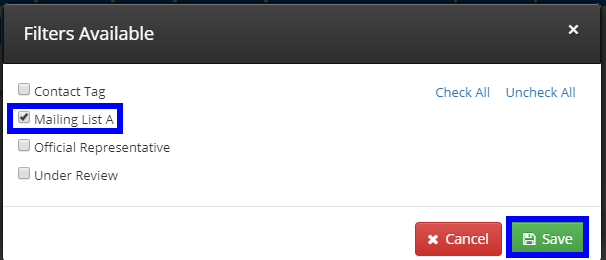
4. From the list of options in the Additional Filtering Criteria, click ‘Tags’.

5. Choose ‘Shared Contact Tags’ when prompted, then select the tag we created earlier from the list. Click ‘Save’.

Congratulations, you now know how to create and use a custom filter for your Lists in Member365!