You may want to share your upcoming events online. Displaying the Public Events Calendar on a website can be done by copying and pasting its HTML code. This article will show you where that code is located, and how to choose which events appear in the Public Events Calendar.
Accessing the Code
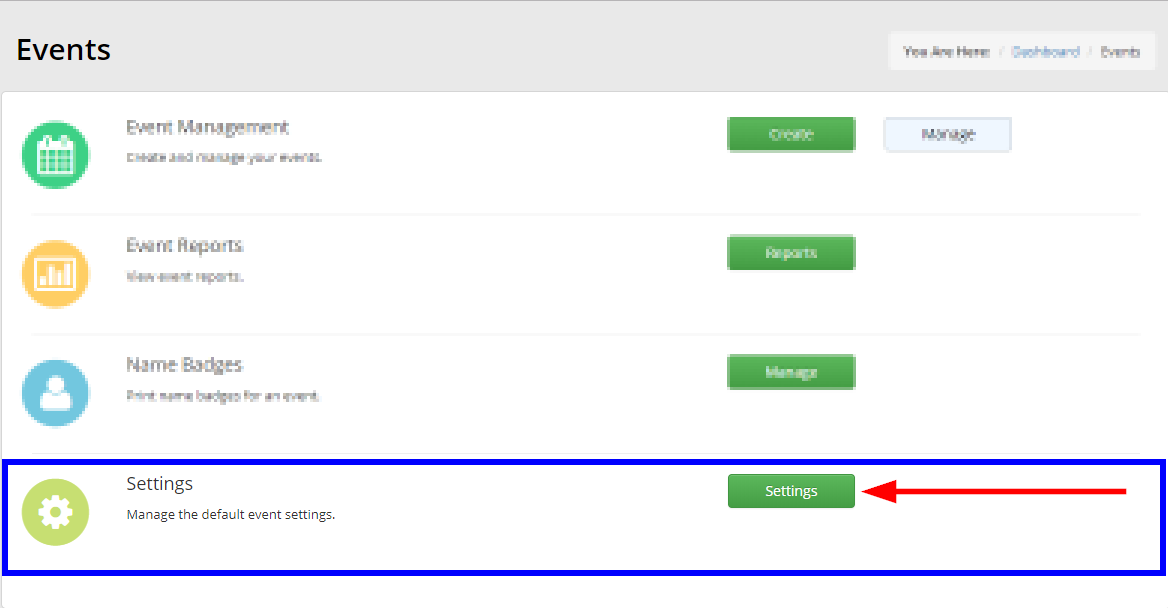
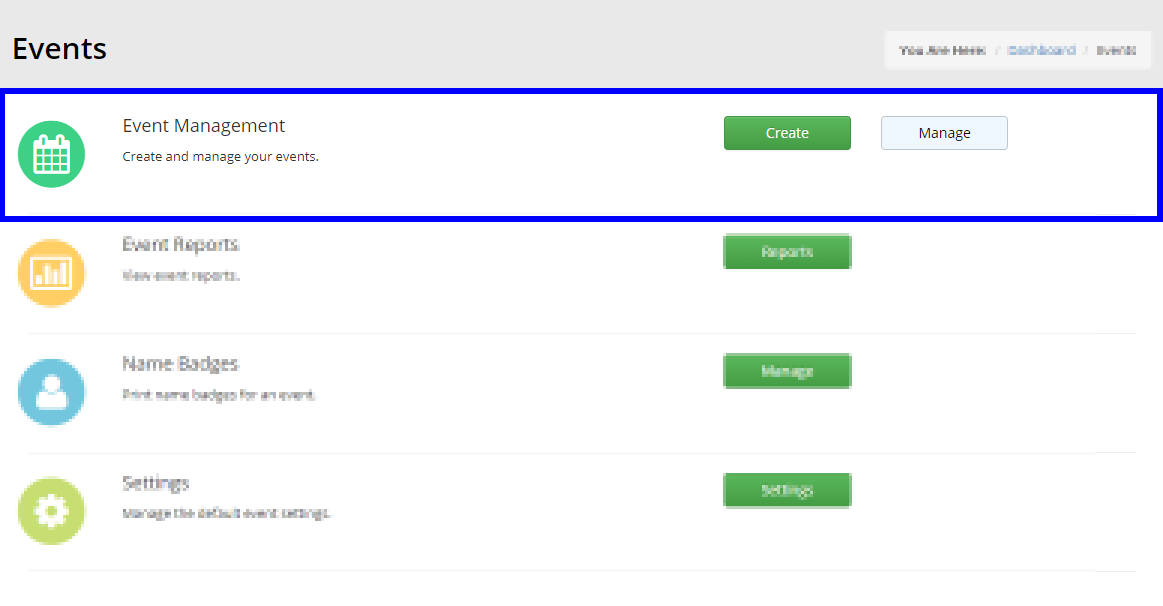
1. From the Member365 Administrator Dashboard, click ‘Events’ at the top of the page.
![]()
2. Click ‘Settings’ on the page that follows.
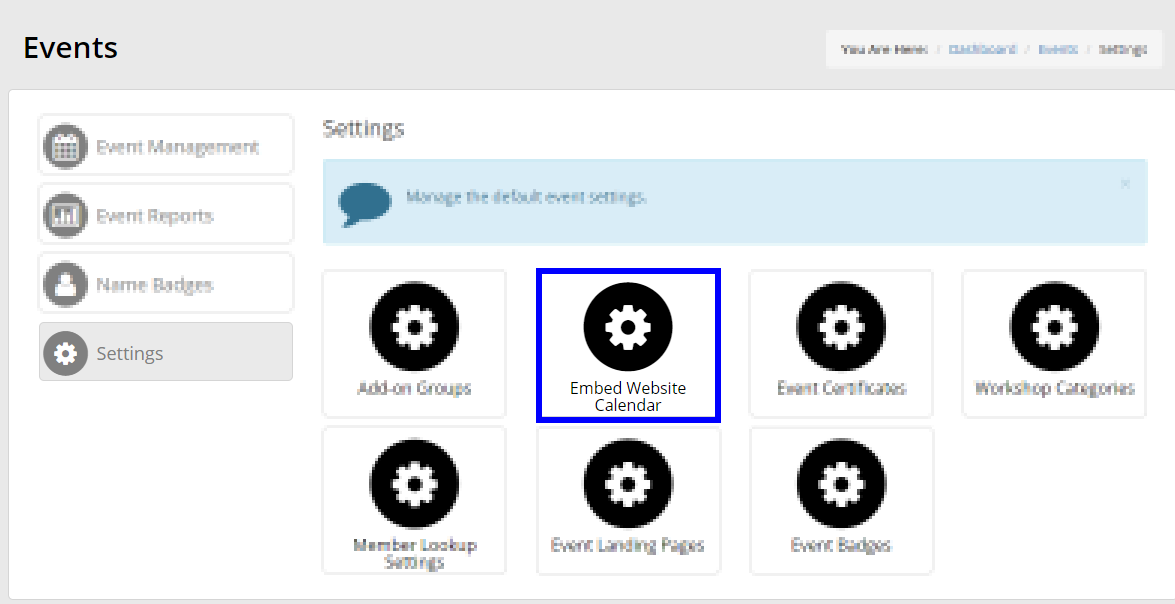
3. Select ‘Embed Website Calendar’ from the list of options.
4. Click either ‘Calendar View’ or ‘List View‘. Both buttons will yield the HTML code necessary for embedding your Public Events Calendar.
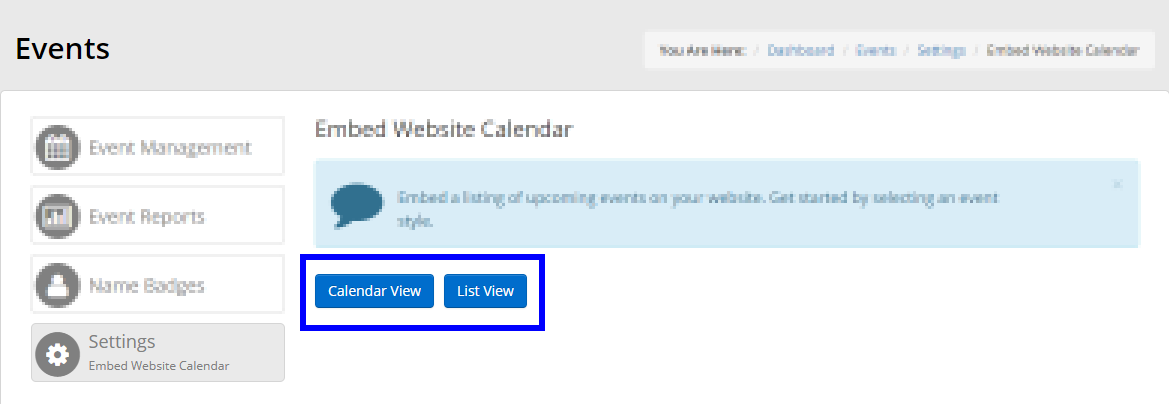
‘Calendar View’ is recommended if you host at least one event per month.
‘List View’ is recommended if you host only a few events each year.
Alternatively, many users choose to implement both ‘Calendar View’ and ‘List View’.
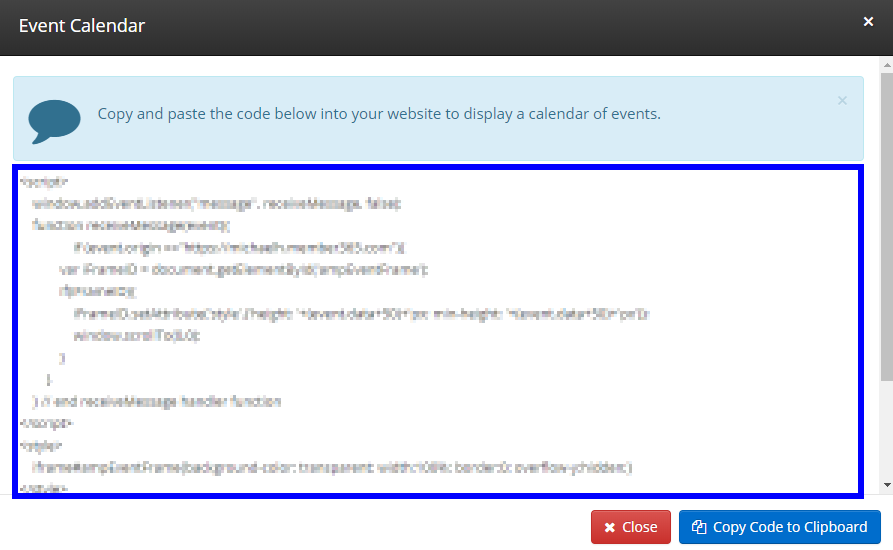
5. Copy and paste the HTML code that appears in the pop-up window to embed the Public Events Calendar on a website.
Adding Events to the Calendar
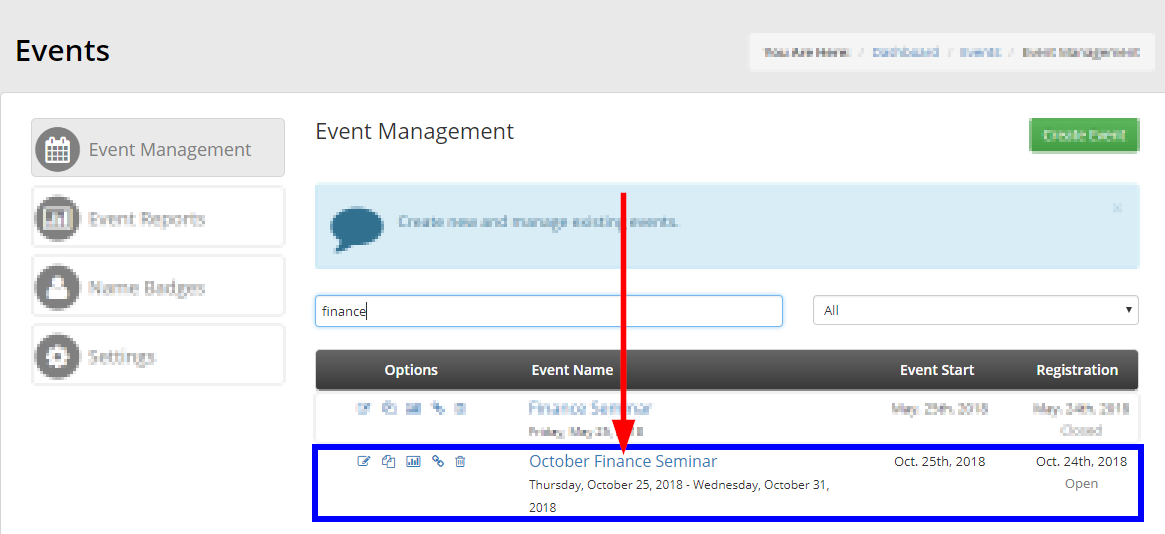
6. Click the ‘Events’ button on the bar at the top of the page.
![]()
7. If you are creating a new event, click ‘Create’ on the page that follows. If you are publicising an existing event, click ‘Manage’.
8. If you are creating a new event, skip to Step 9. If you are editing an existing event, find and click its name from the list.
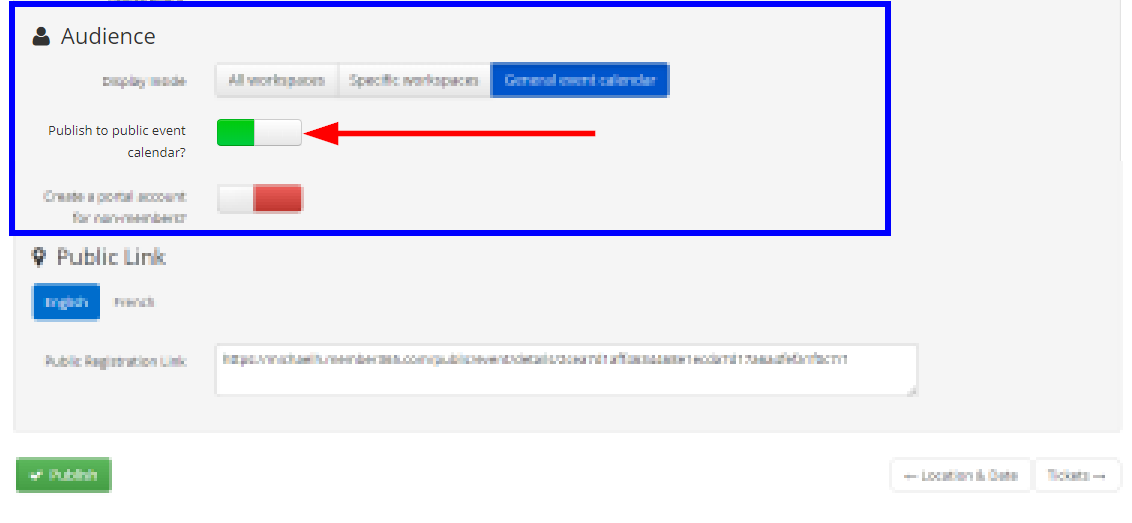
9. Click the ‘Registration’ tab.

10. Toggle on ‘Publish to public event calendar?’ under the ‘Audience’ sub-header. The option should be green like the image below if you want the event to display on your Public Events Calendar.
Congratulations, you can now share and update the Public Events Calendar!