This article will guide you through registering a non-member to an event.
Enable or Confirm Non-Member Registration
1. Log into your Member365 Administrator Dashboard.
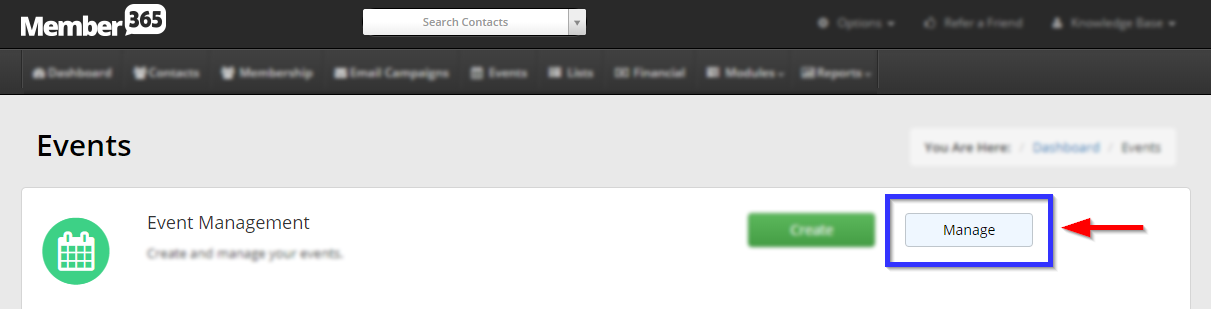
2. On the top bar, click ‘Events‘.

3. Next to “Event Management”, click ‘Manage‘.
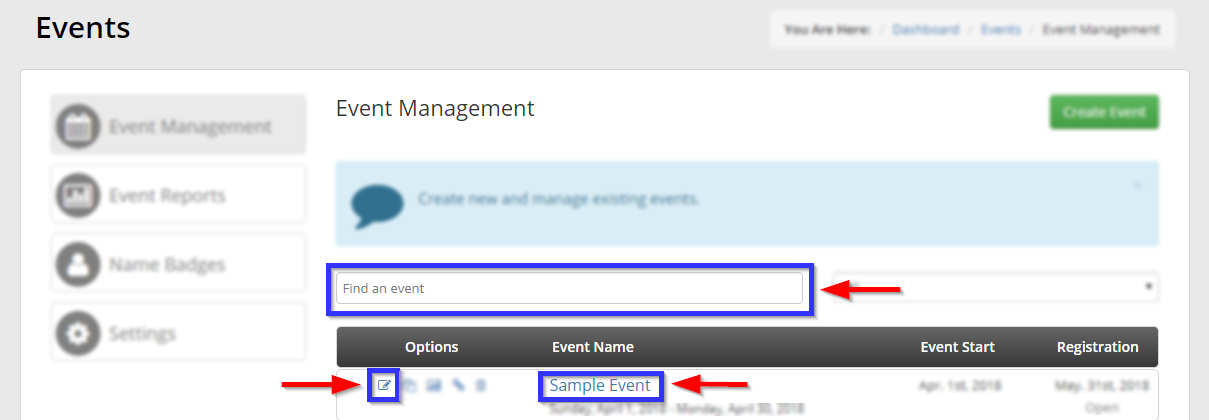
4. Find the event by typing its name into the search bar or finding it in the list, and then click its name or the pencil icon next to it.
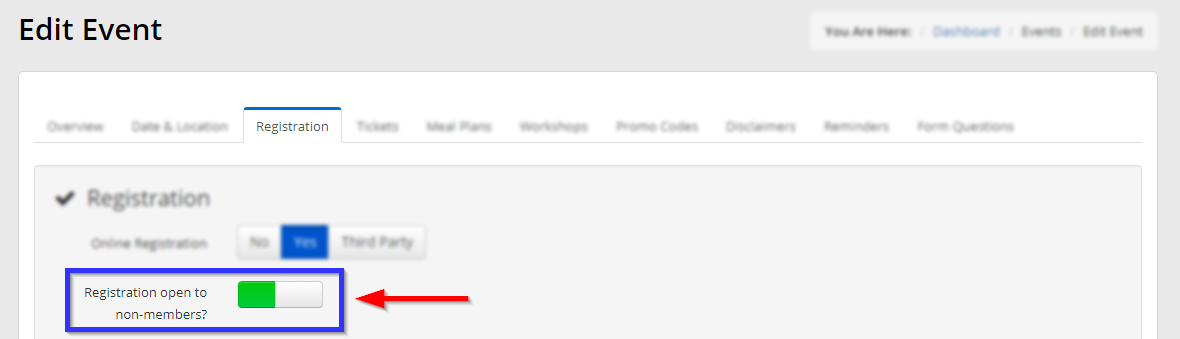
5. Click the ‘Registration‘ tab.

6. Click the left half of the toggle button labelled ‘Registration open to non-members?’, which will turn it green if it is not green already.
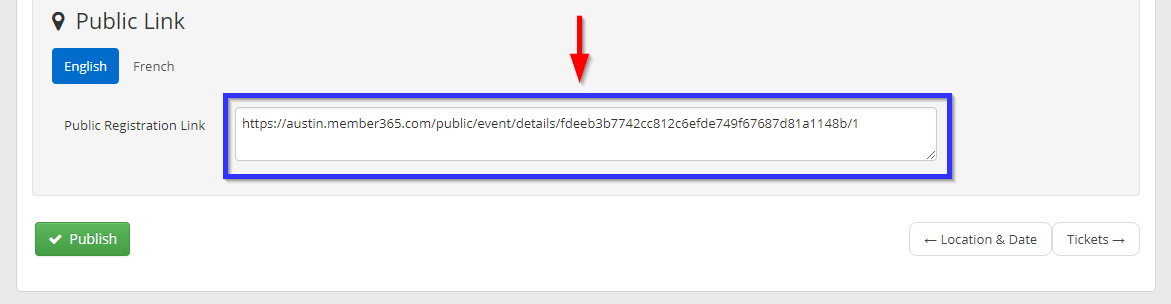
7. If you don’t know where the link to register exists, take the time now to scroll down to the section labelled ‘Public Link’, and copy the contents of the ‘Public Registration Link’ text field, then click ‘Publish‘ in the lower-left corner.
Registering for the Event
8. Log out of your Member365 Administrator account by clicking your name in the upper-right corner and then clicking ‘Logout’ from the drop-down menu that appears.
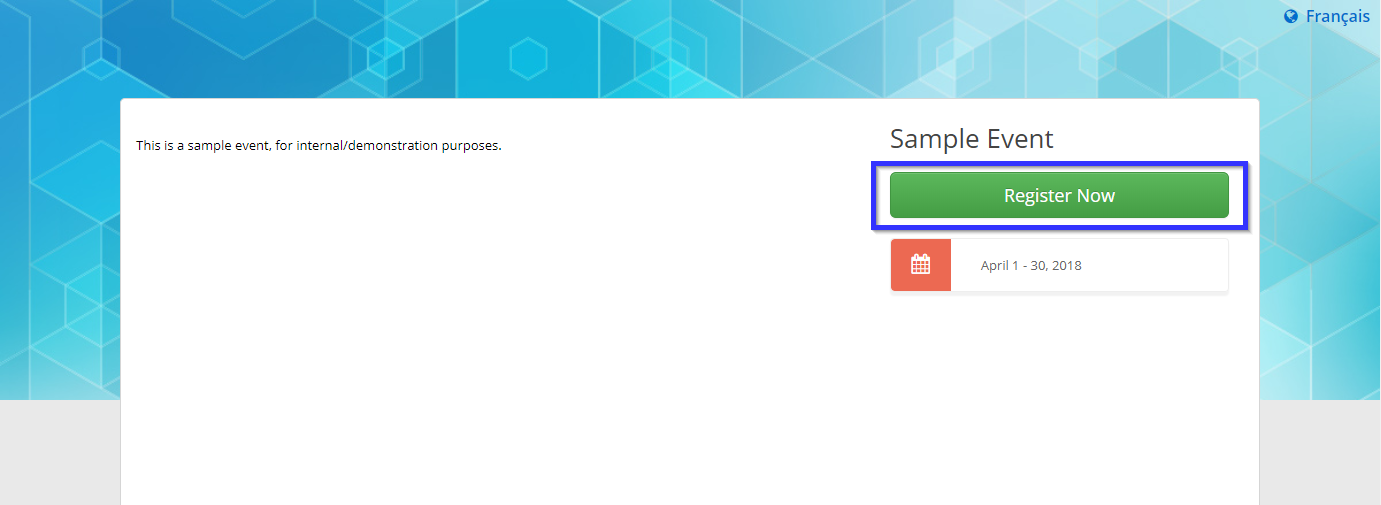
9. Paste the public registration link into your browser.
10. Click ‘Register Now‘.
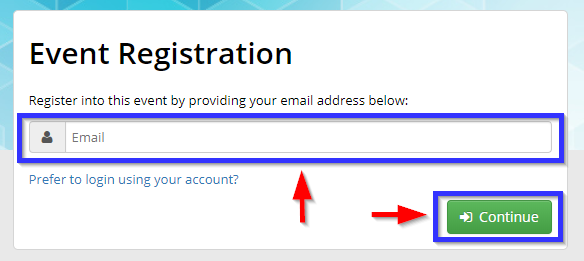
11. Enter the non-member’s email address in the ‘Email’ text field, then click ‘Continue‘.
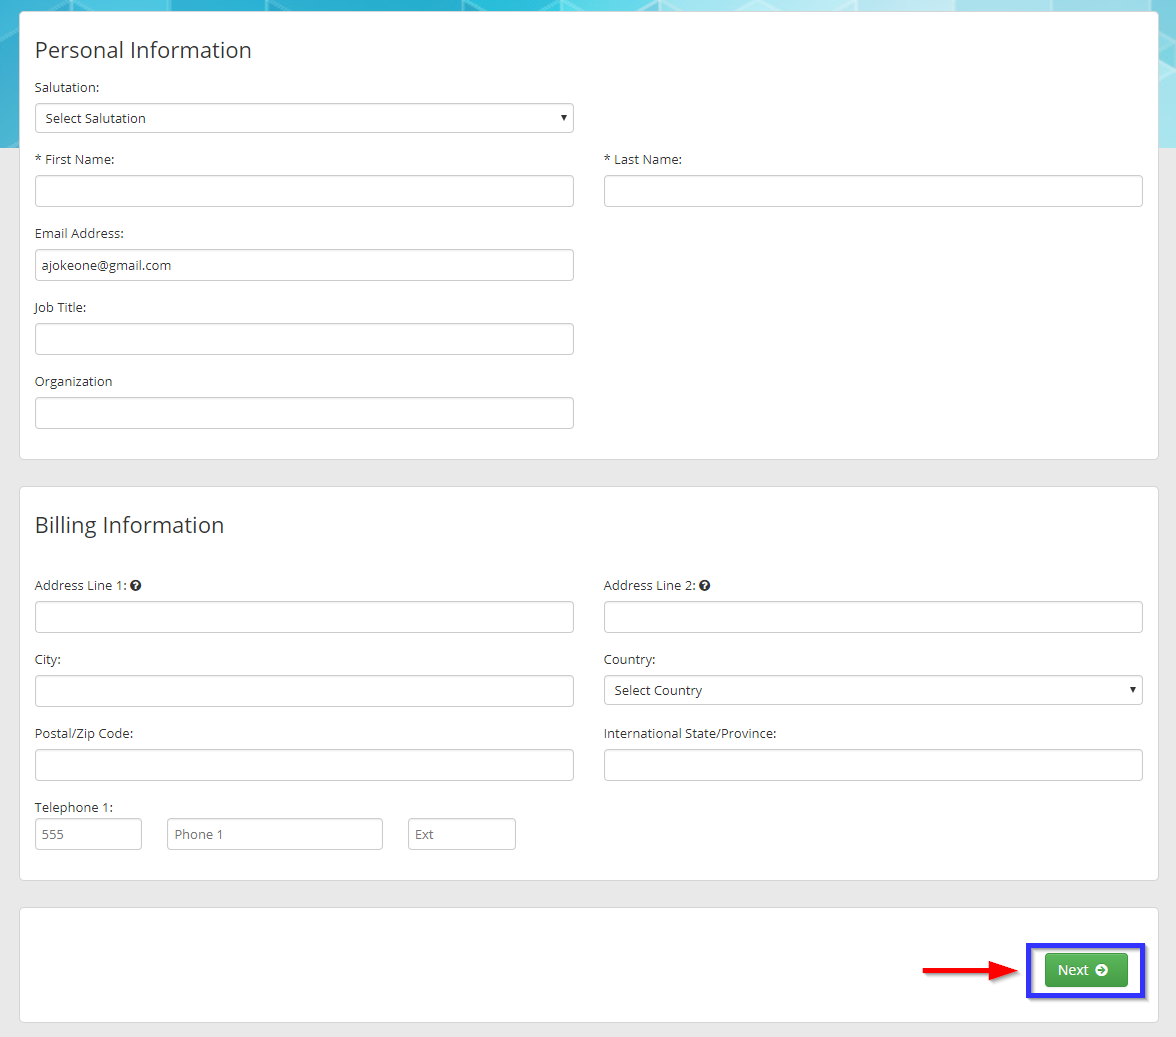
12. In the next screen, enter the non-member’s contact information — ‘Salutation’, ‘Job Title’, ‘Organization’, and ‘Ext’ are optional, but the remainder is mandatory. Then click ‘Next‘.
13. Enter the quantity of each ticket type to be assigned to this registrant, then click ‘Continue to Step 2‘.

14. If you would like to assign this ticket, click ‘Assign Ticket‘; you may also click ‘Add Ticket‘ to add more tickets from this screen.
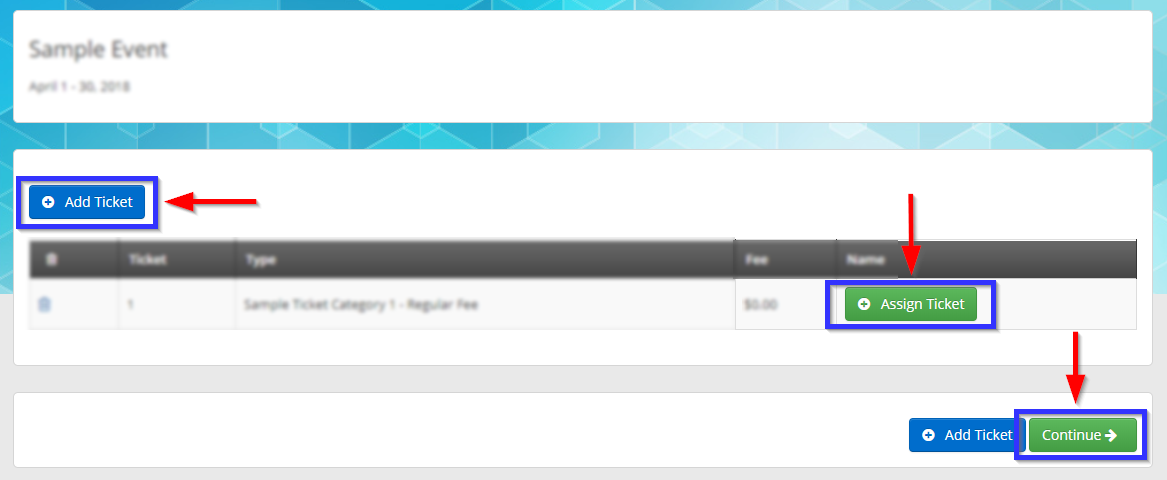
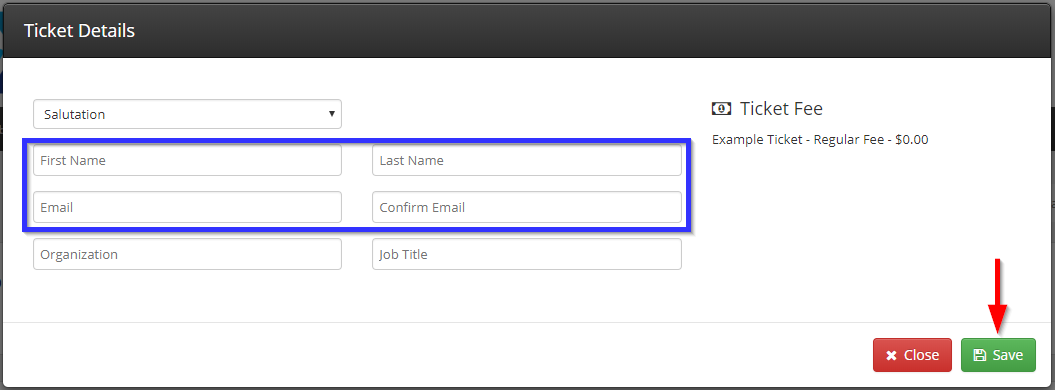
‘Assign Ticket’ will produce the following pop-up; fill in the four indicated fields at minimum, then click ‘Save‘.
15. Click ‘Continue‘ to complete your purchase; you will be presented with a link to your invoice.
Congratulations, you have successfully registered a non-member to an event!