In order to configure Member365 to recognize Authorize.net as your credit card payment processor, you’ll need to first navigate to Member365’s Payment Gateway settings.
Finding Payment Gateway Settings
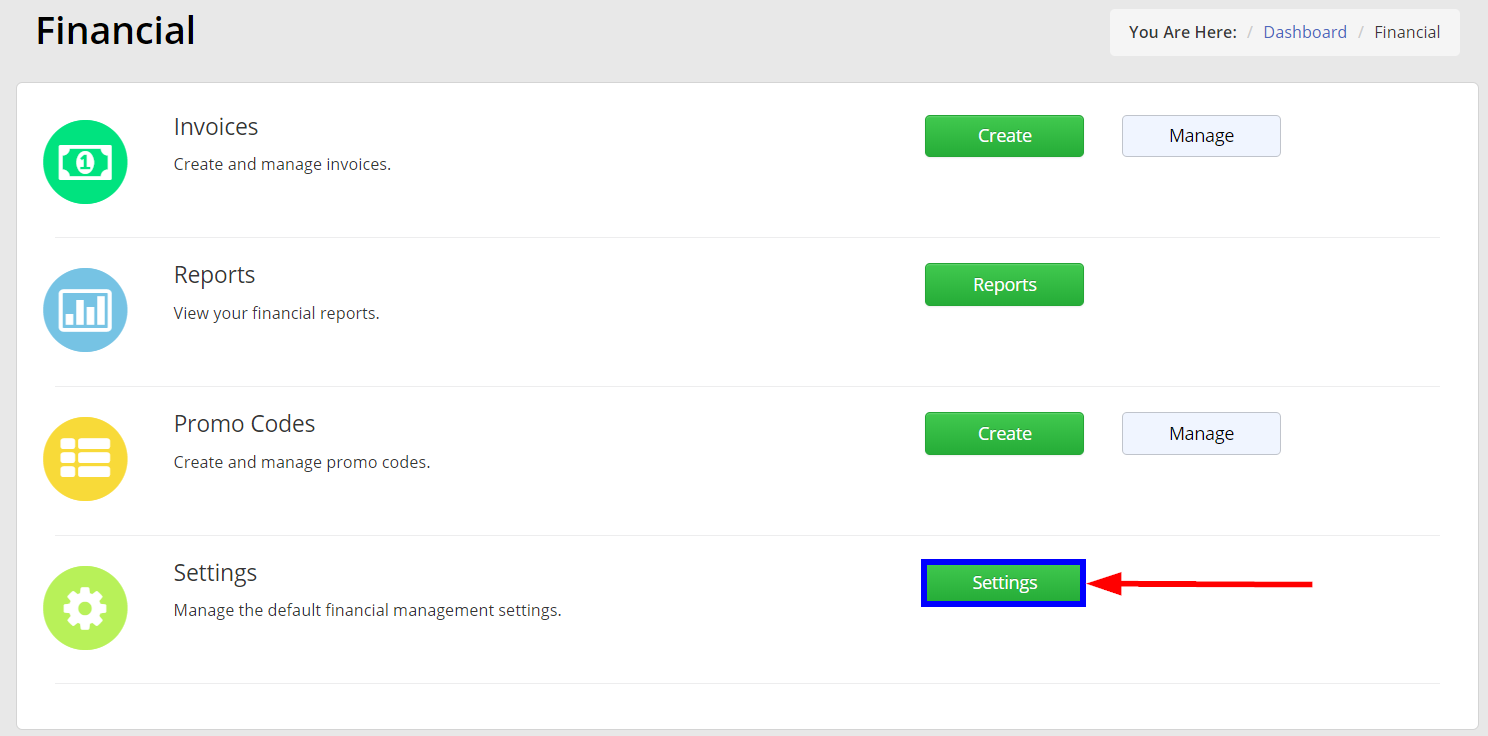
1. From your administrator dashboard, click ‘Financial‘ in the Main Menu.

2. On the Financial page, click ‘Settings’
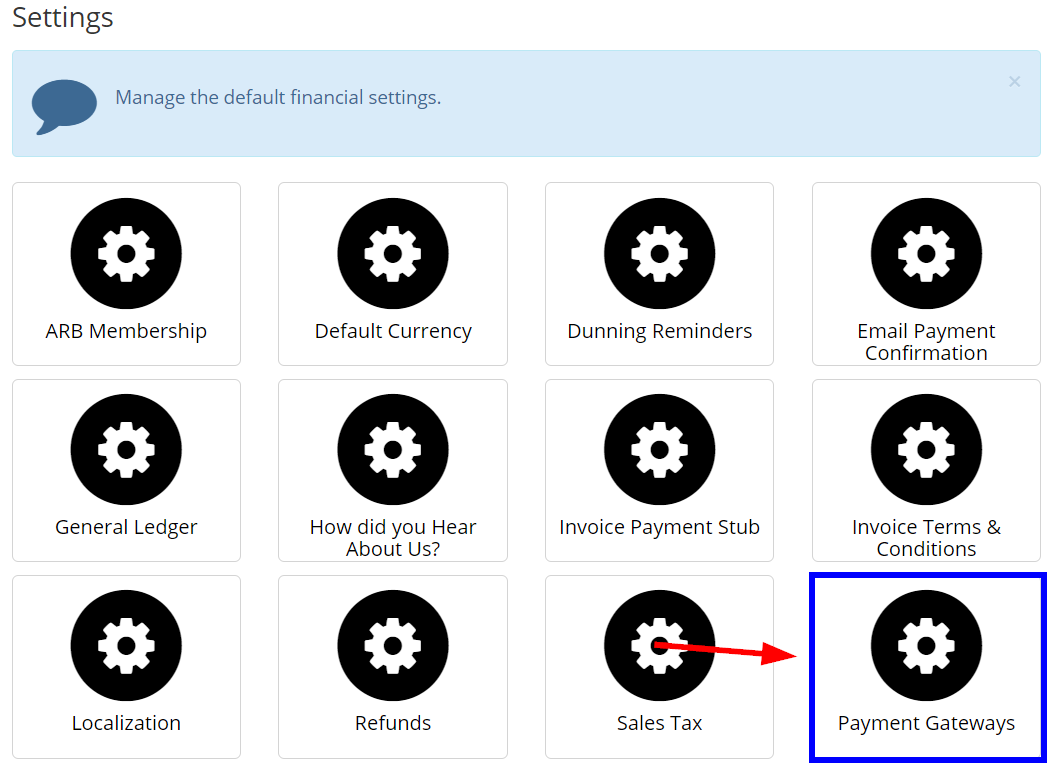
3. From the Settings Page, click ‘Payment Gateways‘.
4. Then, click ‘Create Payment Gateway‘

5. Using the ‘Merchant‘ field, select ‘Authorize.net‘ from the drop-down options. After doing so, you’ll see this:
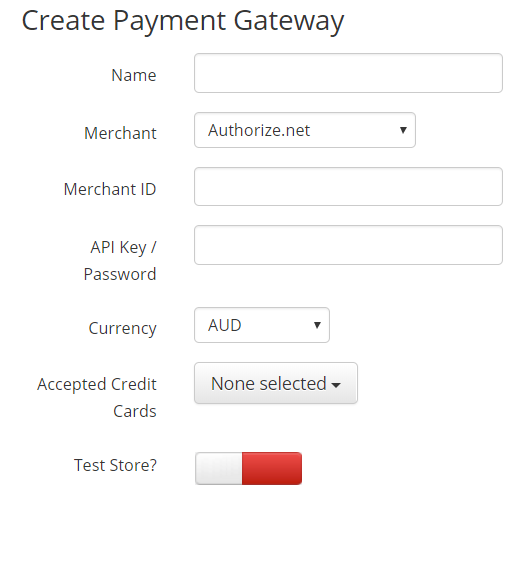
6. Fill the ‘Name‘ field with any name you’d like. The name of the payment gateway will be the one you select when there is a payment option in memberships, events, online store, and more. Please ensure to have a unique name for each payment gateway.
What Info Do I Need From Authorize.net?
In order to complete this process, you’ll need to find your Authorize.net Merchant ID and API Key / Password. The chart below shows the different languages used within Authorize.net and Member365 to assist you in locating the correct information.
Authorize.net vs. Member365 Key Terms Chart
| Authorize.net | Member365 |
| API Login | Merchant ID |
| Transaction Key | API Key / Password |
Here’s how:
1. Open a new tab, and head to Authorize.net to log into your account.
2. When logged in, click ‘Accounts‘ from the list of available tabs near the top of the screen.

How to Find Your Merchant ID
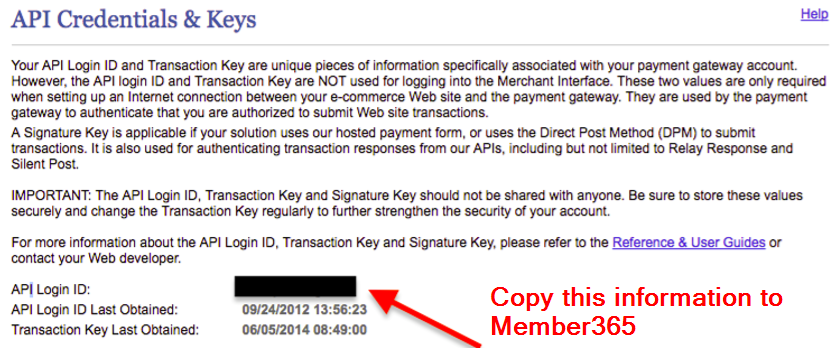
3. Scroll to “API Login ID”, and copy the information it presents and paste it to the Merchant ID field in Member365.
How to Find Your API Key / Password
4. To generate an API key / Password, scroll down the page to the “Create New Keys” section. Ensure ‘New Transaction Key‘ is selected, and click ‘Submit‘. A pop-up will appear to verify your authorization. Enter the verification PIN and Submit.
![]()
5. Submitting will bring you to a new page where you’ll find your Transaction Key. Copy the Transaction Key and paste it the API Key / Password field in Member365.
![]()
Ensure Customer Information Manager is Enabled
It’s important when using Authorize.net as your payment processor that you ensure your Authorize account has Customer Information Manager (CIM) enabled. You can do so by:
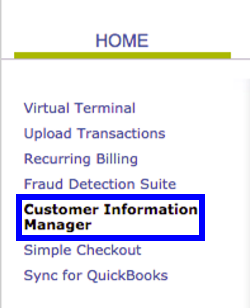
6. From Authorize.net, click the ‘Tools’ tab near the top of the page.

7. In the left toolbar, click ‘Customer Information Manager’
8. Near the bottom of the page, click the link offering to sign up for CIM.
9. After familiarizing yourself with the Terms and Conditions, accept in order to enable CIM.
Finishing Touches
Once you’ve ensured CIM is enabled, head back to Member365 to complete your payment processor setup. Ensure your currency type and accepted credit cards are configured and click ‘+ Create Payment Gateway’ when done to save!
IMPORTANT NOTE 1: In Member365 gateway setup when selecting Credit Card types we only control what images will appear at the checkout (Visa/MC/AMEX logos) – we DO NOT control what Credit Cards are eligible for use. That is done within the gateway itself.
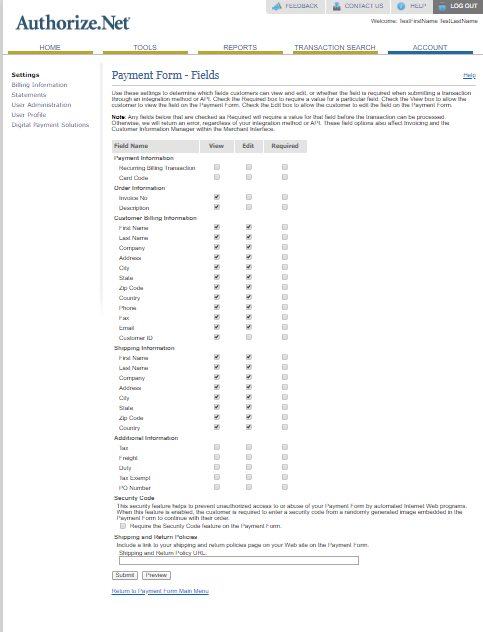
IMPORTANT NOTE 2: For the Payment Form – Fields, please do not adjust them from the default settings.
WARNING! Please ensure no fields are checked off as ‘Required‘. If you make any of the fields required on this page no transaction can be processed within Member365.
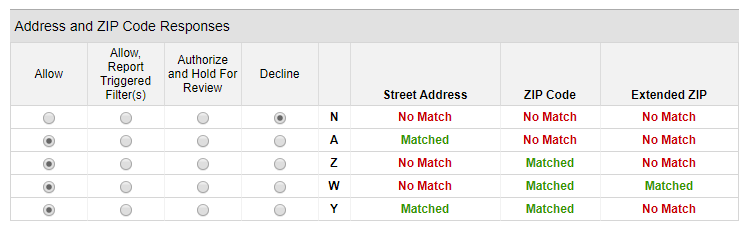
IMPORTANT NOTE 3: On the ‘Enhanced Address Verification Service (AVS) Handling Filter‘ page in Authorize.net you can either Allow transactions to process without matching mailing address and ZIP/Postal Codes or you can Decline transactions from processing that do not match mailing address and ZIP/Postal Code.
If you are allowing your members, to make a payment on behalf of other contacts or members you will want to have the Allow option checked off (enabled) otherwise the transactions will be declined.