In order to configure Member365 to recognize Stripe as your credit card payment processor, you’ll need to first navigate to Member365’s Payment Gateway settings.
Finding Payment Gateway Settings
1. From your administrator dashboard, click ‘Financial‘ in the top toolbar.

2. From the menu, click ‘Settings’
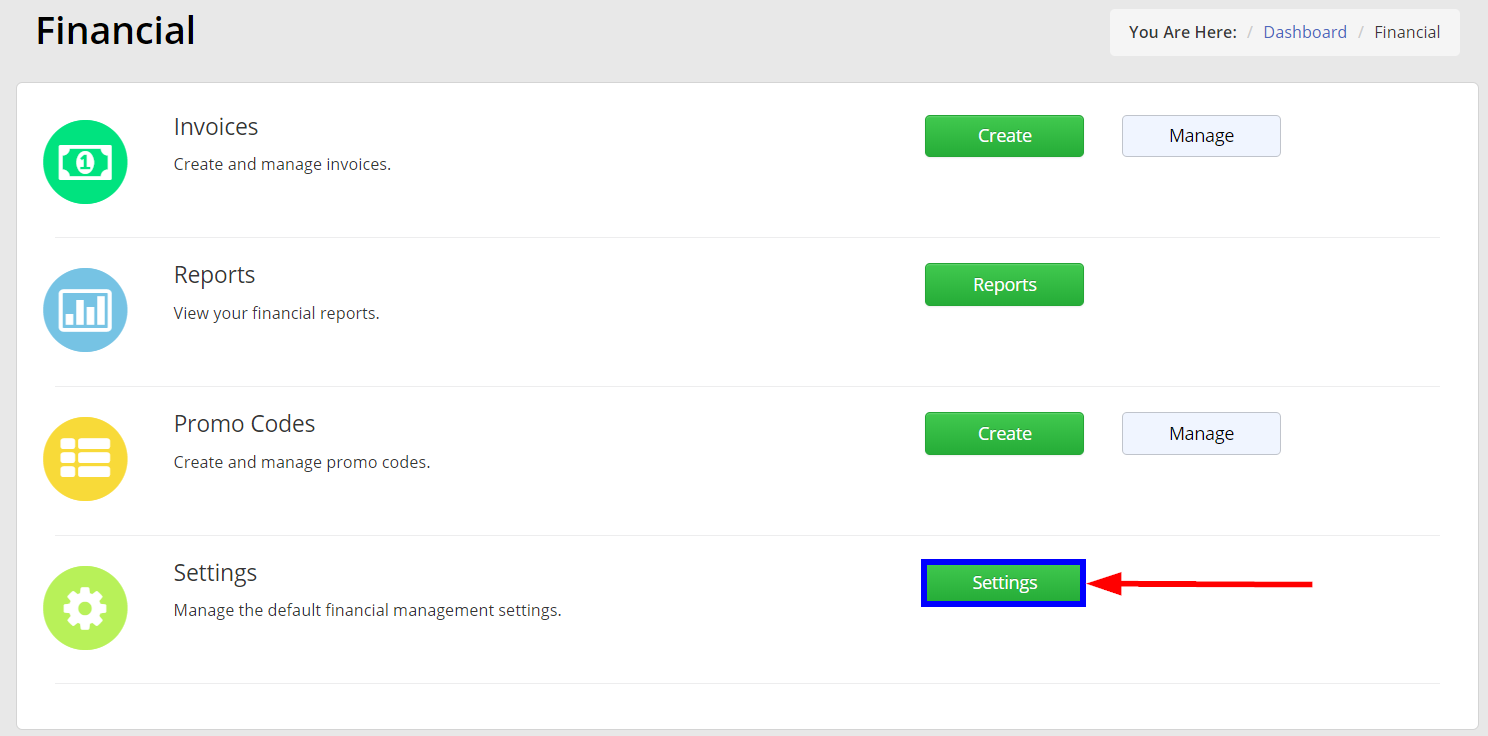
3. From the resulting options, click ‘Payment Gateways‘.
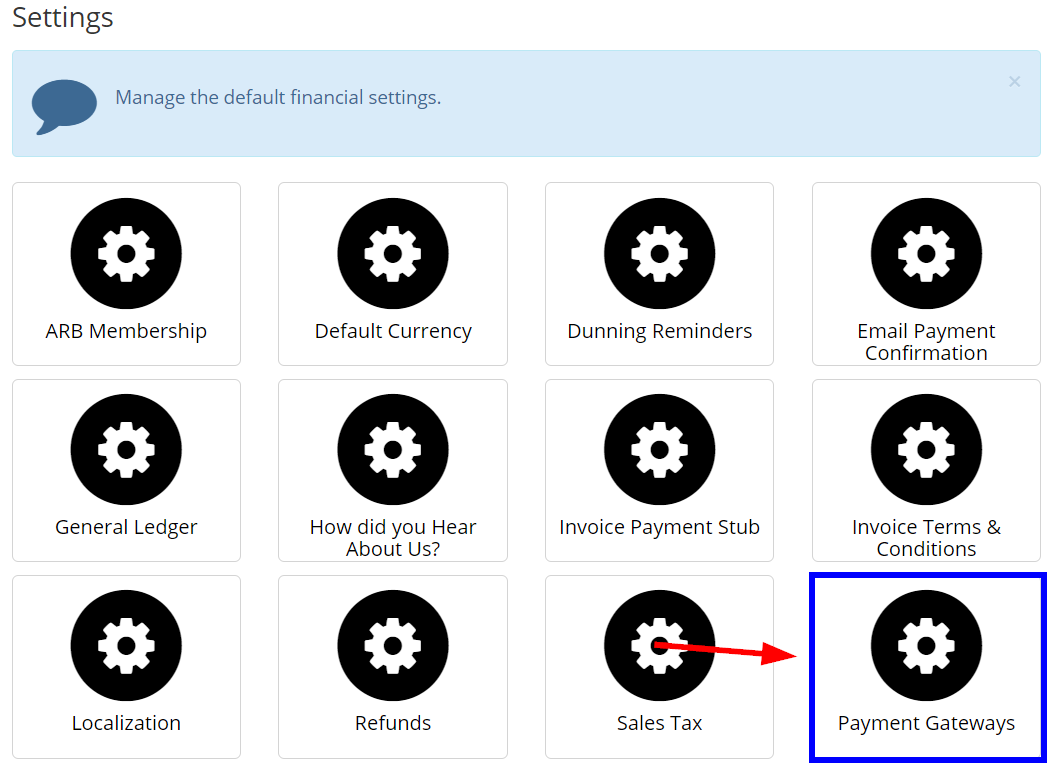
4. Click ‘Create Payment Gateway‘

5. Using the ‘Merchant’ field, select ‘Stripe‘ from the drop-down options. After doing so, you’ll see this:
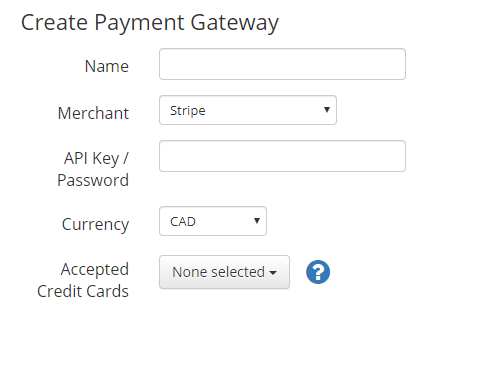
6. Fill the ‘Name’ field with any name you’d like.
In order to complete this process, you’ll need to get some information from your Stripe account to fill the remaining fields. Here’s how:
Finding Stripe Gateway Info
Copying Your API Key
7. Open a new tab, and use it to log in to your Stripe account.
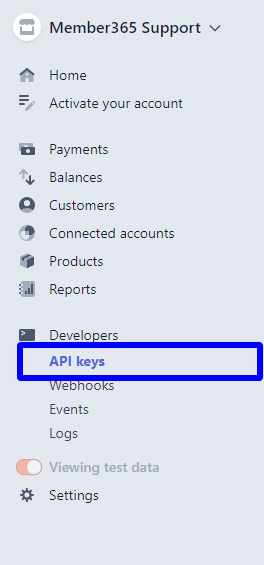
8. From the Stripe Admin Dashboard, in the left menu click ‘Development‘.
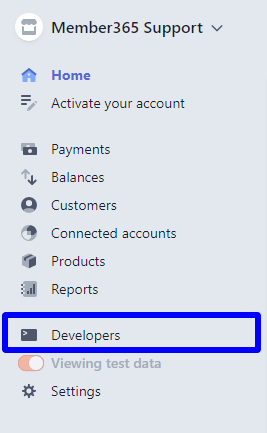
9. Then click ‘API Keys‘ on the development submenu.
10. On the API Key page scroll down to ‘Secret key‘ and click ‘Reveal Token Key‘. You may have to reenter your password to access the Secret key.
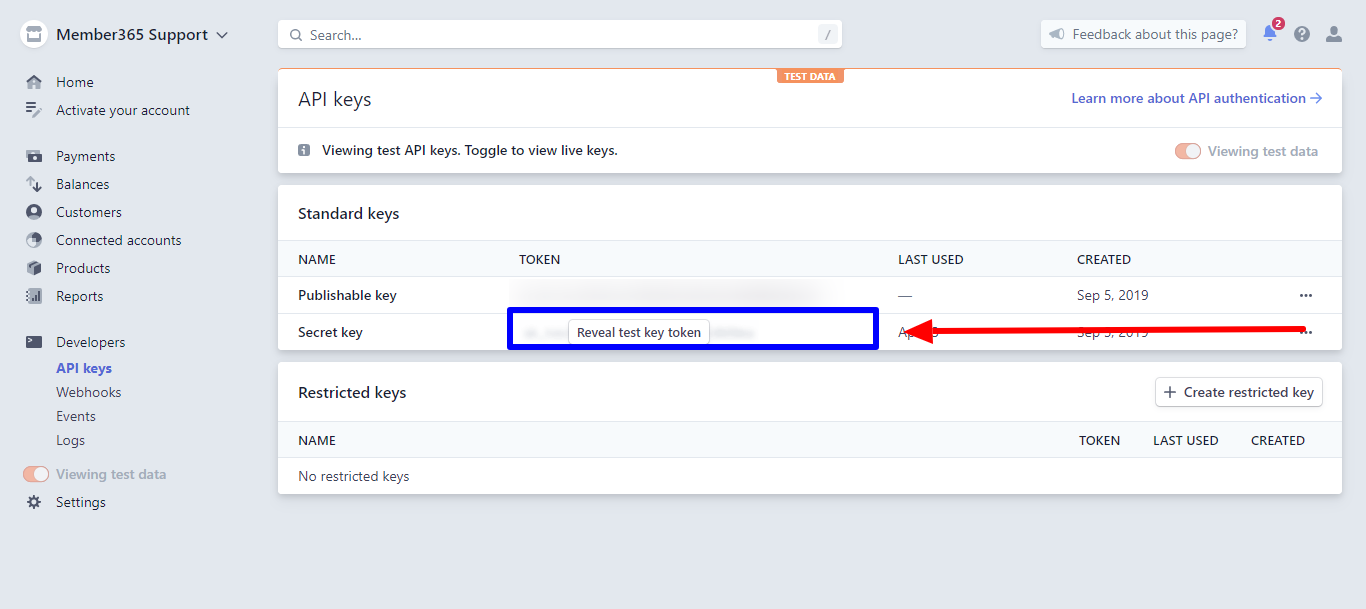
11. Copy the Secret key and continue with the final steps within your Member365.
Final Steps
12. Once you’ve copied the Secret Key, paste the key in the ‘API Key/Password‘ field. Then finish configuring your payment gateway by selecting your currency type and the credit cards you are able to accept.
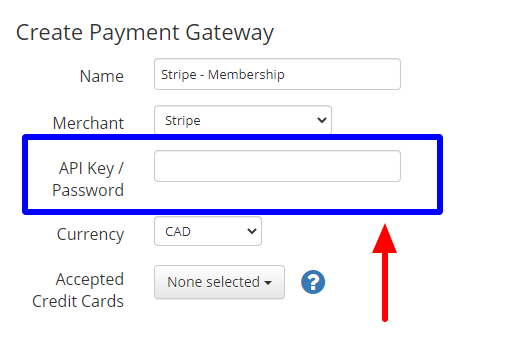
IMPORTANT NOTE: In Member365 gateway setup when selecting Credit Card types we only control what images will appear at the checkout (Visa/MC/AMEX logos) – we DO NOT control what Credit Cards are eligible for use. That is done within the gateway itself.
14. Confirm all your data is correct, and click ‘+ Create Payment Gateway’ to finish!