As an Administrator, you can create Invoices for Store Purchases on behalf of Contacts!
When you issue an ad-hoc Invoice with an added a Store Product, it will be as though the Contact has purchased that item themselves.
Enable the Store Item
Before creating a manual invoice and adding a Store Item, you must first enable that item to be added!
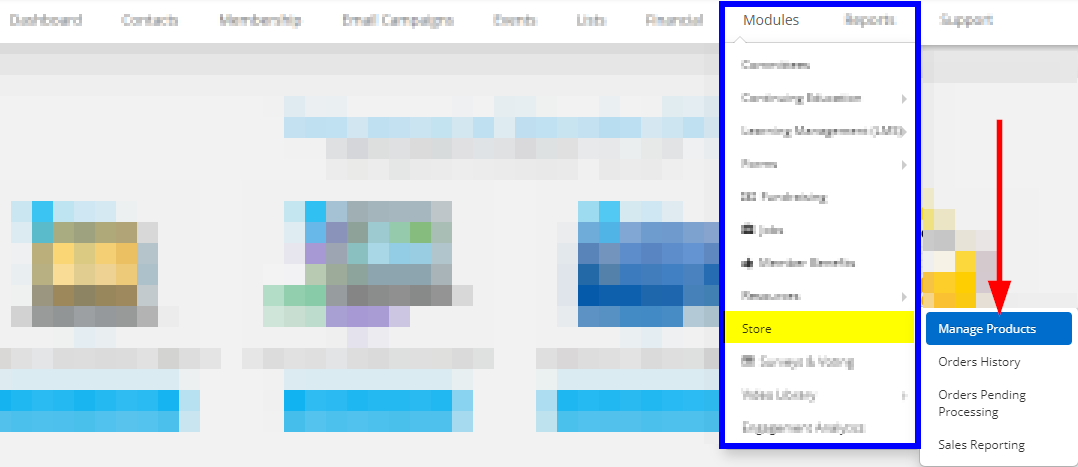
1. From the Member365 Administrative Dashboard, click ‘Modules’ at the top of the screen.

2. Hover over ‘Store’ on the drop-down menu that appears, then click ‘Manage Products’ from the next drop-down menu to its right.
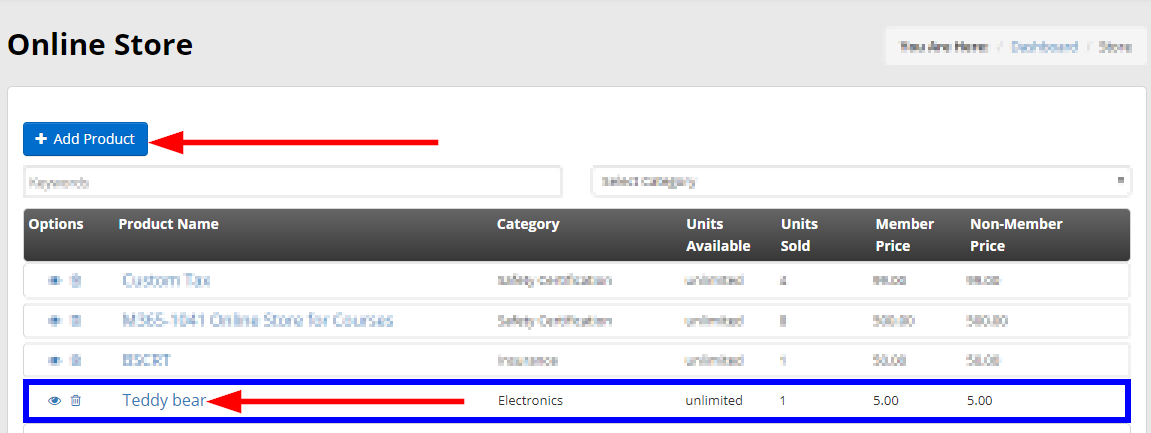
3. Locate the Store Item you wish to add to an Invoice from the list and click its name, or click ‘+ Add Product’ to add a new Store Item.
4. Edit or configure the basic settings of your Store Item as needed, or leave everything the same. The toggle we are concerned with is titled ‘Populate this item on an Ad-hoc invoice’.
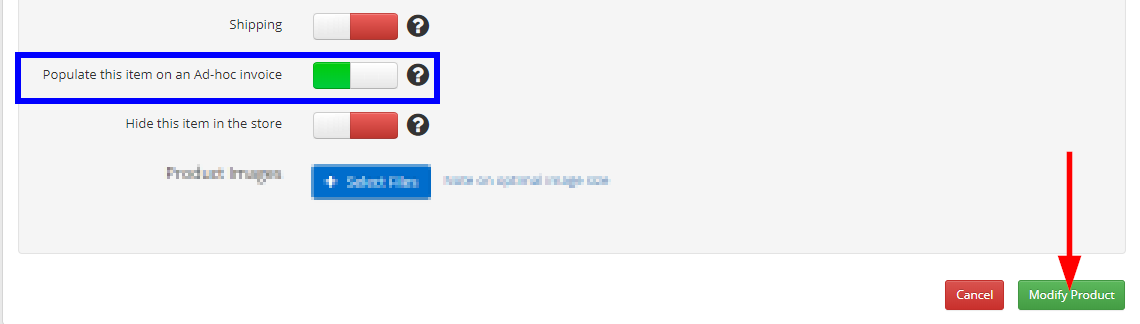
You can also toggle ON ‘Hide this item in the store’ if you would like this Store Item to be available exclusively through these manual invoices. Click ‘Modify Product’ when you are satisfied to confirm all your changes.
Create the Invoice
Now that our Store Item is available on manual invoices, we can add it when issuing ad-hoc invoices to Contacts!
5. Click ‘Financial’ from the Member365 Administrator Dashboard.
![]()
6. On the page that follows, click ‘Create’ next to ‘Invoices’.

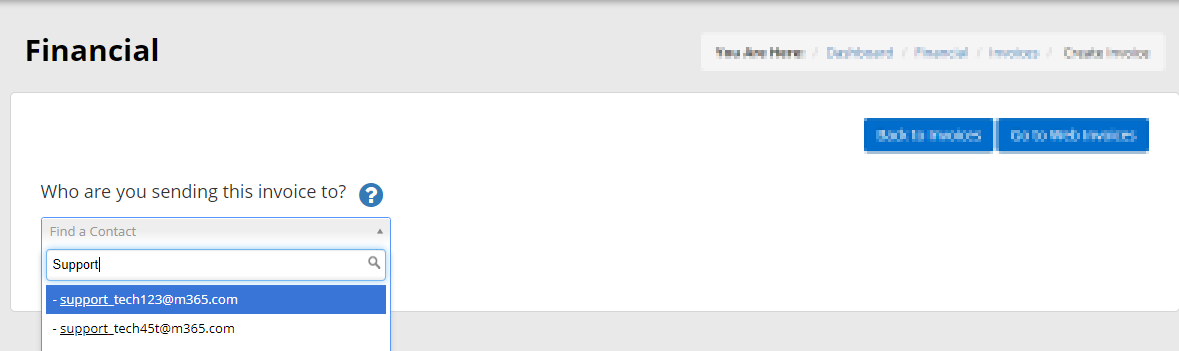
7. Type the name or email of the Contact you are charging into the search bar, and select their record.
8. To add a Store Item, click the magnifying glass icon to the left of the new line item.
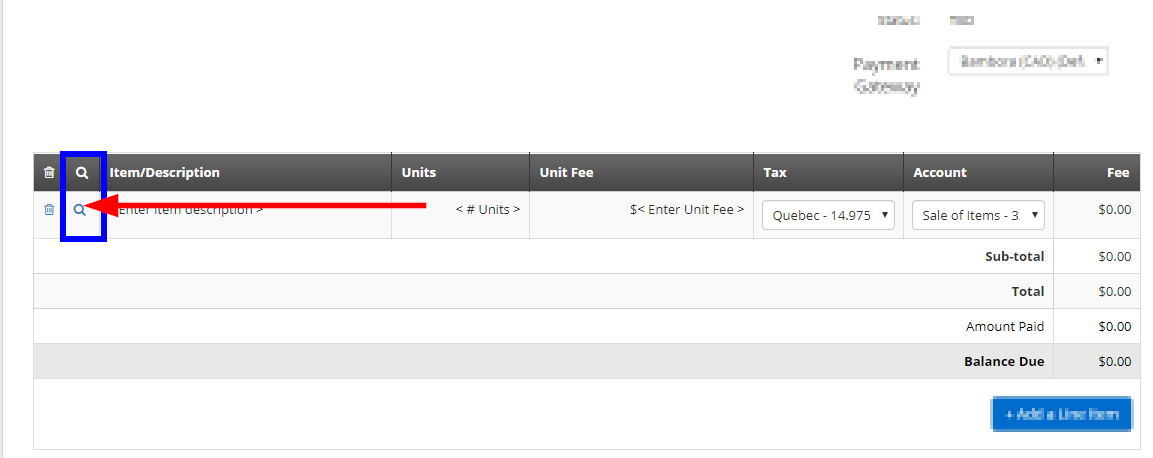
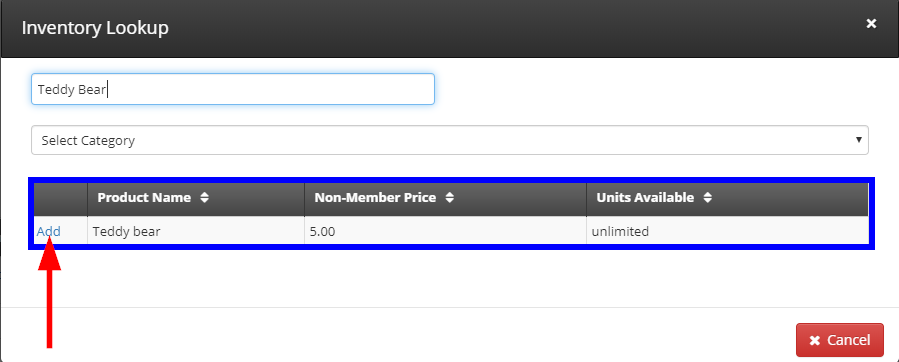
9. Locate the Store Item you wish to add from the window that appears, using the search bar if necessary, then click ‘Add’. If the item is not showing up, ensure the toggle from the previous sub-header is enabled.
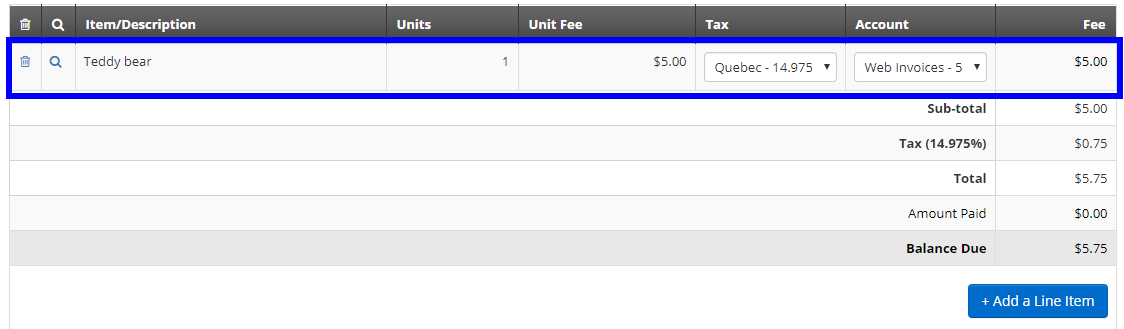
The product has now been added to your new Invoice! If you choose to edit the ‘Units’ field, keep the alert above regarding product quantities in mind: the units available will still be affected and enforced!
Complete your invoice as necessary and issue it to your Contact by following the steps in this article.
Congratulations, you now know how to add a Store Item to a manual invoice!