The Revenue Report in Member365 facilitates the export of all transaction data in your system! You can download your financial history as an Excel file, and use it for accounting purposes as needed.
This article will show you where to find the Revenue Report, and how to use its filters to pull the set of transactions that you need!
How to find the Revenue Report
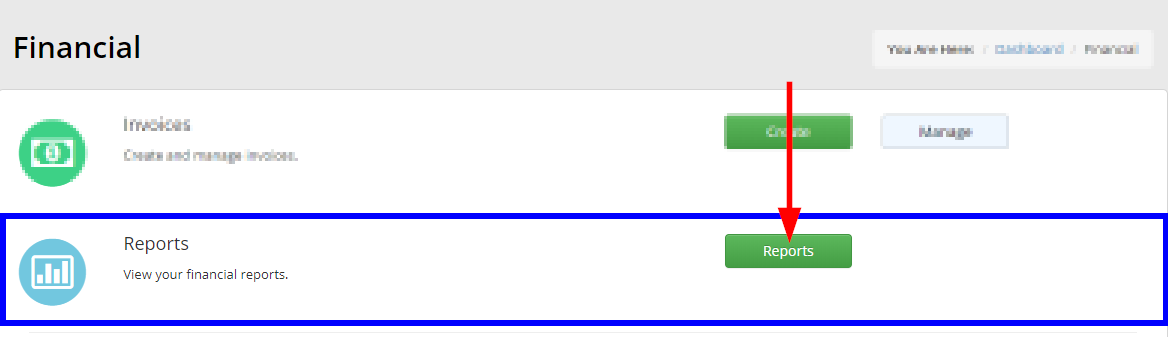
1. From the Member365 Administrator Dashboard, click ‘Financial’ at the top of the screen.
![]()
2. On the page that follows, click ‘Reports’.
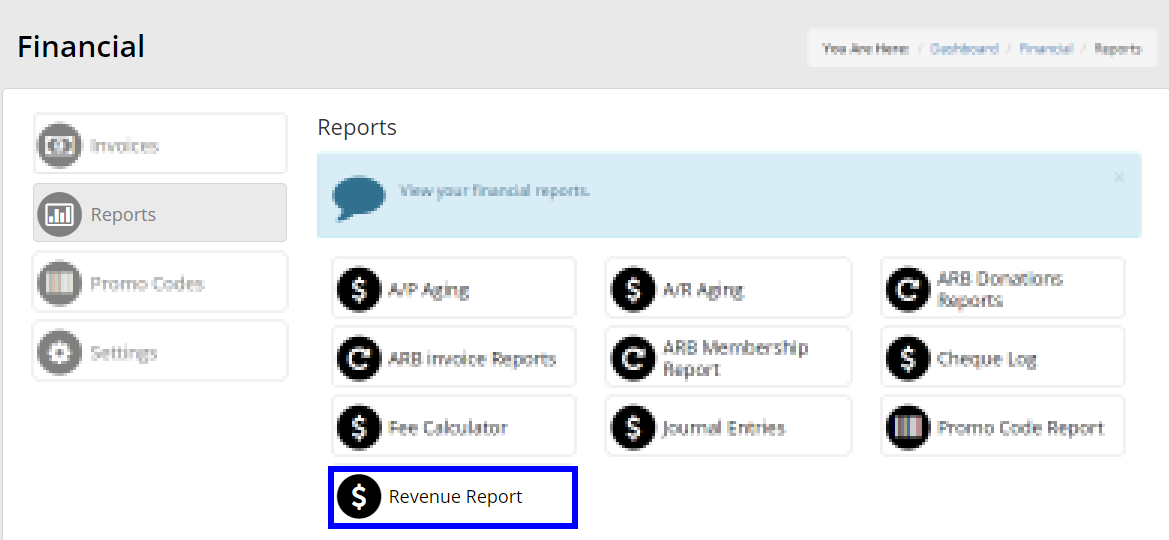
3. Choose ‘Revenue Report’ from the list of Reports.
How to use the Revenue Report
Before exporting your Revenue Report to Excel, you can use a series of filters to customize the set of transactions that you wish to pull. An overview of each filter option will follow:
Date Range – Use the calendar icons to specify the ‘Start Date’ and ‘End Date’ for your export. The report will pull transactions within the range that you set.
Date Type – Select a Date Type from the drop-down menu. The Date Type will change which transactions appear in the Date Range you have selected.
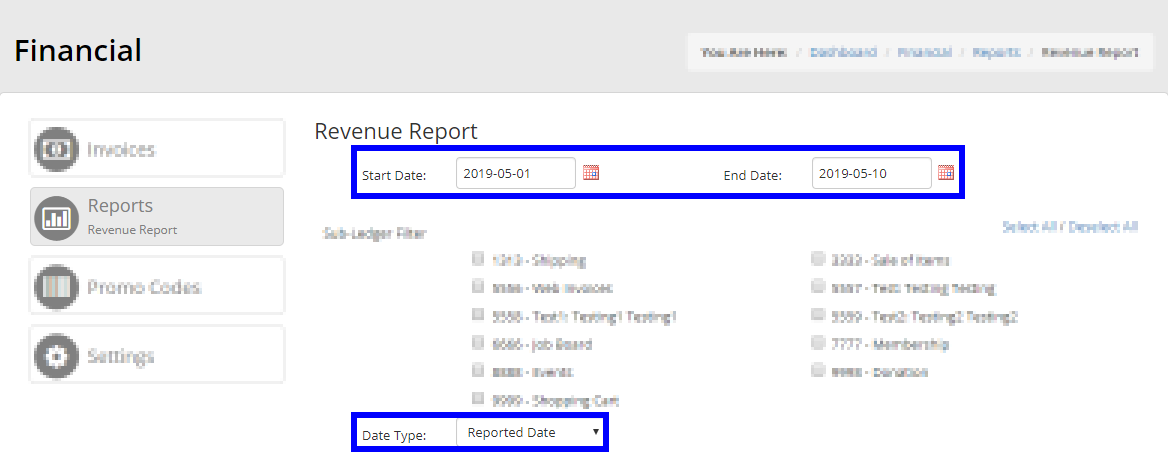
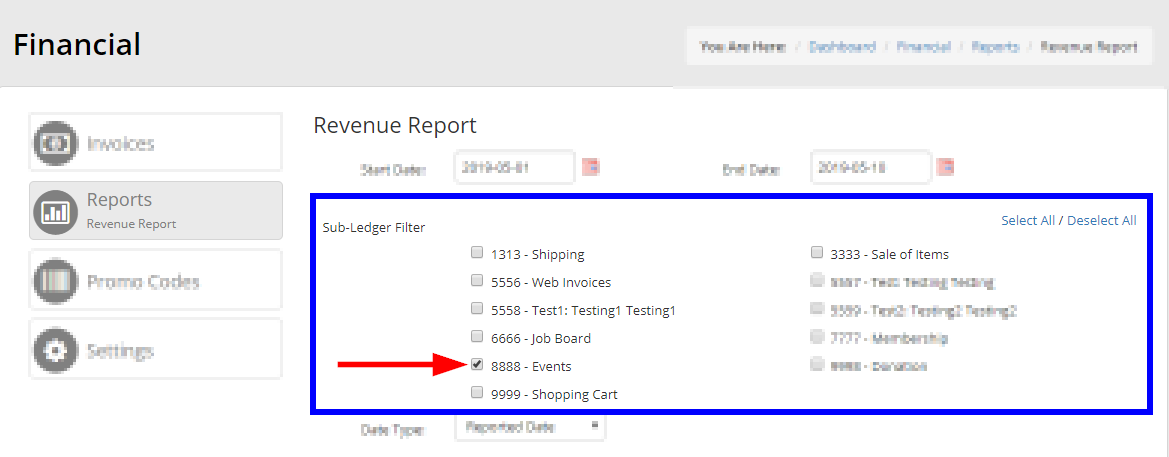
Sub-Ledger Filter – Specify transactions on a specific Sub-Ledger by checking its box. To simply pull a full list of transactions within your Date Range, leave everything unchecked.
When you are satisfied with your set of filters, click the ‘Generate Report’ button to export your Revenue Report to Excel!

Congratulations, you now know how to find the Revenue Report in Member365, and how to customize the data it pulls to suit your accounting needs!