This article will show you how to create and send an Email Campaign to your Contacts in Member365.
Create an Email Campaign
1. From the Member365 Administrator Dashboard, click ‘Email Campaigns’ from the bar at the top of the page.
![]()
2. On the page that follows, click ‘Create’ next to ‘Campaign Management‘.

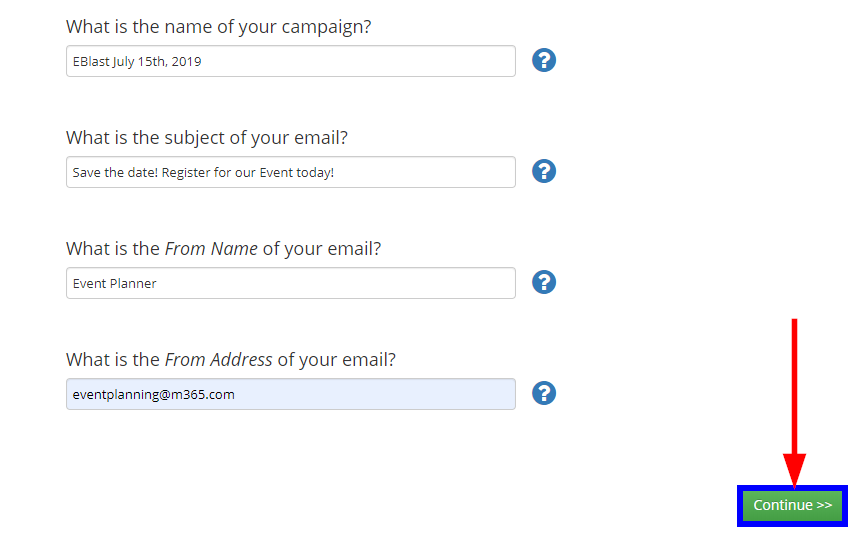
3. The following page will have a series of fields for your Email Campaign, like its name and subject line. Fill out each field as necessary, then click ‘Continue’ to proceed.
Build an Email Campaign
We have created the Email Campaign and specified details like its Name, Subject Line, and From Address. The next step will be to build the content of the campaign itself!
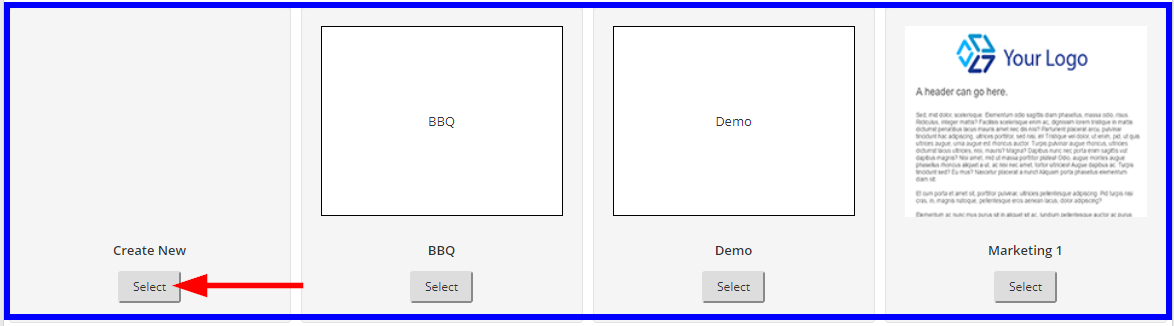
4. Choose an Email Template to begin building your Email Campaign by clicking ‘Select’ beneath its name. Alternatively, start from scratch by clicking ‘Select’ under the New/blank template.
5. Build the content of your Email Campaign. This is where you will create the email that your Contacts will receive. We have a Knowledge Base article that can show you how to use the Campaign Builder if you are not familiar with how it works.
6. Remember to ‘Save as Draft’ frequently. Click ‘Save & Continue’ at the top of the page when you are satisfied with the content of your Email Campaign.

Choose Email Campaign Recipients
After building the Content of our Email Campaign, we can now specify its recipients.
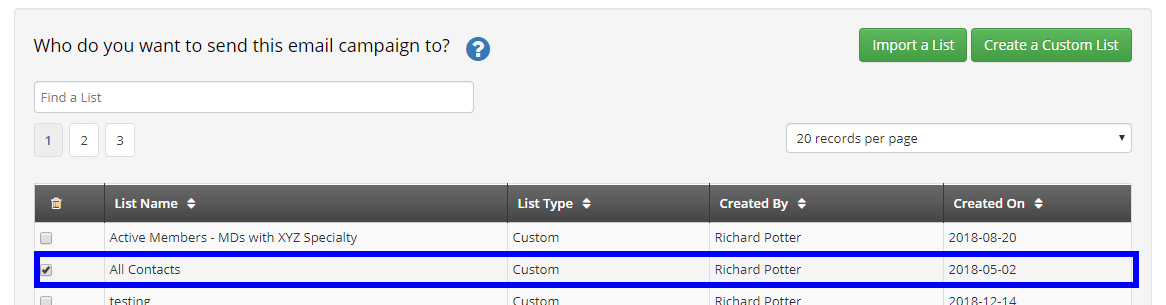
7. Choose which Mailing List your Email Campaign will send to by checking its name from the list. If you wish to create a new Mailing List for this Email Campaign, click ‘Create a Custom List’ and set its criteria.
8. Scroll down to the ‘Additional Recipients’ field. If there are any Contacts who are not covered by your list(s) in Step 7, or who are not Contacts in your system, paste their Email Addresses into this box, separated by commas.

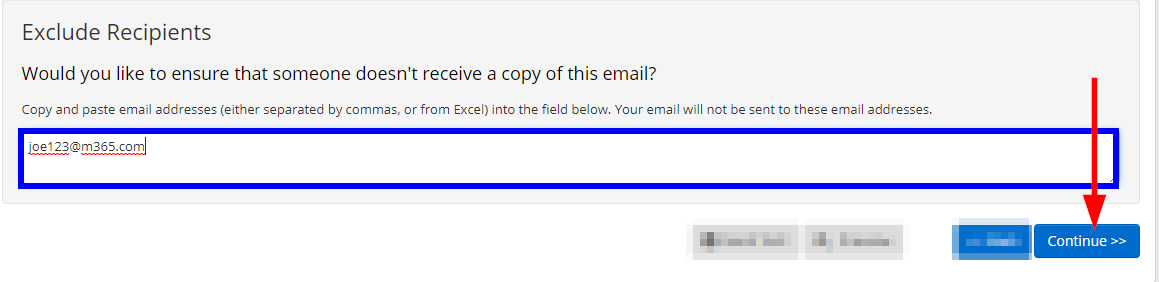
9. Scroll down to the ‘Exclude Recipients’ field. If there are any Contacts who you wish to ensure do not receive this eblast, paste their email addresses into the box, separated by commas.
To confirm the recipients you have selected for this Email Campaign, click ‘Continue’ at the bottom of the page.
Send the Email Campaign
We have built the Email Campaign and we have specified its recipients. It’s now time to send the Email Campaign, or schedule its delivery date!
10. Choose ‘Immediately’ under ‘Delivery Schedule’ to send your Email Campaign right away. Depending on the size of your Mailing List and the time of day, it may take five-to-ten minutes for the Email Campaign to send.

11. If you would like to schedule the Email Campaign for a specific date, choose ‘Schedule for Later’ instead, then specify the date when prompted.
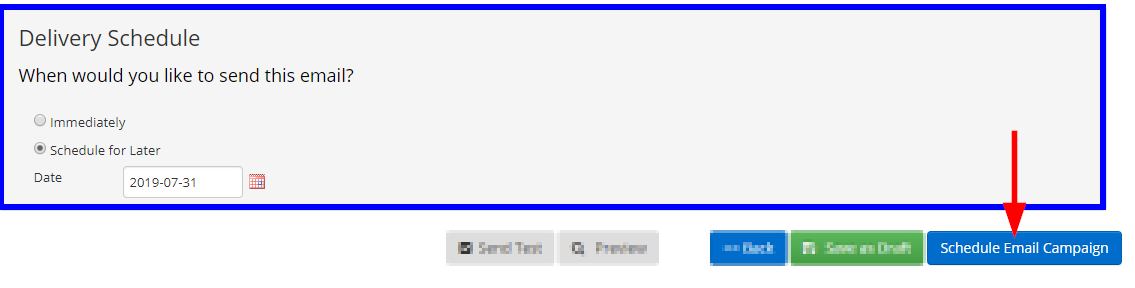
12. Finally, click ‘Send Email Campaign’ to send your eblast Immediately, or ‘Schedule Email Campaign’ to add your eblast to the queue for a later date.
Congratulations! You have just created, built, and sent an Email Campaign to your desired set of recipients!