This article will guide you through testing your membership approval process.
Finding the Membership Application Link
1. Log in to your Member365 Administrator Dashboard.
2. On the top bar, click ‘Membership‘.

3. In the ‘Membership Categories’ section, click ‘Manage‘.
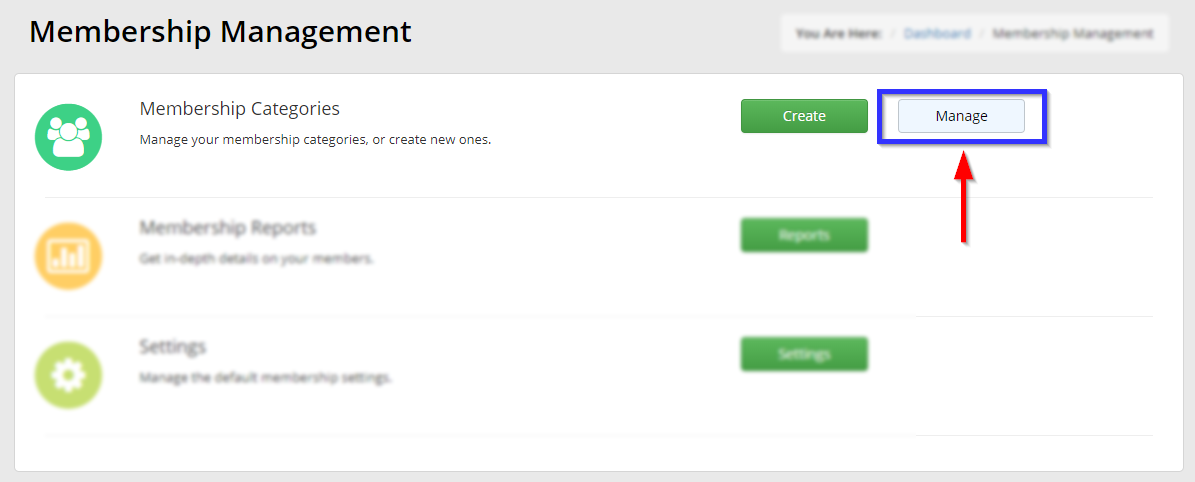
4. Find the membership category whose application you would like to test, click the chain-link icon next to its name, and click ‘Copy Link to Clipboard‘ in the window that pops up.
Testing the Application Process
5. Open an incognito browser window in your web browser; instructions are provided below.
- Internet Explorer
- Mozilla Firefox
- Google Chrome
- Safari
Click 'Settings', then 'Safety', then 'InPrivate Browsing', or press Control+Shift+P.
Click the icon with three stacked horizontal lines in the upper-right corner, then click 'New Private Window', or press Control+Shift+P.
Click the icon with a column of three dots in the upper-right corner, then click 'New incognito window', or press Control+Shift+N.
Click 'File' then 'New Private Window', or press Command+Shift+N.
This will ensure that the membership form begins blank instead of being filled in with data from your open Administrator account.
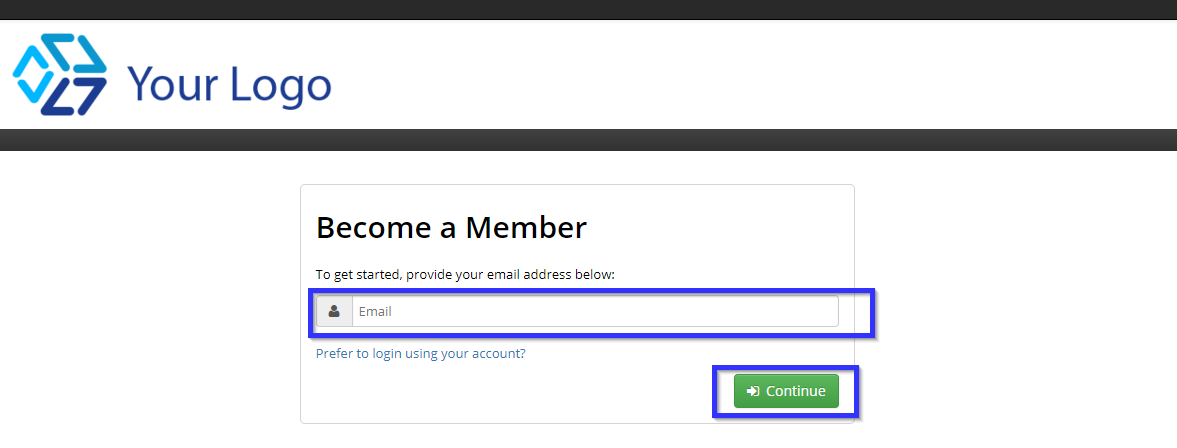
6. Paste the link you copied earlier into the address bar to arrive at the following screen; enter an email address that does not exist in the system, then click ‘Continue‘.
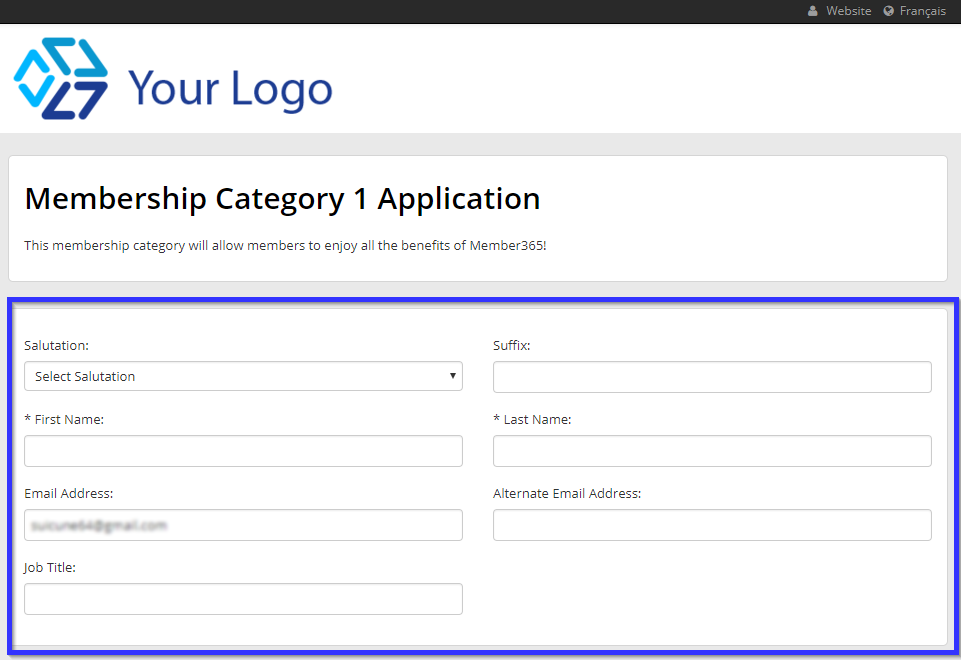
7. At the top of the application, verify that the description of the membership category is accurate.

8. Scroll down to the next section and ensure that all fields you intend to require are marked with an asterisk. In the example below, ‘First Name’ and ‘Last Name’ are mandatory, and the rest are not. (The email address is the one entered in step 6, and cannot be removed.)
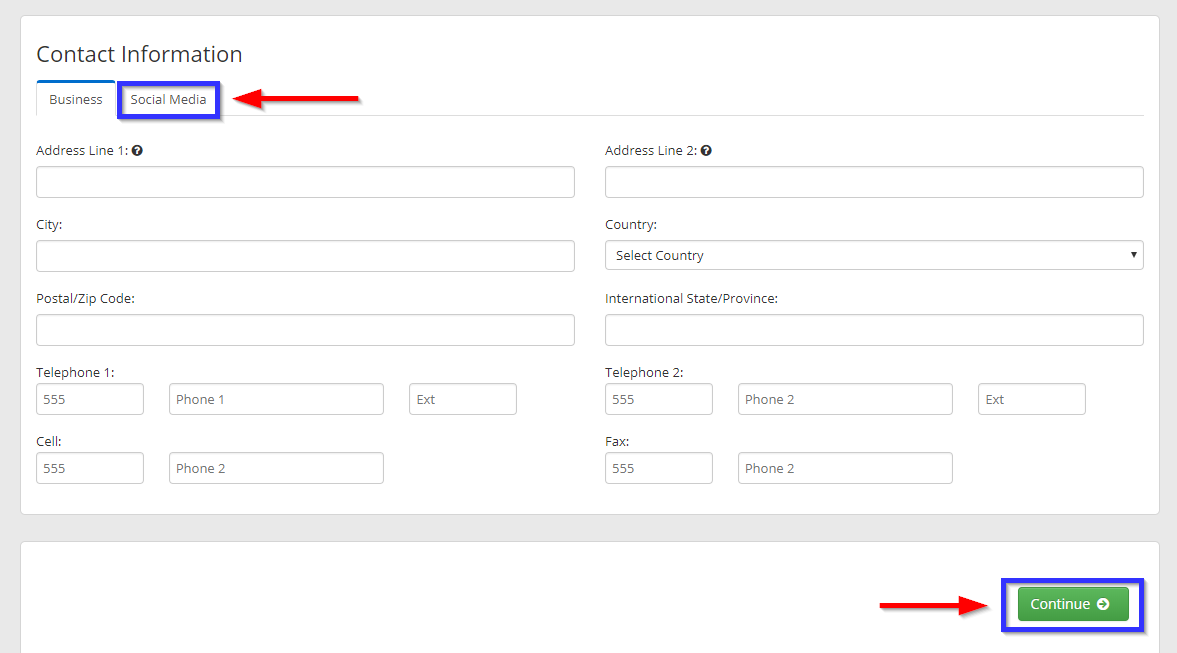
9. Scroll further to the ‘Contact Information’ section, and verify that all fields you intend to be mandatory are marked with an asterisk; in the below example, none of the fields are mandatory. Click the ‘Social Media‘ tab to examine the user’s options for entering social media contact information. Then click ‘Continue‘.
10. The next page will present you with any choice of fee categories that you have enabled, followed by any Extended Fields form that you have attached to this membership — these are the first and second boxes indicated here.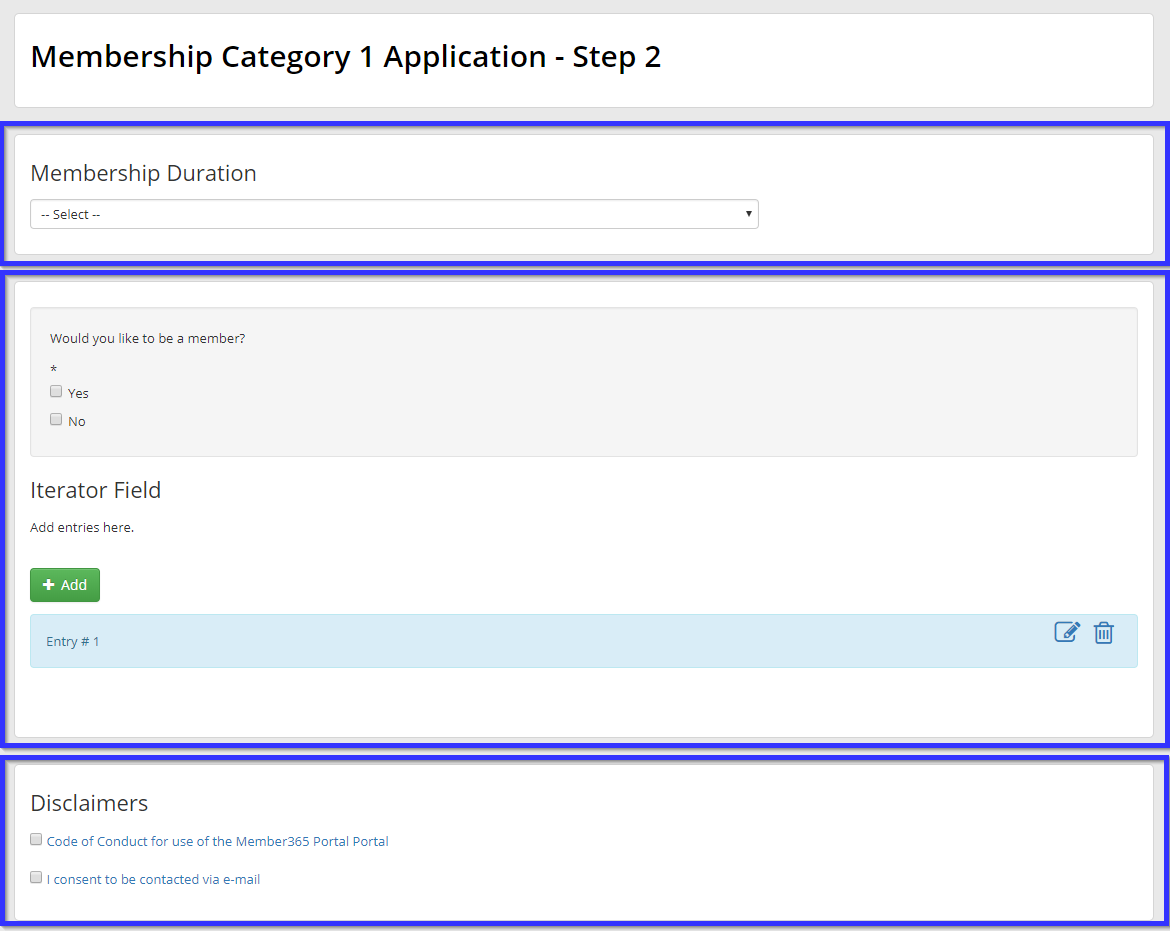
The third box, by default, will display the Code of Conduct and email consent disclaimers, and will display any additional disclaimers you have added as well. Clicking on the name of a disclaimer should display it.
11. Once you have reviewed the membership, scroll to the bottom and click ‘Continue‘; you should be presented with a system message that thanks you for your application and indicates that administration will contact you after approval.
After step 11, you will have successfully completed testing your membership application process!