1. Home
  2. Membership Management
  3. How To Set Up Group Memberships

How To Set Up Group Memberships

This article was written with the assumption that you understand Group Memberships. If you are unfamiliar with Group Memberships in Member365, we would recommend reading this Knowledge Base article before proceeding.

Creating a Group Membership

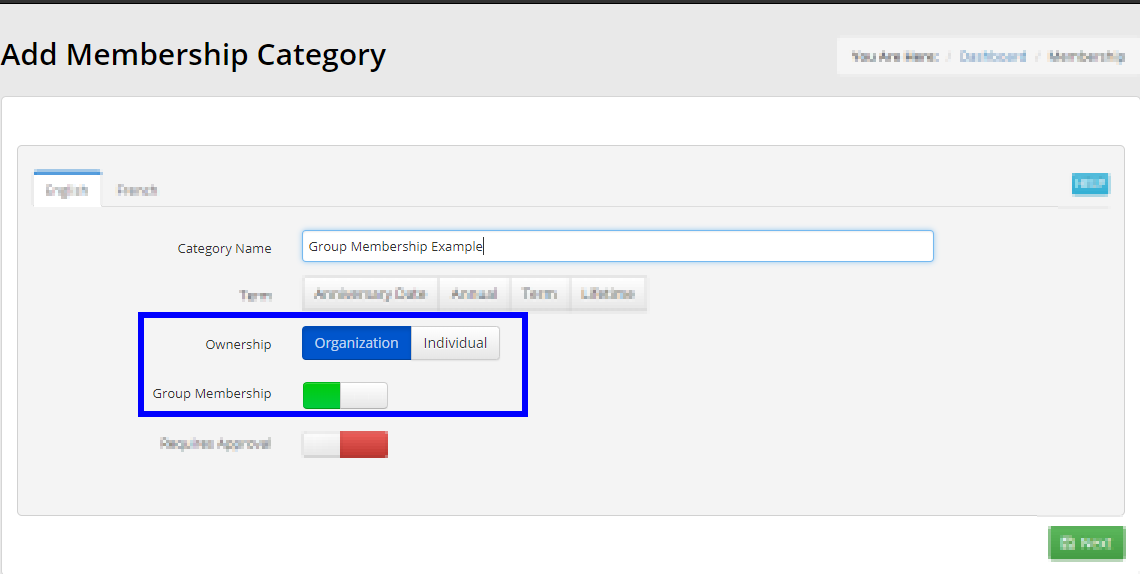
When creating a new Membership Category, you can make it a Group Membership on the very first page.

When prompted for the new Membership Category’s basic setup, ensure that ‘Ownership’ is set to ‘Organization’, and ensure that the resulting ‘Group Membership’ toggle is set to ON.

Image showing the creation screen for a new Membership Category, indicating that 'Organization' has been selected, and that 'Group Membership' is toggled on.

Converting to a Group Membership

You can also convert an existing Membership into a Group Membership. The process is as simple as navigating to the Membership Category’s settings, and tweaking a few of its toggles.

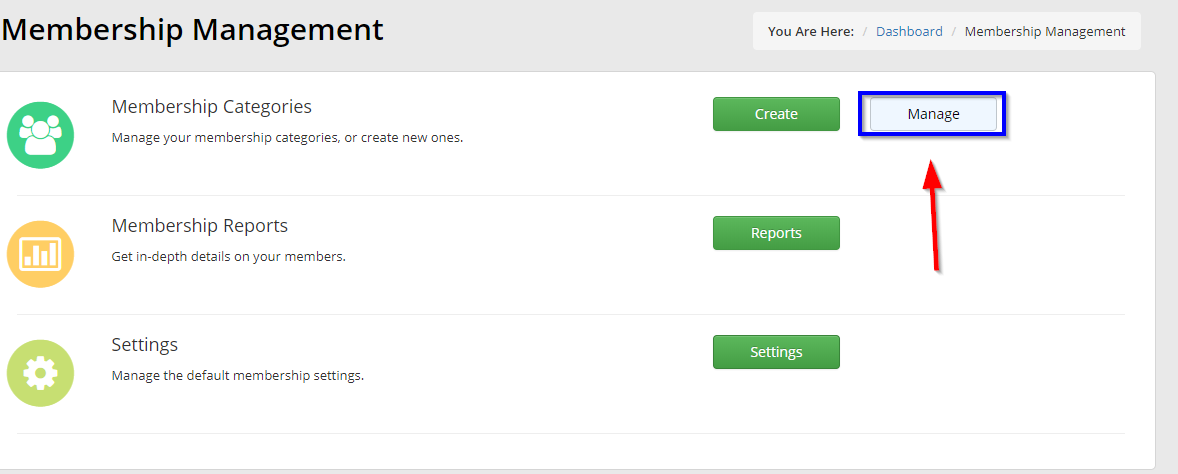
1. From the Member365 Administrator Dashboard, click ‘Membership’ on the bar at the top of the page.

2. On the page that follows, click ‘Manage’ next to ‘Membership Categories’.

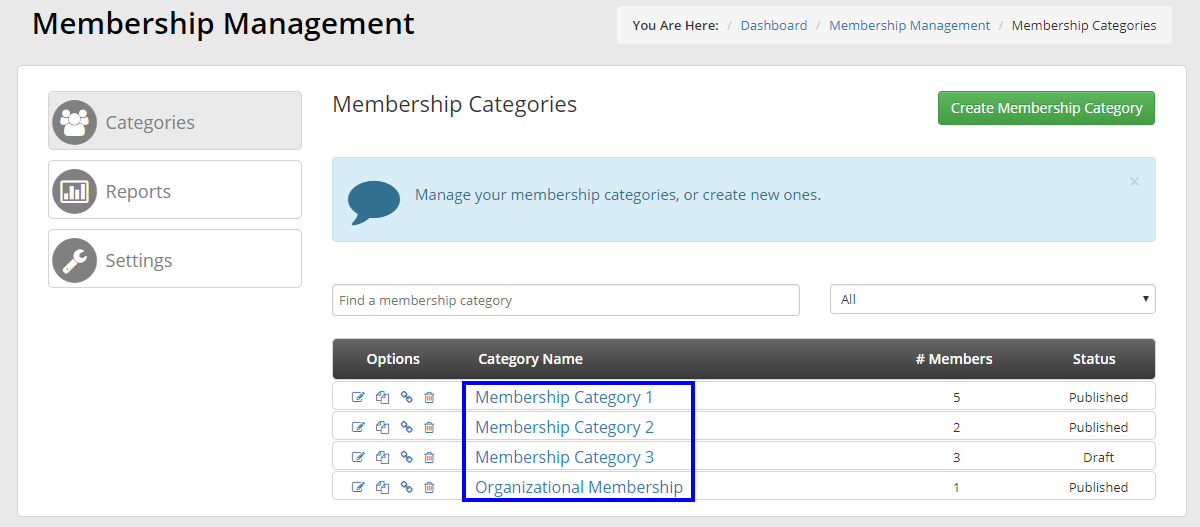
3. Locate the Membership Category you wish to convert, using the search bar if necessary, then click its name.

Updating Membership Settings

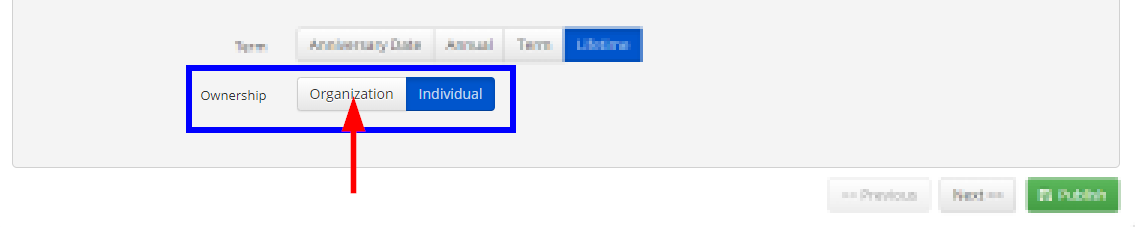
4. Under the ‘Overview’ tab, scroll to the bottom of the page. Ensure that ‘Ownership’ is set to ‘Organization’. If it’s not, you need to change it by clicking ‘Organization’.

Image indicating the options for 'Ownership' under the Membership Category's 'Overview' tab.

Use caution when converting an ‘Individual’ membership to an ‘Organization’ membership. If the Membership Category you wish to convert is an ‘Individual’ membership, it may be easier to simply create a new Membership Category altogether for your Group Membership.

5. Next, click the ‘Configuration’ tab. Click ‘Membership’ from the list of sub-tabs that appears.


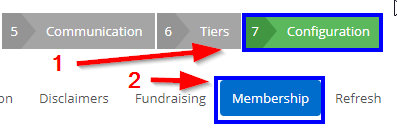
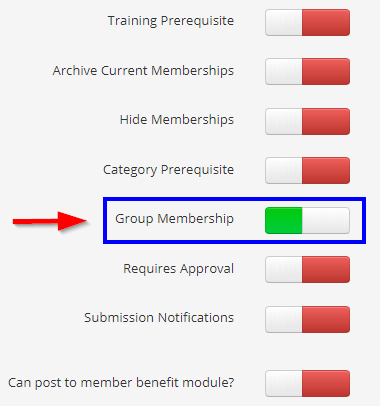
6. Several toggles will appear. Ensure that ‘Group Membership’ is set to ON if you wish for this Membership Category to be a Group Membership.

Configuring your Group Membership

A Membership Category with the ‘Group Membership’ settings enabled correctly will have a tab labeled ‘Group Membership. If you do not see the tab, consult the earlier sections of this article and ensure that your Membership Category is configured correctly.

Employee Seats

The first option you will see after clicking the ‘Group Membership’ tab relates to Employee Seats. How many Employee Accounts will a Primary Contact be allowed to add?

Image showing the three options for Employee Seats under the Group Membership tab. I.e. 'Unlimited', 'Limited', 'Seat Packages'.

Unlimited – There is no limit to the amount of Employee Accounts that can be added under one Primary Contact. This option works best for large organizations who will be adding several employees to their membership.

Limited – Specify the maximum amount of Employee Accounts that can be added to a Group Membership. This option would work well for limiting the number of family members who can be added onto the same membership.

Seat Packages – Only allow Employee Accounts to be added if the Primary Contact purchases Seat Packages through your online Store Module. This option would work great if you want to charge groups extra depending on how many members they have under their membership.

Group Membership Permissions

After specifying your Employee Seats, the final step in configuring a Group Membership is to set its permissions. Regardless of the Employee Seats option you chose, the same set of toggles will be presented.

Image showing the series of Group Membership Permissions toggles.

Hide Employee accounts in member portal– If this toggle is ON, the Primary Contact will not be able to add Employee Accounts from their Member Portals: the privilege would rest exclusively with you and your administrators.

Show Directory? – Will Employee Accounts on this membership be allowed to see your Member Directory?

Show Store? – Will Employee Accounts on this membership be allowed to view and purchase from your online Store Module?

Show Job Board? – Will Employee Accounts on this membership be allowed to view your Job Board Module?

Show Education? – Will Employee Accounts on this membership be allowed to enroll in your Continuing Education program?

Show Events?  – Will Employee Accounts on this membership be able to view your Event Calendar, and will they be allowed to register for your Events?

Show Member Benefits? – Will Employee Accounts on this membership be allowed to view the Member Benefits module?

Allow primary account holder to invite employee accounts to the member portal? – If this toggle is OFF, then it won’t be possible to send login details to Employee Accounts upon creation.

Employee Tagging – Employee Tagging is a new feature that will have its own Knowledge Base article soon!

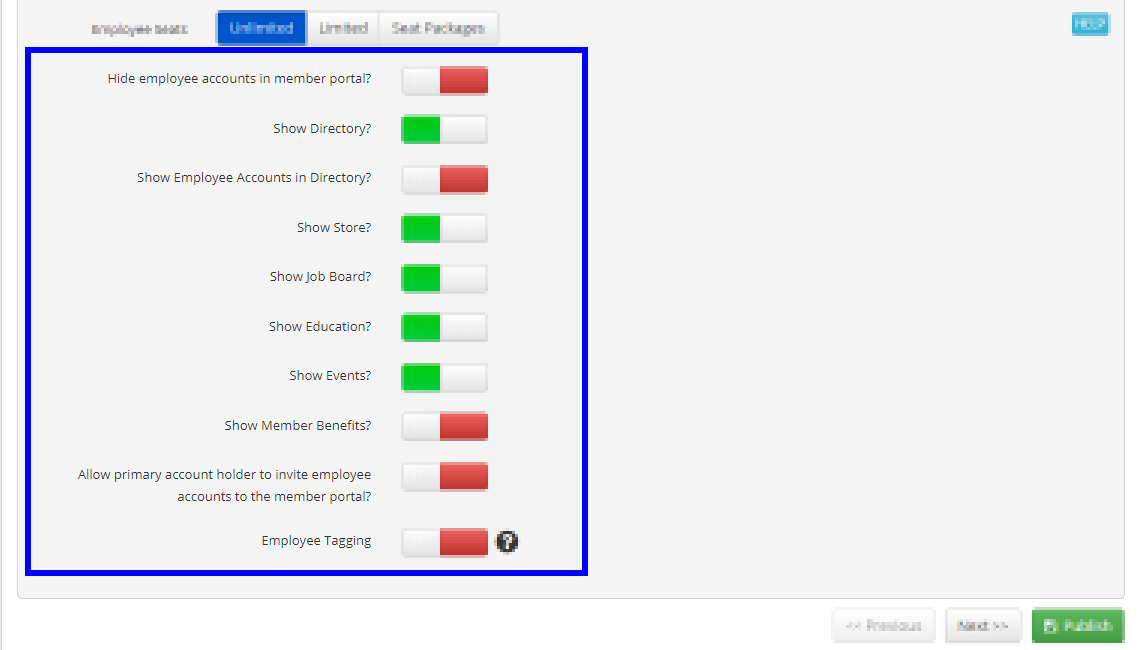
The most important setting above is the ‘hide employee accounts in member portal’ option. Whether or not a Primary Contact can add members themselves is a very big distinction when working with Group Memberships, so ensure you have this option set correctly depending on your administrative needs.


Congratulations, you have learned how to create and configure Group Memberships!

Was this article helpful?

Related Articles