This article will guide you through setting an event withdrawal fee; this fee will be charged to an attendee who cancels their ticket past a date that you specify.
Accessing Event Configuration
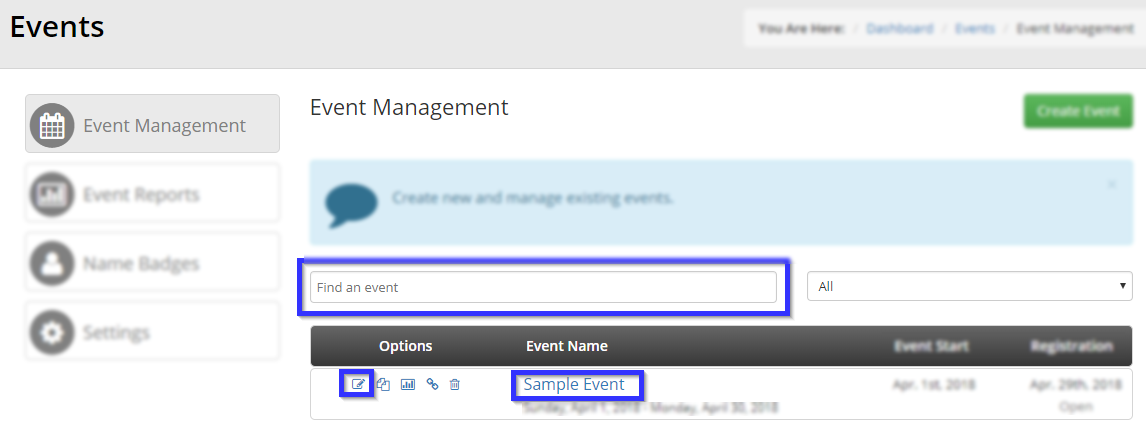
1. Log in to your Member365 Administrator Dashboard.
2. On the top bar, click ‘Events‘.

3. In ‘Event Management’, click ‘Manage’.

4. Find the event you are looking to modify, by entering its name in the text box or finding it in the list, and then click its name or the pencil icon to the left.
Enabling and Setting a Withdraw Penalty Fee
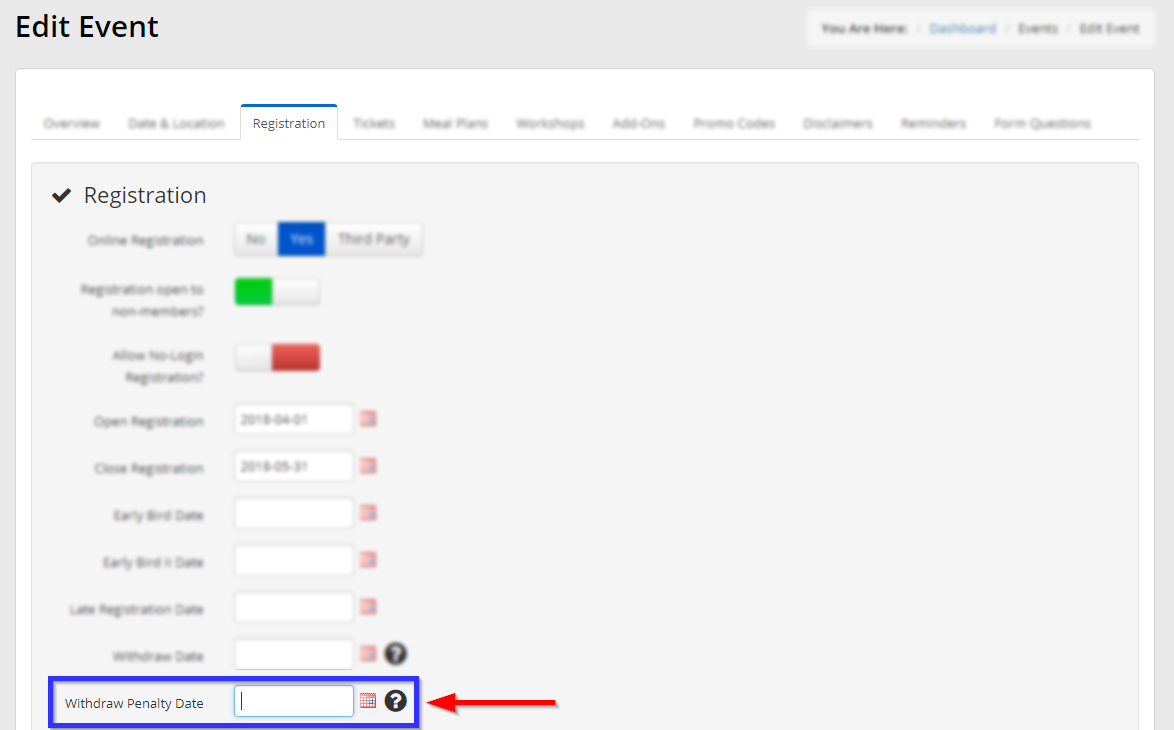
5. Click the ‘Registration‘ tab.

6. Find the setting marked ‘Withdraw Penalty Date‘ and enter a date. The fee you set in the next steps will apply to any registrations withdrawn after this date.
7. Click the ‘Tickets‘ tab.

8. Find the entry marked ‘Withdraw Penalty Fee‘, enter the desired fee in the text field, and decide whether you would like to apply this on a per-ticket or a per-order basis.
9. Scroll to the bottom and click the green ‘Publish‘ button.
Congratulations, you have set a fee for late withdrawals from this event!