This article will guide you through removing membership categories from a directory.
Accessing the Directory
1. Log in to your Member365 Administrator Dashboard.
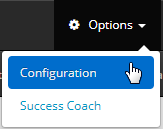
2. On the top bar, click ‘Options‘, and then ‘Configuration‘ from the drop-down menu that appears.

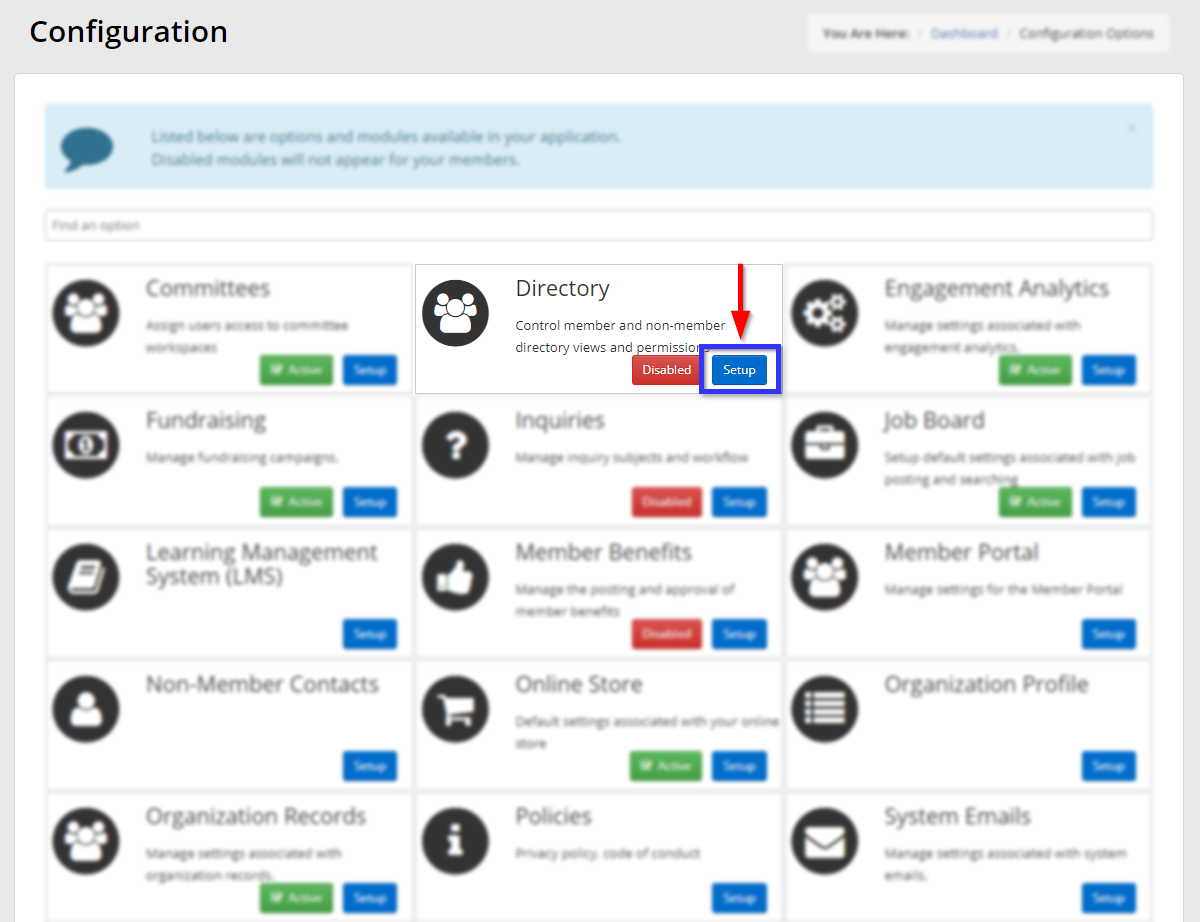
3. Find the section labelled ‘Directory’ and click ‘Setup‘.
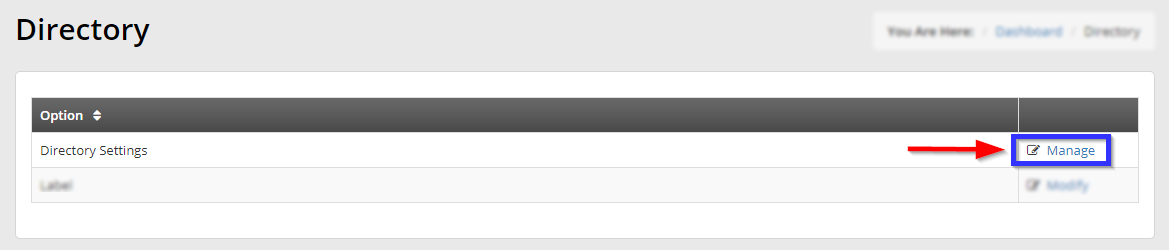
4. Next to ‘Directory Settings’, click ‘Manage‘.
Removing Membership Categories from the Directory
5. Click the name of the directory you wish to edit.

6. Find the section labelled ‘Membership Categories‘ and uncheck the boxes next to every membership category you would like to remove.
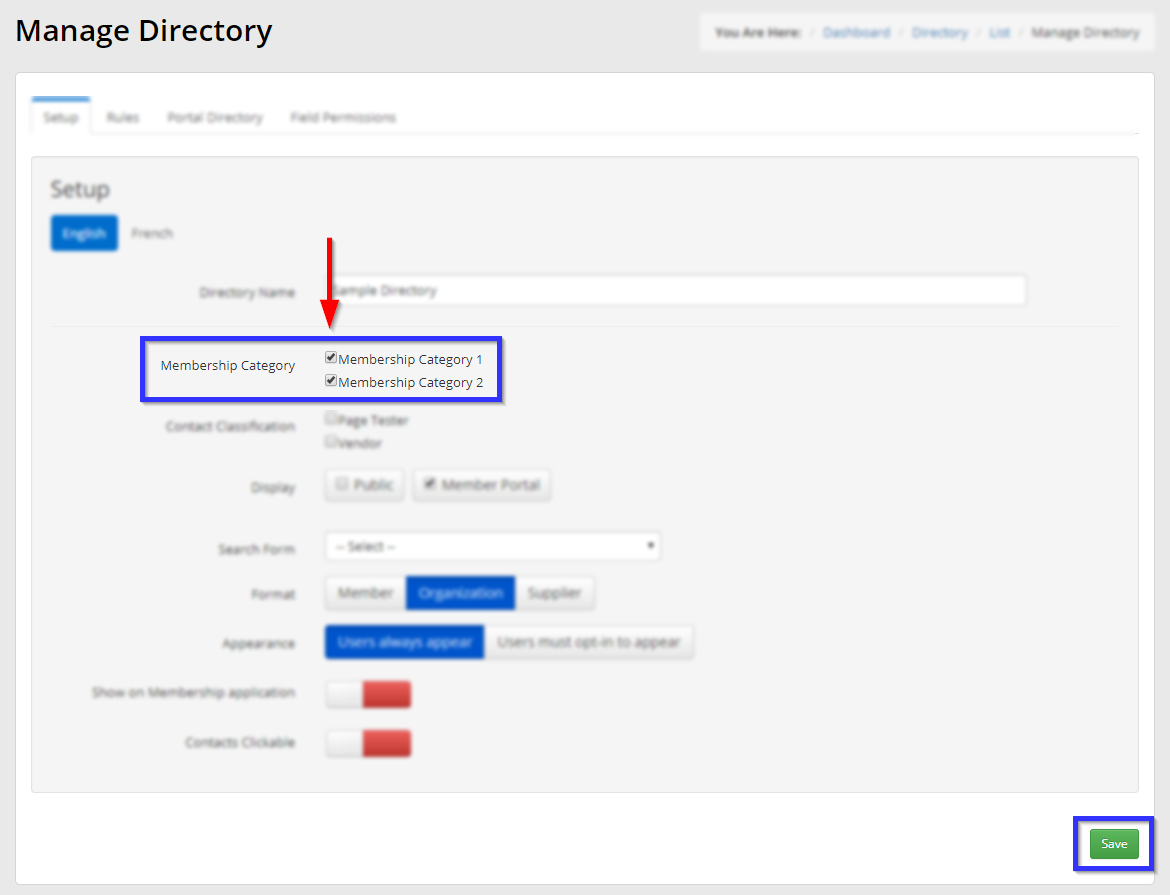
7. Click the ‘Save‘ button in the bottom-right corner.
Congratulations, you have removed one or multiple membership categories from this directory!