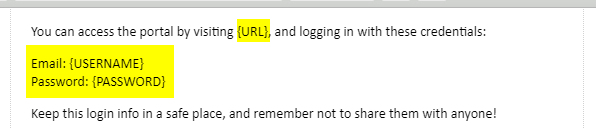
A ‘Welcome Email’ in Member365 is the login email template with a Username/Password combination, and a link to the Member Portal!
Welcome Emails are sent automatically by the system to Contacts when they are granted Member Portal Access.
You can customize Welcome Emails in Member365: this article will outline the steps to do so!
What do Welcome Emails Contain?
Initially, your Welcome Emails will contain a stock message and a link to your Member Portal. There will also be a username/password combination that’s generated automatically and unique to each recipient.
When do Welcome Emails Send?
The System will send a Welcome Email automatically to any Contact who is granted Member Portal Access. There are two scenarios that result in a Welcome Email sending.
When Contacts become Members
In Member365, Active Members are granted Portal Access automatically. When a Contact’s Membership Application is successful, they will be granted Portal Access and a Welcome Email will send.
When Portal Access is Granted Manually
If there is a Contact without Portal Access – be it a Non-Member, or someone you enrolled manually – you can still send them a Welcome Email on-demand.
Since the Welcome Email is linked to Portal Access, it is configured to send as soon as a Contact receives that permission. As such, as soon as you grant someone Portal Access manually, they will receive a Welcome Email.
Where do I Edit the Welcome Email?
There are actually two versions of the Welcome Email in Member365, and the one that sends depends on the situation.
- Category Specific – Every Membership Category has its own Welcome Email template. The Category Specific Welcome Email is the template that sends when a Member of that specific Category is approved and granted Portal Access.
- System Default – The System Default Welcome Email is the template that sends when you grant Portal Access manually, and it is the template that sends if you disable the Category Specific Welcome Email.
Category Specific Welcome Email
Every Membership Category you create has its own custom Welcome Email template. When Members of this Category apply successfully, they will be sent this Welcome Email unless you choose to disable it: in that case they would be sent the System Default instead.
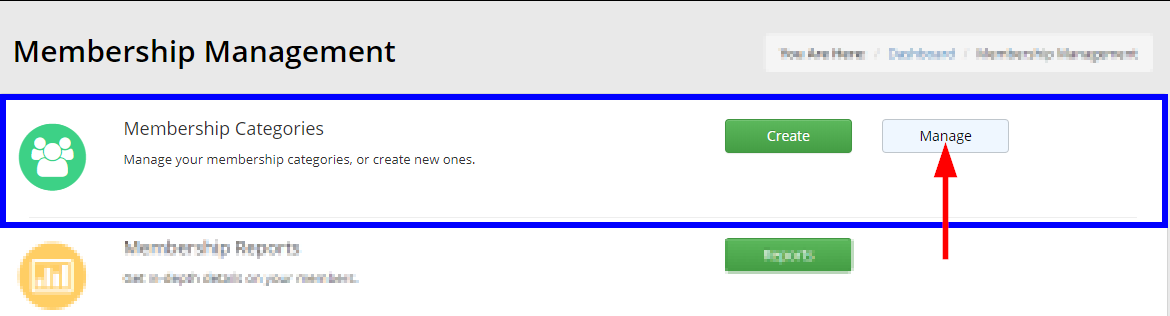
1. From the Member365 Administrator Dashboard, click ‘Membership’ at the top of the page.
![]()
2. Click ‘Manage’ next to ‘Membership Categories’ on the page that follows.
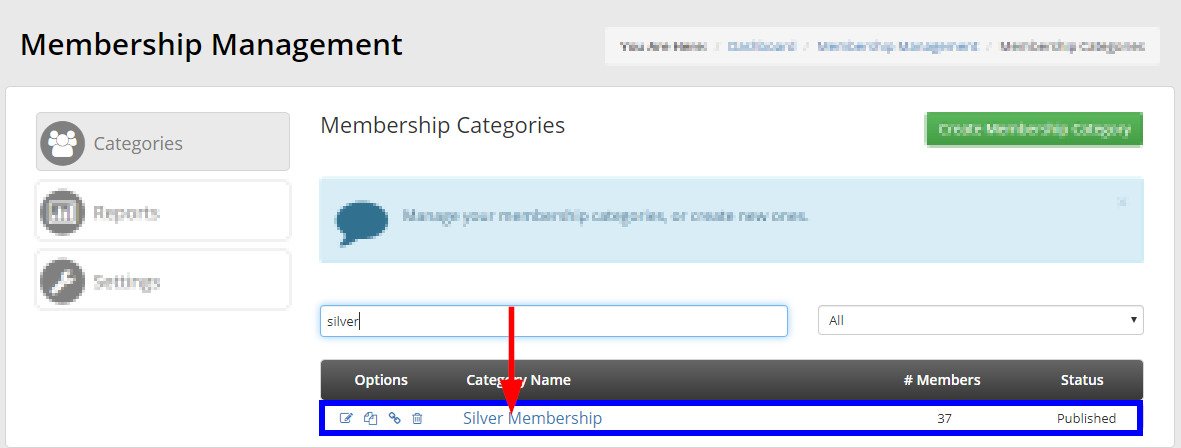
3. Locate the Membership Category whose Welcome Email you wish to view, then click its name.
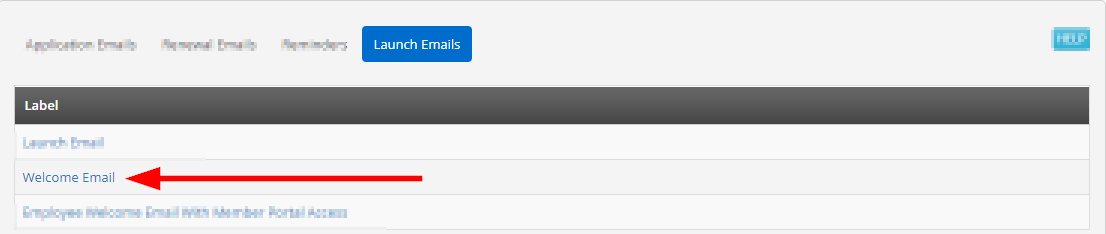
4. From the list of tabs, click ‘Communication’, then click the ‘Launch Emails’ sub-tab.
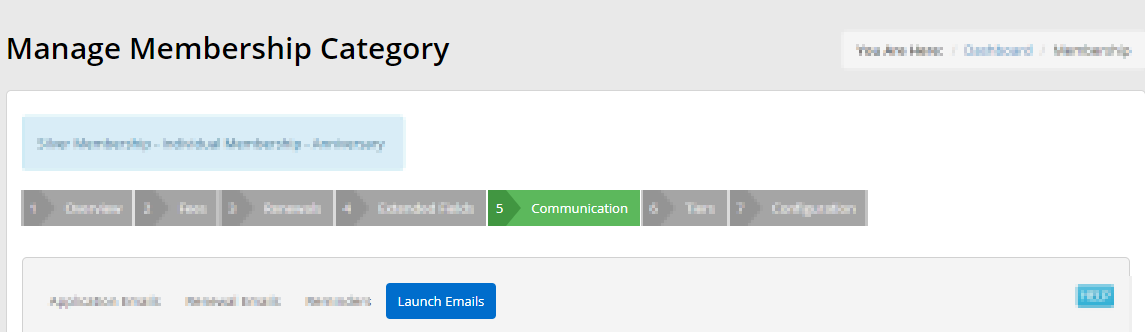
5. Click ‘Welcome Email’ from the list of templates.
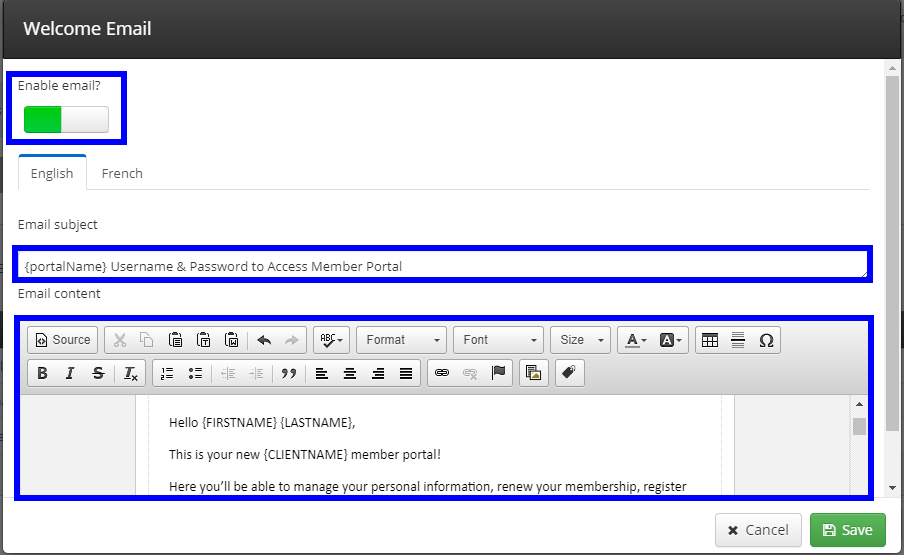
6. A window will open in which you can customize your Welcome Email.
System Default Welcome Email
The System Default Welcome Email will send when you grant your Contacts Portal Access manually. The System Default Welcome Email will also send automatically to successful applicants if you disable their Category Specific Welcome Email.
1. Click ‘Options’ at the top of the screen, then click ‘Configuration’ from the drop-down menu that appears.

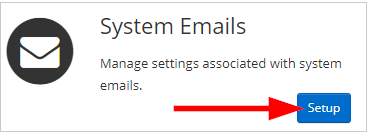
2. Scroll through the list of configuration options, and click ‘Setup’ for ‘System Emails’.
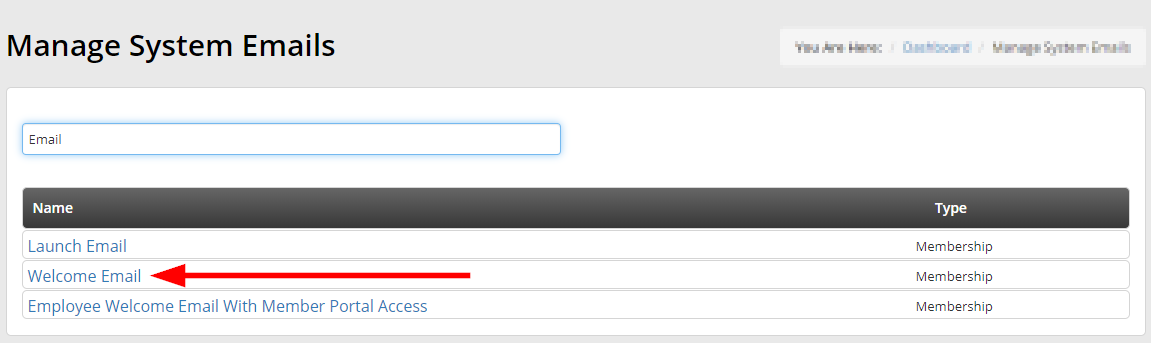
3. Locate and click on ‘Welcome Email’ from the list of templates.
Congratulations! You now know what Welcome Emails contain, when they send, and how to customize them!