This article will describe how to make a video viewable in the Member Portal Video Library. A number of preliminary steps can be taken in order to be able to better organize your videos, but after these have been carried out, you can skip to the section labelled “Adding A Video”.
Configuring Your Video Library
1. Login to your Admin365 Administrator Dashboard.
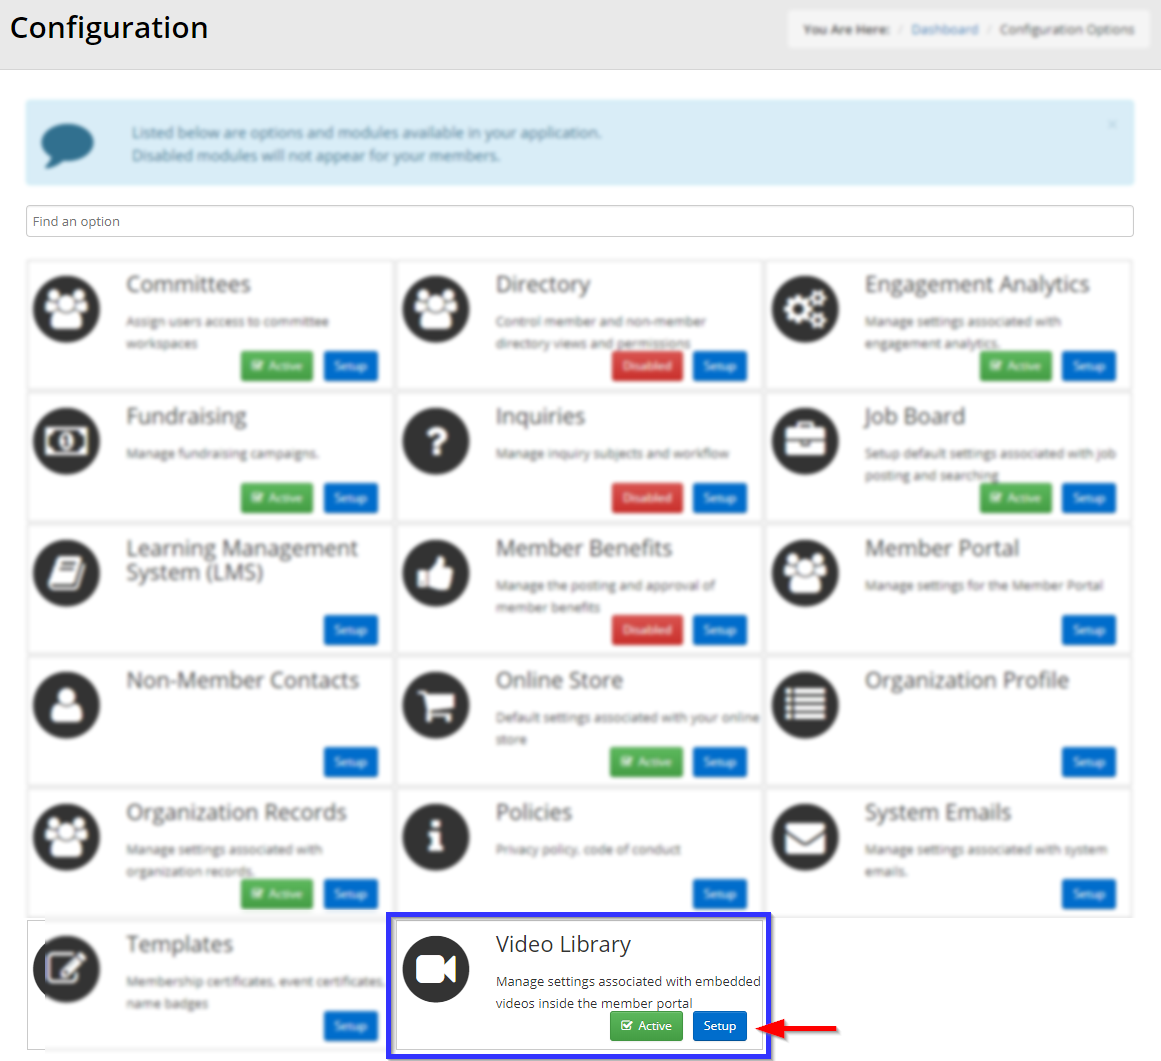
2. In the top bar, click “Options”, and then click “Configuration” in the drop-down menu that appears.

3. In the “Video Library” box, click “Setup”.
Adding Video Tags and Categories
4. To add tags or categories to organize the videos you add, you may click “Add” next to either Video Tags or Video Categories.

5. Adding a video category is fairly straightforward:
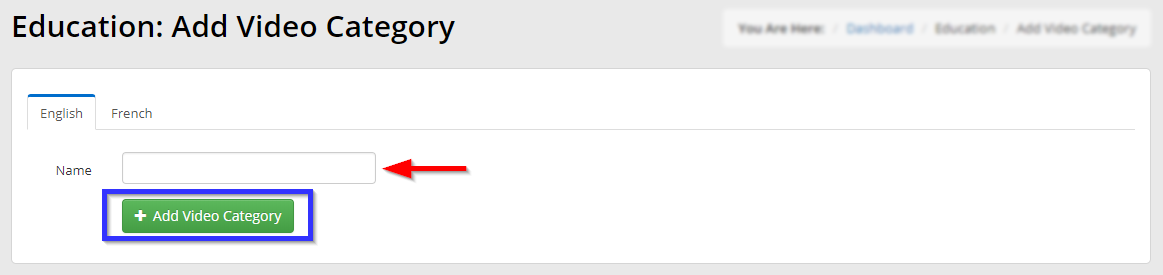
Simply enter a name for the new category into the indicated text box, then click “Add Video Category.”
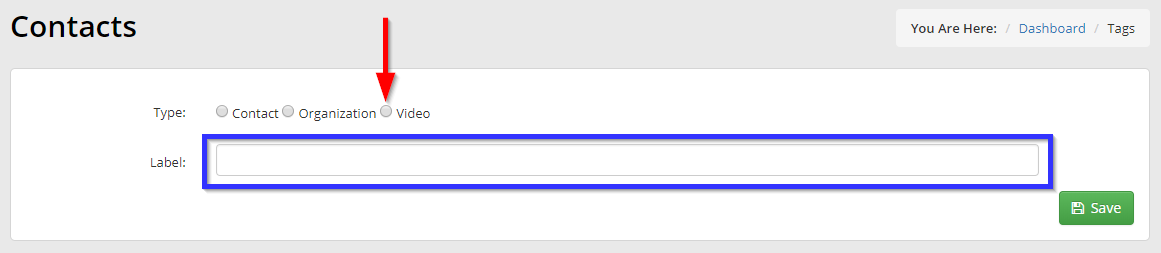
6. Adding a new video tag requires a slight extra bit of care: the “Add” button brings you to a more general page that allows you to create multiple types of tag. Click the circular button next to “Video”, enter the desired tag in the text box, then click “Save”.
Adding A Video
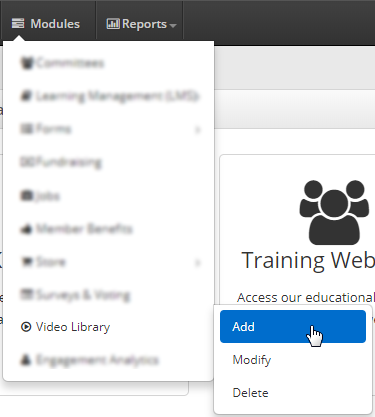
1. In the bar at the top, click “Modules”.

2. From the drop-down menu, move the cursor over “Video Library”, and click “Add” on the sub-menu that appears.
3. You will find yourself at the Add Video interface. Start by entering a video title and description into the indicated text boxes.
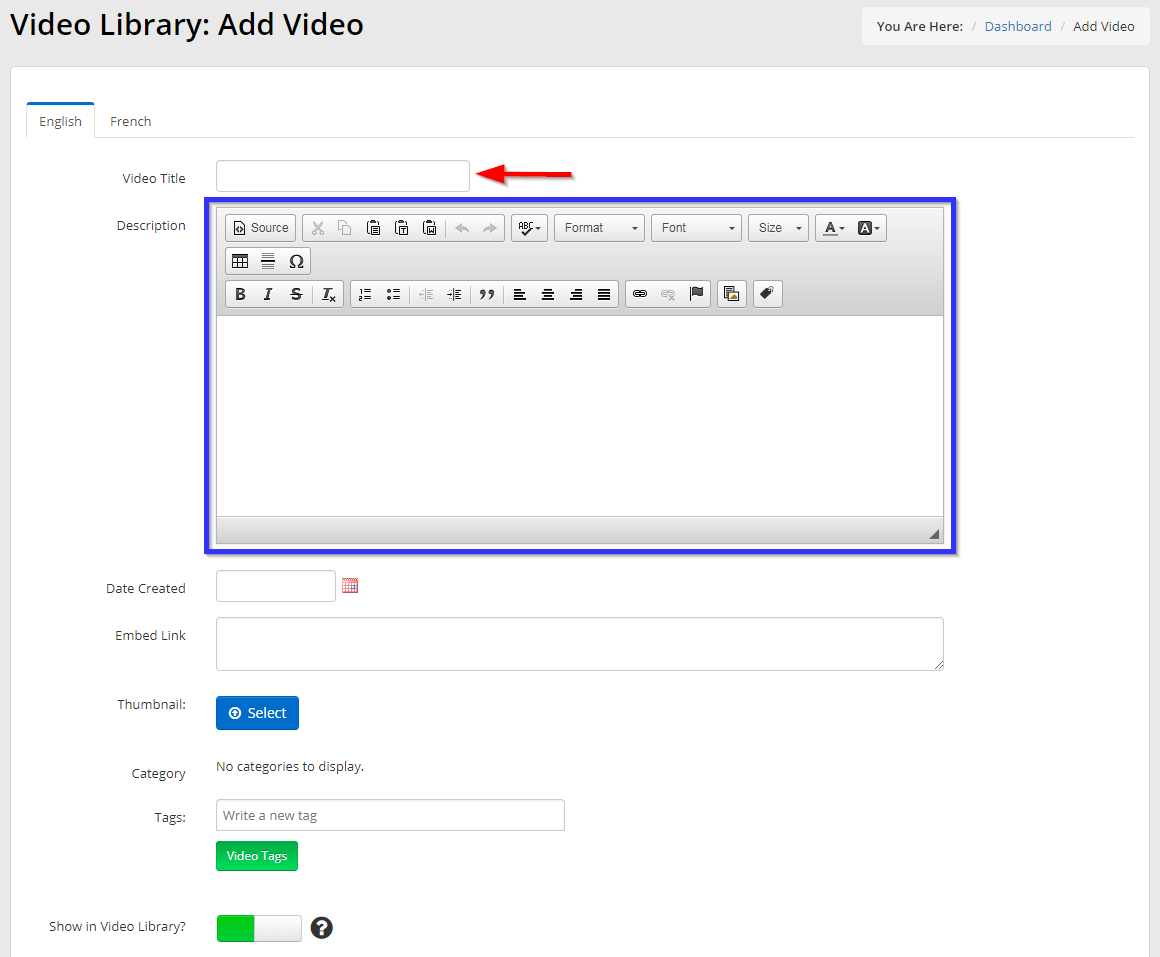
4. Next, configure the advanced options for the video: use the button next to “Date Created” to select the date that the video was created, then enter the embedding code for the video into the text box labelled “Embed Link”.
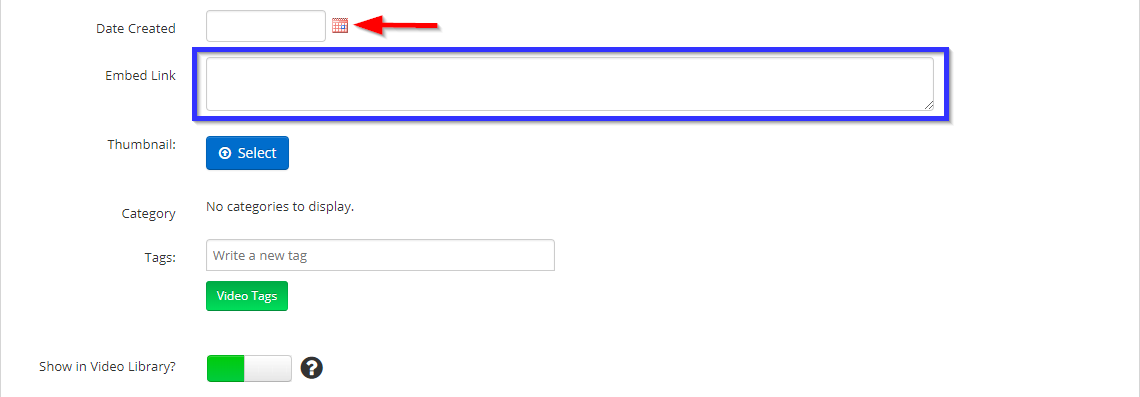
5. To add a thumbnail, click the blue “Select” button, then click “Choose File” in the dialogue box that appears. Navigate to the image file on your computer you wish to use as a preview, and click “Open”.
6. Click the checkboxes next to the names of any categories to which you wish to add this video.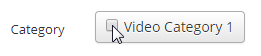
7. Enter the name of a tag you would like to assign to this video in the text box labelled “Tags”, or click “Video Tags” to access a list of existing tags:
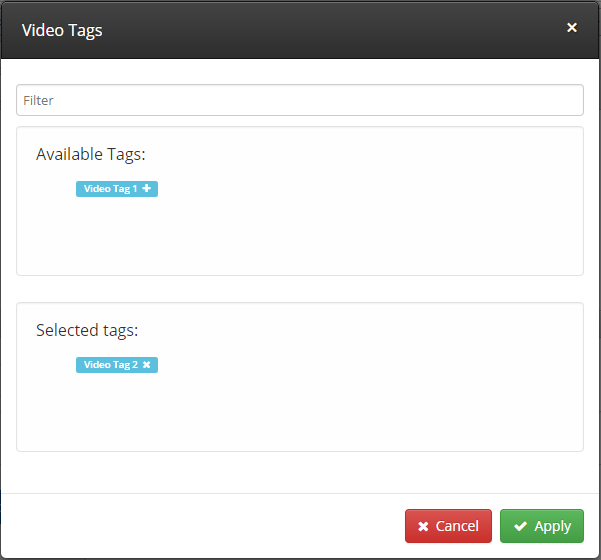
Entering text into the box marked “Filter” will allow you to narrow down the list of tags that are available. Click on tags under “Available Tags” to select them, and click on tags under “Selected tags” to remove them. Click “Apply” once you are satisfied.
8. The toggle button at the bottom of the form allows you to decide whether this video will be displayed in the Member Portal. If the button is showing the red right side, click the left side to turn it green.
9. Scroll to the bottom and click “Add Video”.
Congratulations, you have added a video to the Member Portal Video Library!