You can create a form that will be presented to any user who registers for an event; doing so will require that the user fill out the form before completing the registration process. You can attach a single form to an event and ask the same questions of every attendee (click here to learn how), or you can create specific forms for specific ticket types.
This guide will walk you through creating a form and attaching it to a specific ticket type. You will need to build the form and then either create a new ticket type or edit an existing ticket type.
Creating the Form
1. Log in to your Member365 Administrator dashboard.
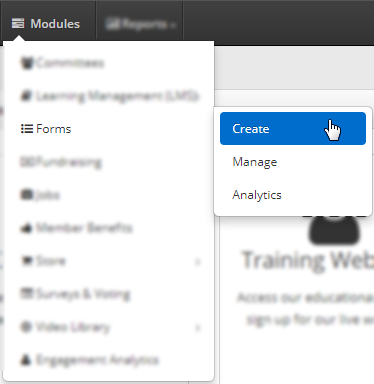
2. On the top bar, click ‘Modules‘.

3. From the drop-down menu that appears, hover the cursor over ‘Forms’ and then click ‘Create‘.
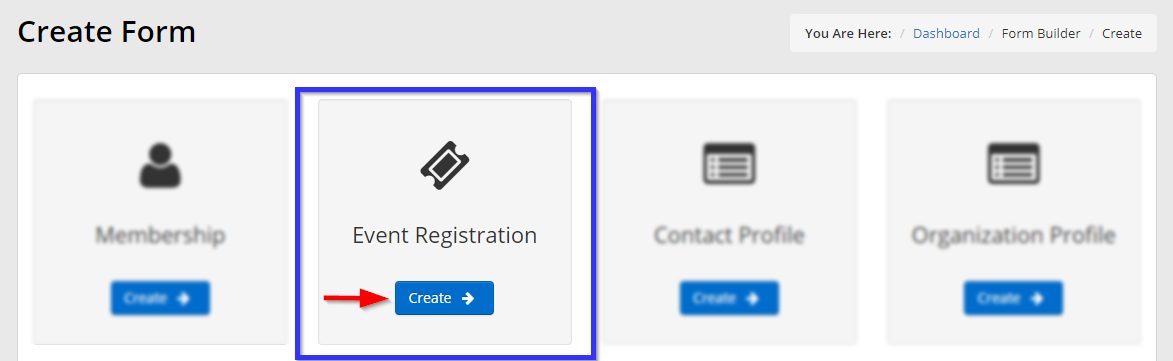
4. In the section labelled ‘Event Registration’, click ‘Create‘.
5. Enter a name for your form that you’ll remember for later, and set a category for the form.
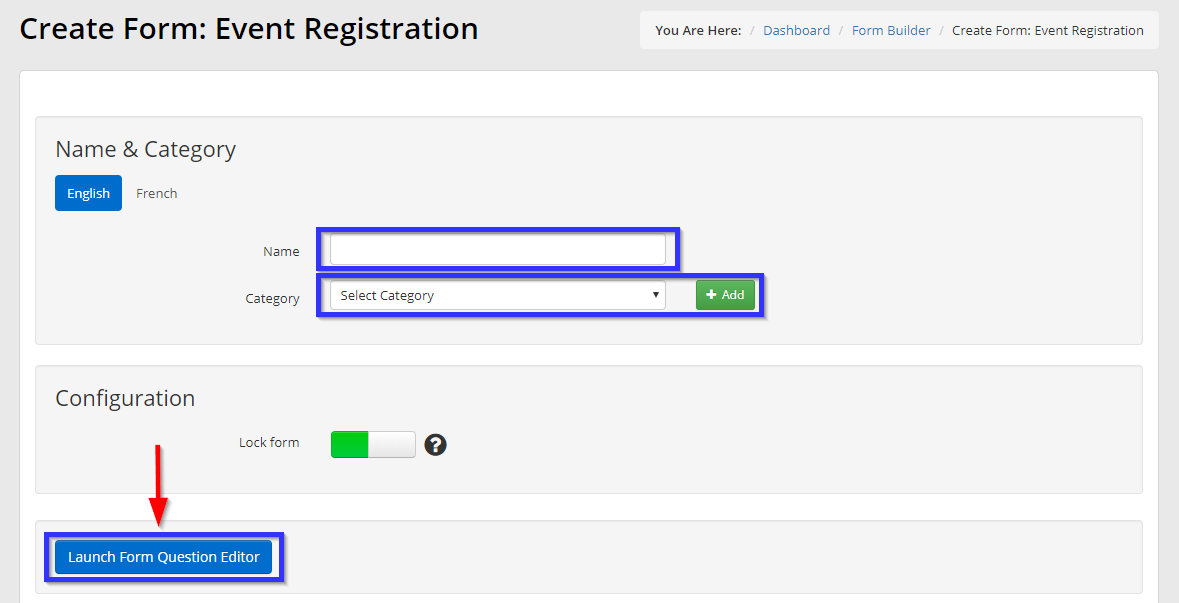
If an appropriate category exists, select it from the drop-down menu and skip to step 7. If there is no appropriate category, proceed to the next step.
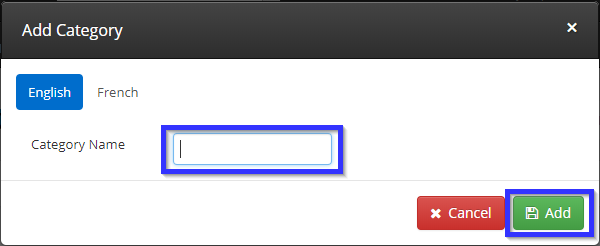
6. Click the ‘Add’ button pictured in the previous step, then enter a name for this new category in the box that appears. Click ‘Add‘, then select the name from the drop-down menu indicated in the previous step.
7. Click the button labelled ‘Launch Form Question Editor‘ indicated in step 5. See our guide on using the Form Question Editor. Once you are done creating your form, click ‘Save‘, and proceed to step 8.
8. Click ‘Publish‘ on the page you return to after completing the form.
Attaching the Form to a Ticket Type
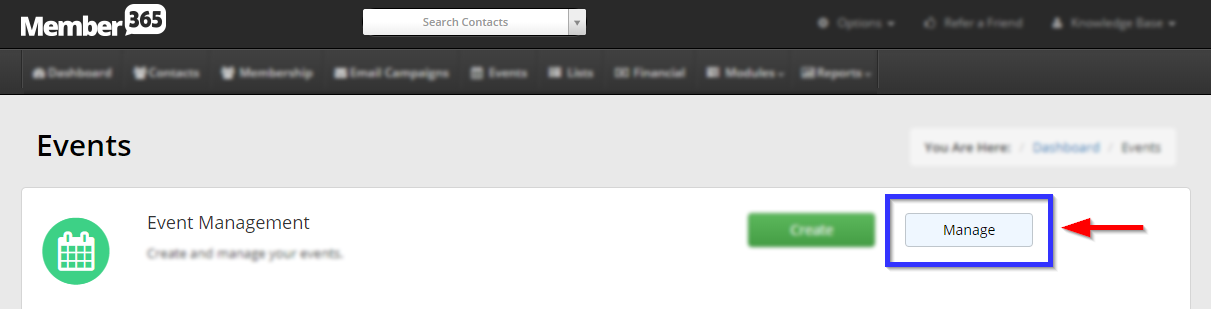
9. On the top bar, click ‘Events‘.

10. Next to ‘Event Management’, click ‘Manage‘.
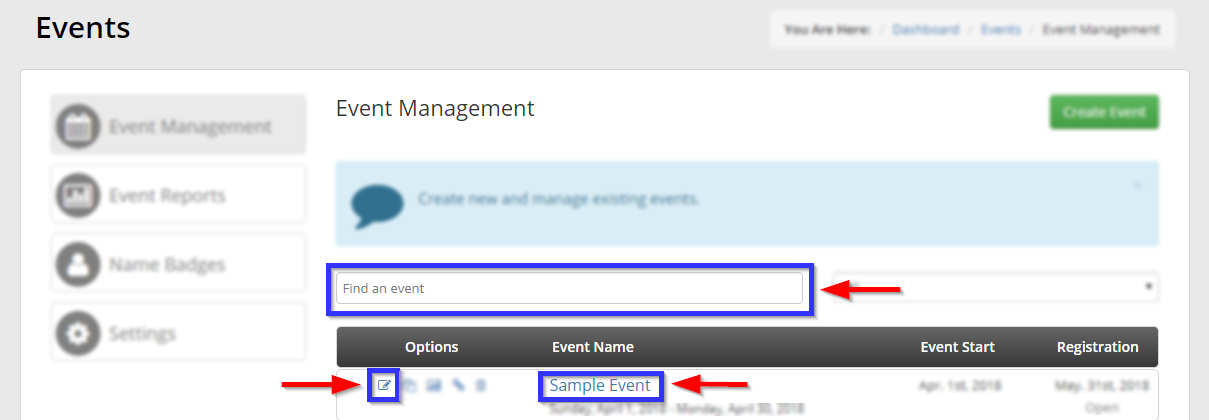
11. Find the event that you are using this form for, either by typing its name into the search bar or by finding it in the list, and then click its name or the pencil icon to the left.
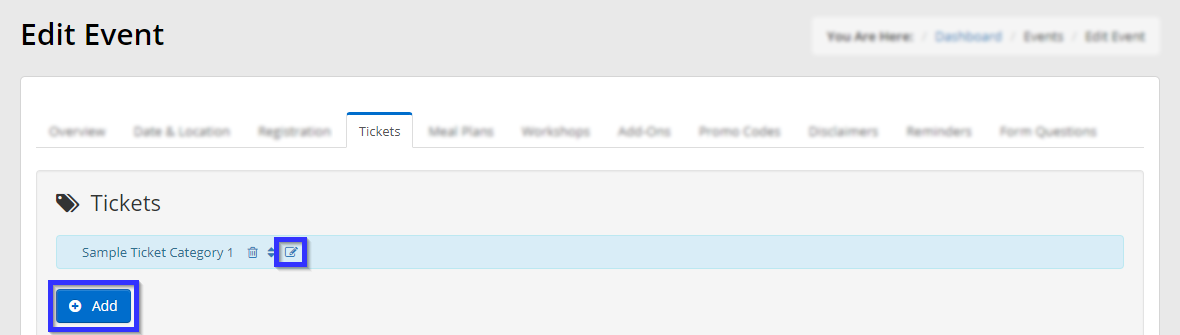
12. Click the ‘Tickets‘ tab.

13. Click the pencil icon next to the name of an existing ticket type or click ‘Add‘.
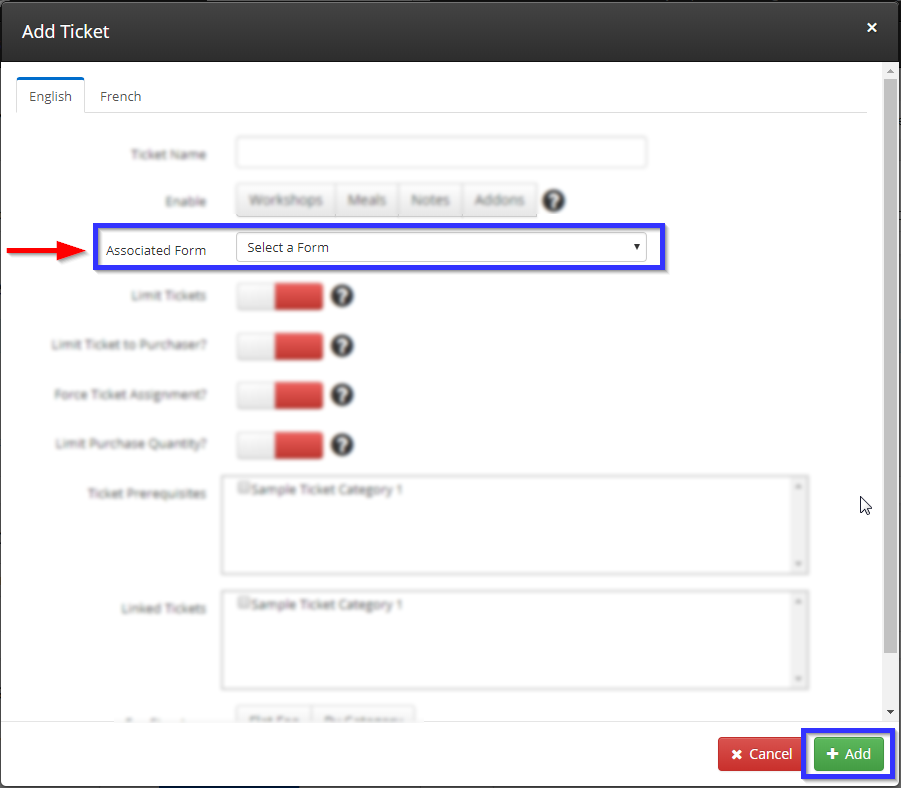
14. In the ‘Add Ticket’ window that appears, click the drop-down menu next to ‘Associated Form’, select the name of the form that you created in step 5, and then click ‘Add‘.
15. Scroll to the bottom of the ‘Edit Event’ page and click the green ‘Publish‘ button.
Congratulations, you have created a form and attached it to a ticket type!