This article will describe how to add non-members and leads into your contact list so that you can email them through Member365.
There are two methods available: manually adding contacts one at a time, or importing a list from an Excel spreadsheet.
Manually Adding Contacts
1. Log into your Member365 Administrator Dashboard.
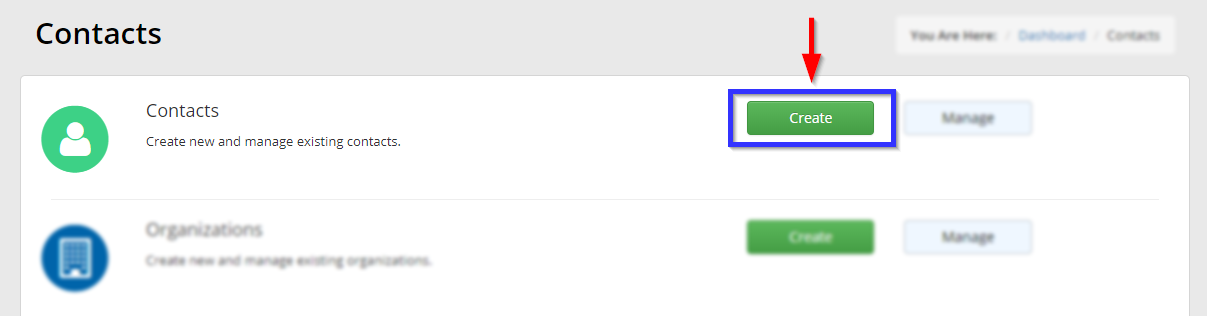
2. On the top bar, click ‘Contacts‘.

3. Next to ‘Contacts’, click ‘Create‘.
4. In the text fields, enter at minimum the contact’s first name, last name and email address. Adding the contact’s organization is recommended but not required.
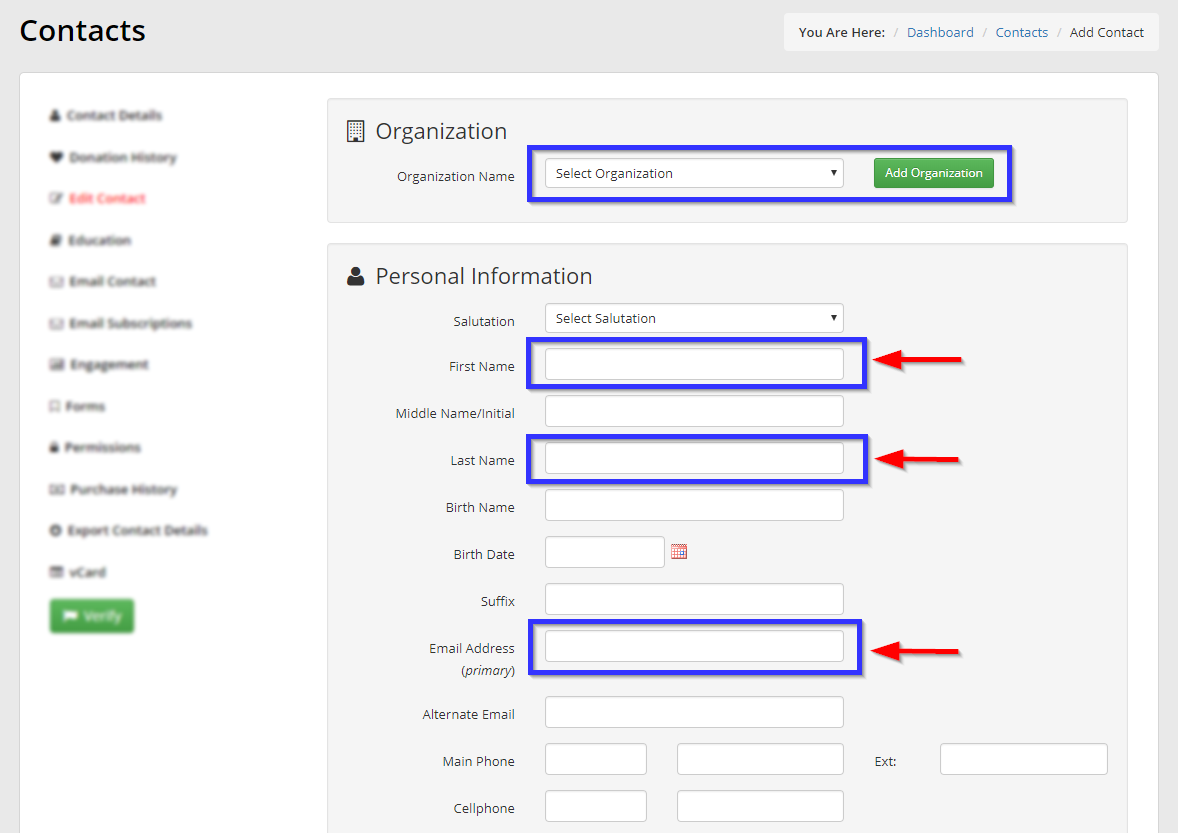
5. When you are satisfied, scroll to the bottom and click the ‘Save‘ button in the bottom-right.
Importing a List of Contacts
1. On the top bar, click ‘Options‘, and then click ‘Configuration‘ from the drop-down menu that appears.

2. In the section labelled ‘Non-Member Contacts’, click ‘Setup‘.

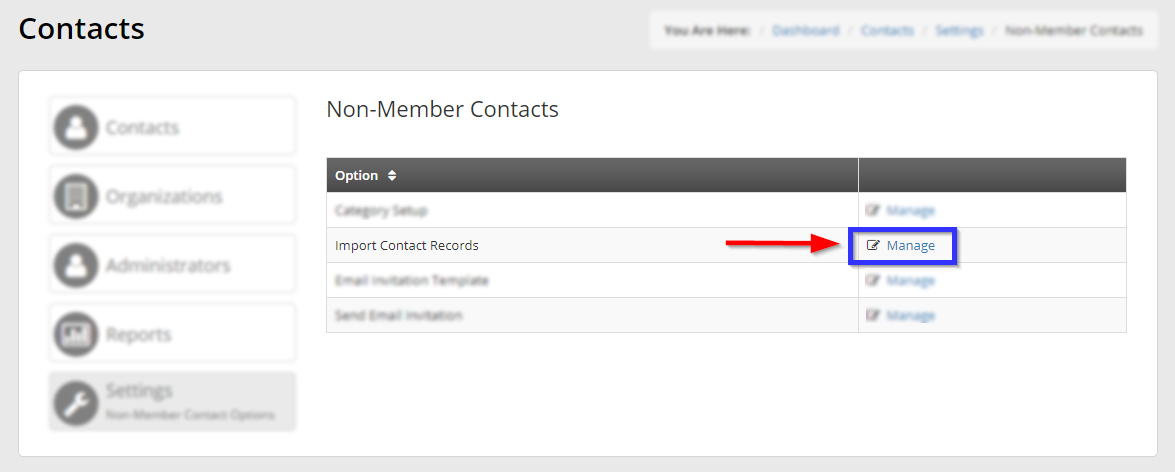
3. Next to ‘Import Contact Records‘, click ‘Manage‘.
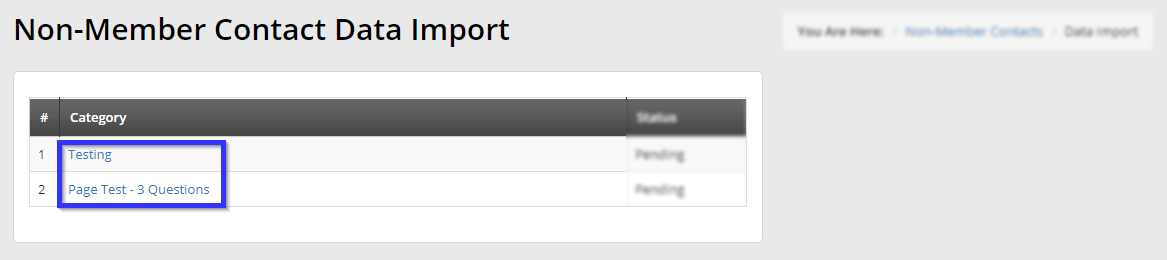
4. Click the name of the category to which you are adding these non-member contacts.
5. Decide whether you are importing basic contact information, and if so, click ‘Contact‘; if you are importing extended field information, click ‘Extended Fields‘.

6. Click ‘Upload File‘ and navigate to the Excel file on your computer containing the data to be imported.

Congratulations, you have added non-members to your contact list!