This article will guide you through setting permissions for groups of members in a Workspace, allowing them to access or upload to the file library, edit the Workspace description or post discussions.
Accessing Workspace Settings
1. From the Member365 Administrator Dashboard, look at your URL.
![]()
2. Delete ‘crm’ and anything that follows from the URL. Replace what you just deleted with ‘sharingnetwork’ to access the Member Portal side of your site.
![]()
3. Click on ‘Administration‘ in the top-right corner.
Important Note: You need to have administrator access for the member portal for the option to appear in the top menu.

4. Find the name of the workspace to which you are looking to grant access, and click the pencil icon next to its name.

Granting Group Access
5. To grant access to a group, scroll down until you find ‘Access Assignments’ and click the ‘Add Assignment‘ button. 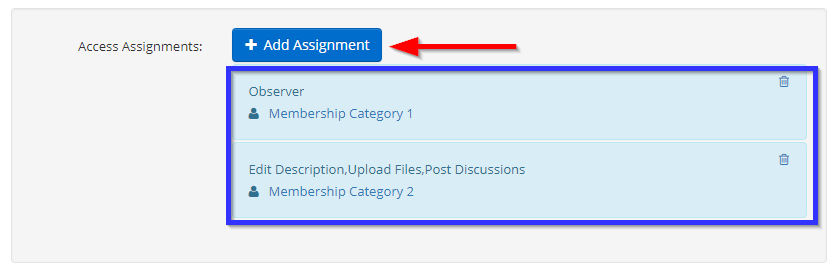
6. In the dialogue box that opens, click one of the tabs to examine your options for selecting groups.
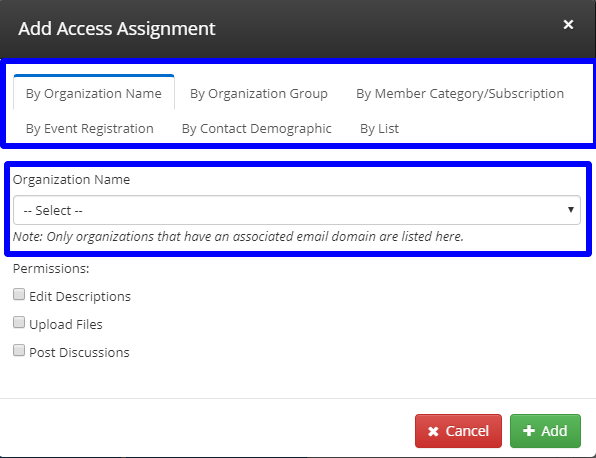
For instance, if you wish to allow members of a specific organization to access the workspace, click ‘By Organization Name‘ and select that organization from the drop-down list; if you wish to grant access to all registrants at a given event, click the ‘By Event Registration‘ tab, and select that event.
IMPORTANT NOTE: If a contact does not have member portal access they will not be able to access the workspace.
Access Assignment Group options:
- By Organization Name: Grant access to a workspace to all the organization members based on the name.
- By Organization Group: Grant access to the workspace to all the organization’s primary members of the organization group your select.
- By Membership Category / Subscription: Grant access to the workspace to all the members in a specific membership category.
- By Event Registration: Grant access to a workspace to all the registrants of an event.
- By Contact Demographics: Grant access to a workspace based on a contact demographic selected on the contact record.
- By List: Grant access to a workspace based on a list created in the list builder module.
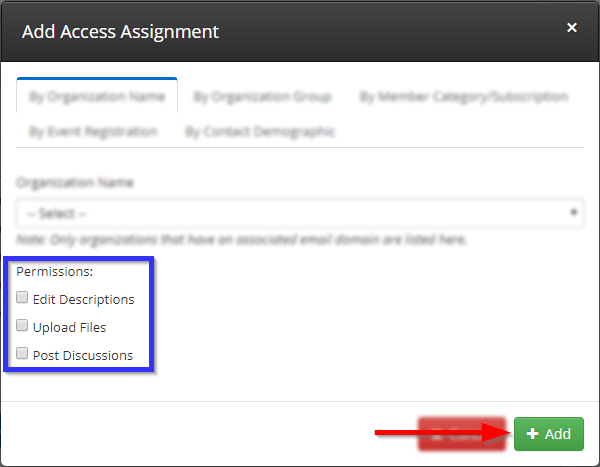
7. Fill in the checkboxes relating to the permissions that you would like to grant this group, click ‘Add‘. clicking ‘Add‘ when no permissions have been enabled — as in the image above — will add the group listed in the drop-down box in the role of ‘Observer’, able to view but not interact with or alter the group and its file library.
7. Upon successfully providing permissions to a group, you will find a box under the ‘Add Assignment’ button that looks like this:
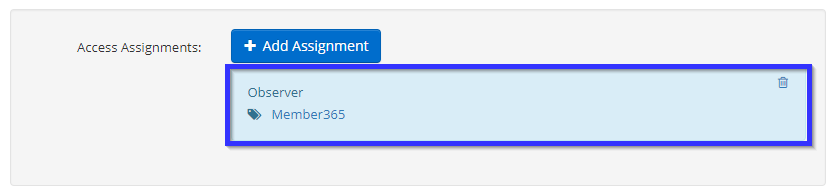
In this case, all users belonging to Member365 may access but not alter the workspace. If you have provided additional permissions, they will appear here in place of ‘Observer’.
8. Repeat steps 5 and 6 for all groups to whom you would like to grant Workspace access.
9. Scroll to the bottom and click ‘Save & Return‘.
Congratulations, you have set Workspace permissions for a group or groups of users!