This article will guide you through editing file categories in a Member Portal workspace.
Accessing Workspace Settings
1. Log in to the Member365 Administrator Dashboard.
2. Delete everything after “.com/” in the URL in order to access the Member Portal.
3. Click on ‘Administration‘ in the top-right corner.

4. Find the name of the workspace for which you are looking to add new file categories; click the pencil icon next to its name.

Creating File Categories
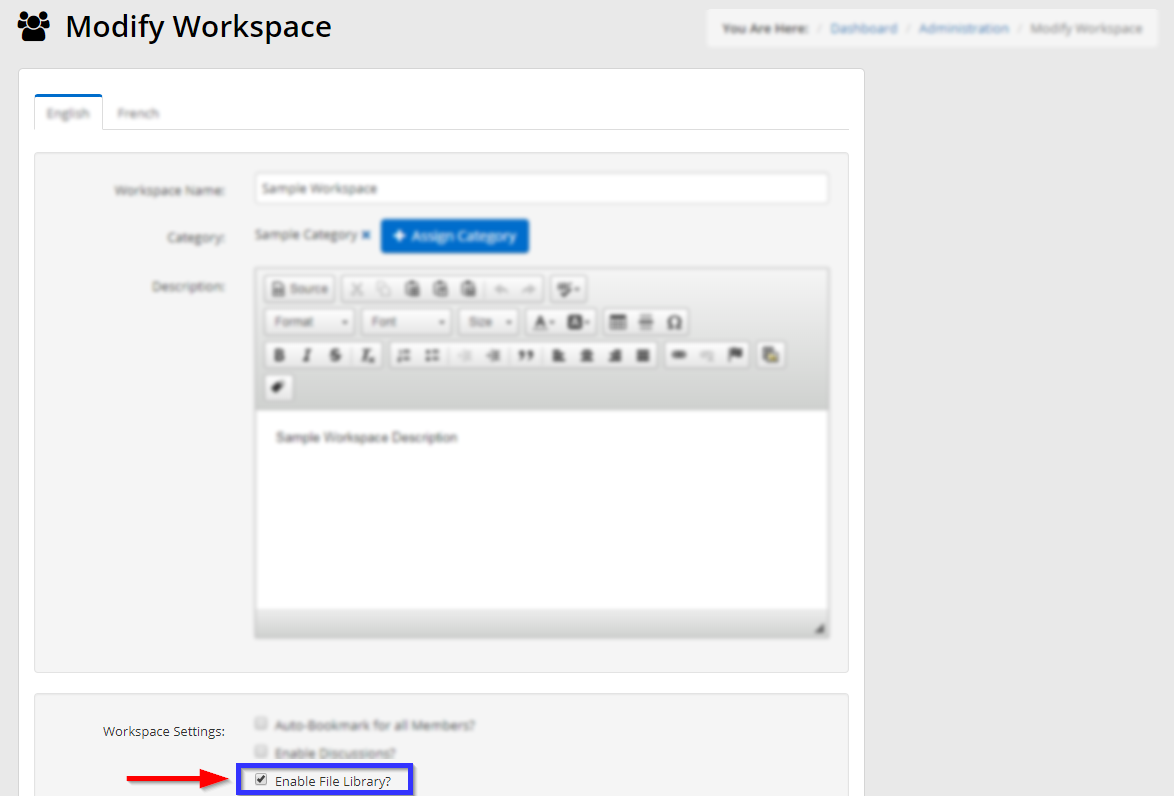
5. Scroll down to ‘Workspace Settings’ and make sure that the checkbox next to ‘Enable File Library?‘ has been filled in.
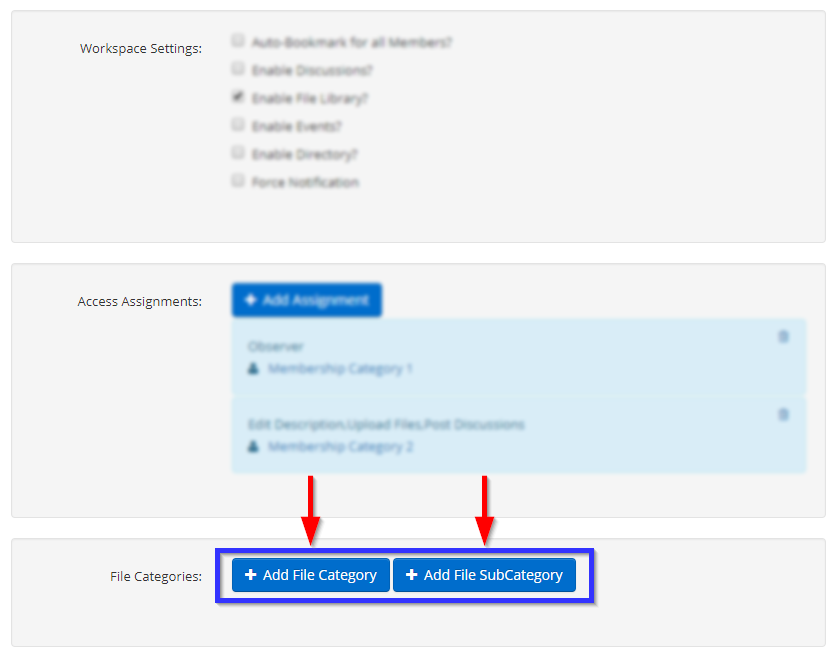
6. Scroll further down to ‘File Categories’ and click ‘Add File Category‘.
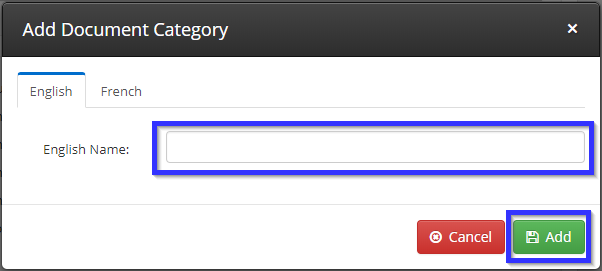
7. In the ‘Add Document Category’ window that appears, enter a name for your file category in the text box and then click ‘Add‘. Repeat steps 6 and 7 for as many file categories as you would like to create.
8. Click ‘Add File SubCategory‘ to create file subcategories. This function works essentially the same as adding file categories, but requires you to select an existing file category that will become a subcategory’s parent category.
9. Once you are satisfied, scroll to the very bottom of the page and click ‘Save & Return‘.
Congratulations, you have created one or multiple new file categories!