Currently, there is no way to toggle off the Member Portal in Member365.
You can, however, edit your settings to ensure that some – or all – members are not sent login details. A member without login details cannot access the Member Portal: it is effectively disabled for them.
Disable Membership Category Login Details
Every Membership Category has its series of email templates that send automatically throughout the application, renewal, and approval process. A quick summary of the email templates available can be found here.
The email template that grants portal access is called the ‘Welcome Email‘. Steps to access your Membership Category’s Welcome Email will follow.
Finding the Welcome Email
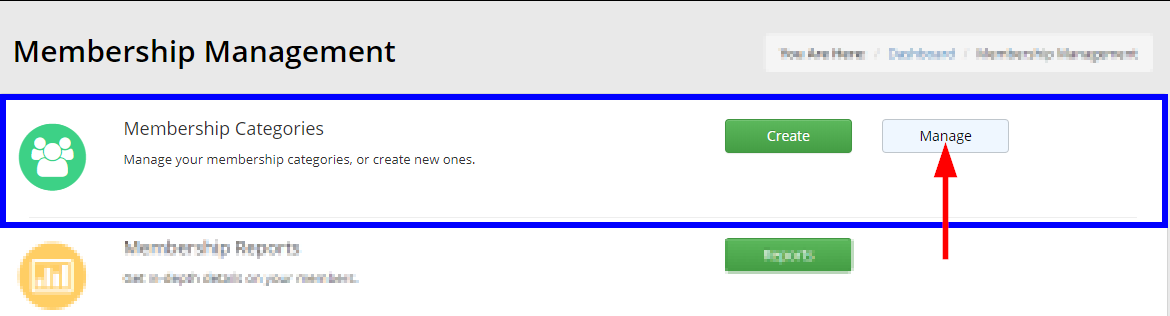
1. From the Member365 Administrator Dashboard, click ‘Membership’ at the top of the page.
![]()
2. Click ‘Manage’ next to ‘Membership Categories’ on the page that follows.
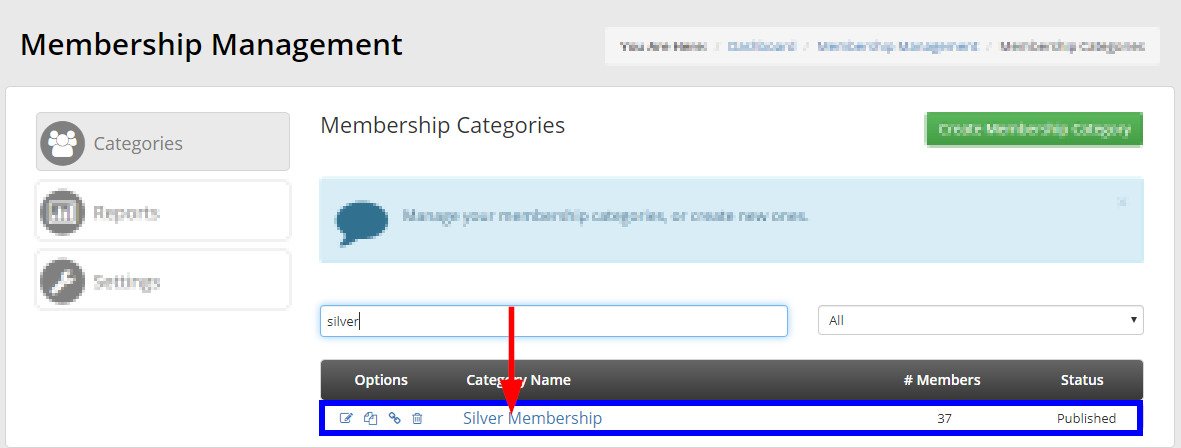
3. Locate the Membership Category whose Welcome Email you wish to edit, then click its name.
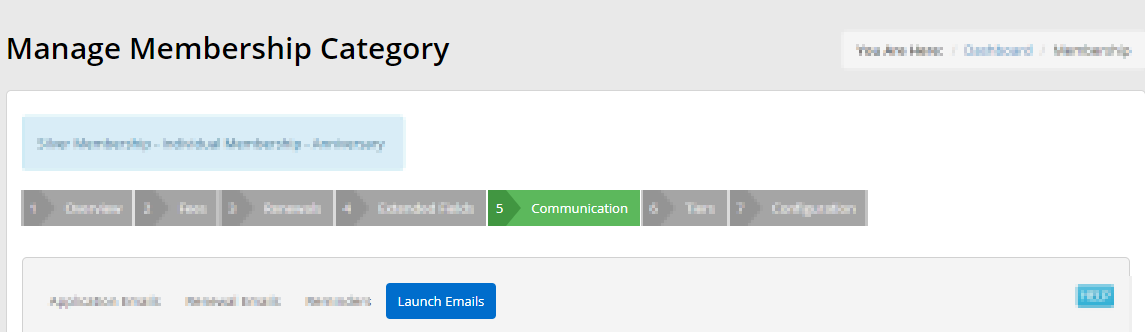
4. From the list of tabs, click ‘Communication’, then click the ‘Launch Emails’ sub-tab.
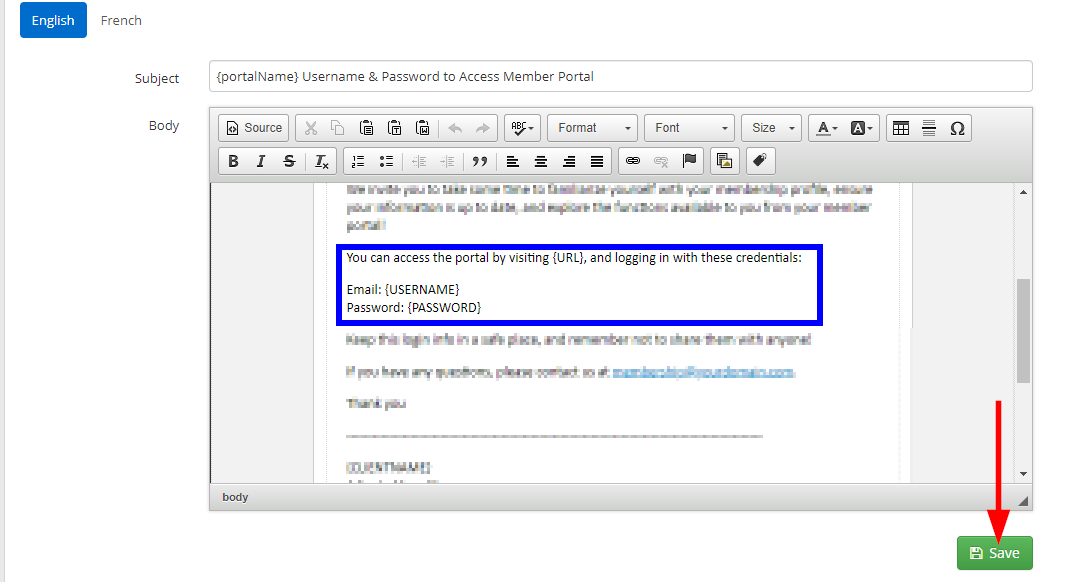
Disabling the Welcome Email
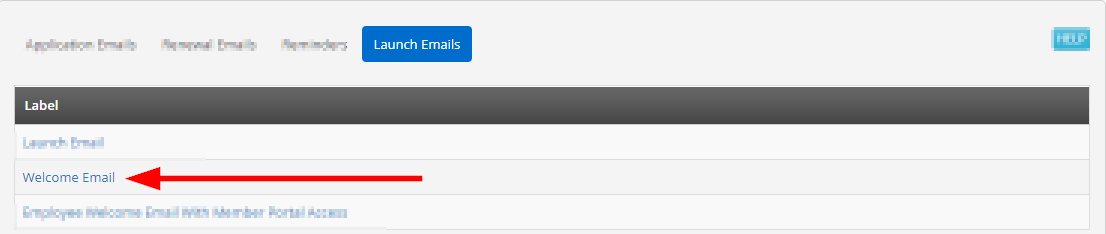
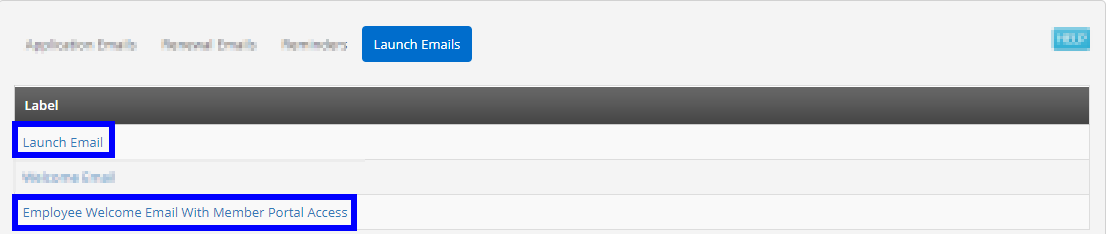
5. Click ‘Welcome Email’ from the list of templates.
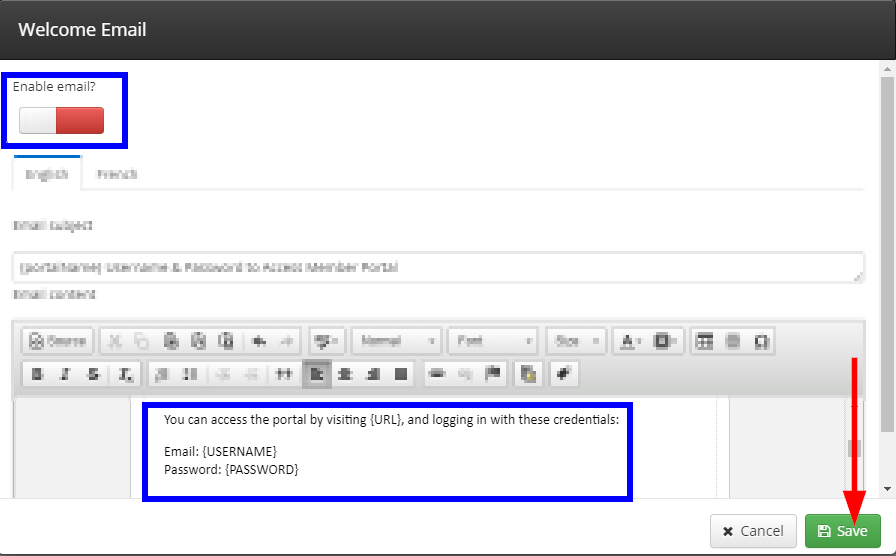
6. Either toggle OFF the ‘Enable Email’ option to prevent this email from being sent – note that the default email will be sent in its place. See further below for more information about the default email. In either email, edit its contents and remove all references to the Member Portal, Usernames, and Passwords. Click ‘Save’.
7. Repeat Step 6 for all templates under this Launch Emails sub-tab to be thorough. For an explanation of what each template does, continue reading here.
Disable System Default Login Details
Once you disable the ‘Welcome Email’ within a Membership Category, the System Default will just take its place. As such, you also need to locate and edit the System Default Welcome Email to ensure that no login details are sent to your members!
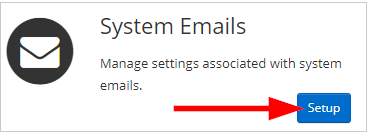
8. Click ‘Options’ at the top of the screen, then click ‘Configuration’ from the drop-down menu that appears.

9. Scroll through the list of configuration options, and click ‘Setup’ for ‘System Emails’.
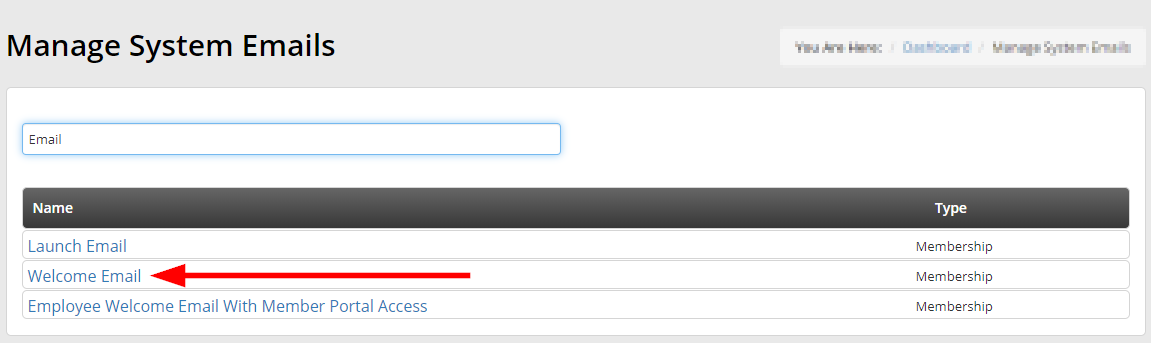
10. Locate and click on ‘Welcome Email’ from the list of templates.
11. Delete all references to the Member Portal, Usernames, and Passwords, then click ‘Save’.
12. Repeat Step 11 for ‘Employee Welcome Email With Member Portal Access’ and ‘Launch Email’ to be thorough.
Congratulations, you now know how to prevent your members from receiving login details to the Member Portal!