All members of a Group Membership, except for its Primary Contact, are called ‘Employee Accounts’. Follow the steps in this article to learn how you can populate a Group Membership as an Administrator!
Group Memberships can be populated immediately in Member365. This article will show you how, as an Administrator, you can add contacts to a Group Membership without requiring any sign-up or work for these new members.
Method 1: From the Administrator Dashboard
You can add Employee Accounts to a Group Membership directly from the Administrator Dashboard in Member365.
Accessing an Organization Profile
1. Log in to your Member365 Administrator Dashboard.
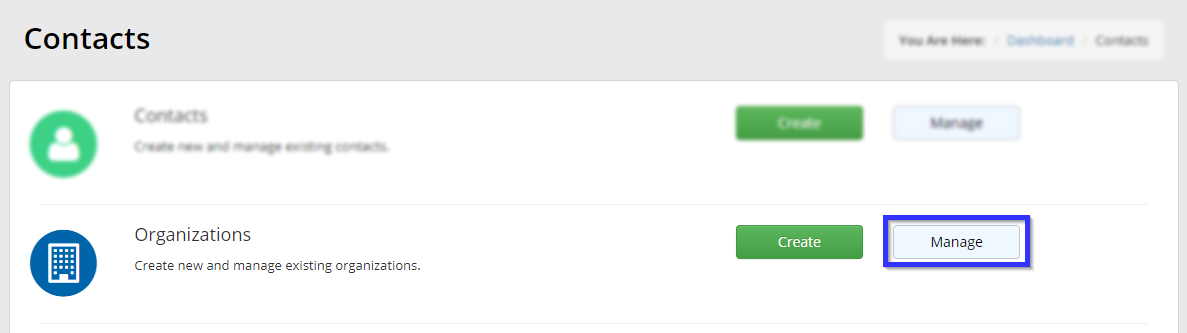
2. On the top bar, click ‘Contacts‘.

3. Next to ‘Organizations’, click ‘Manage‘.
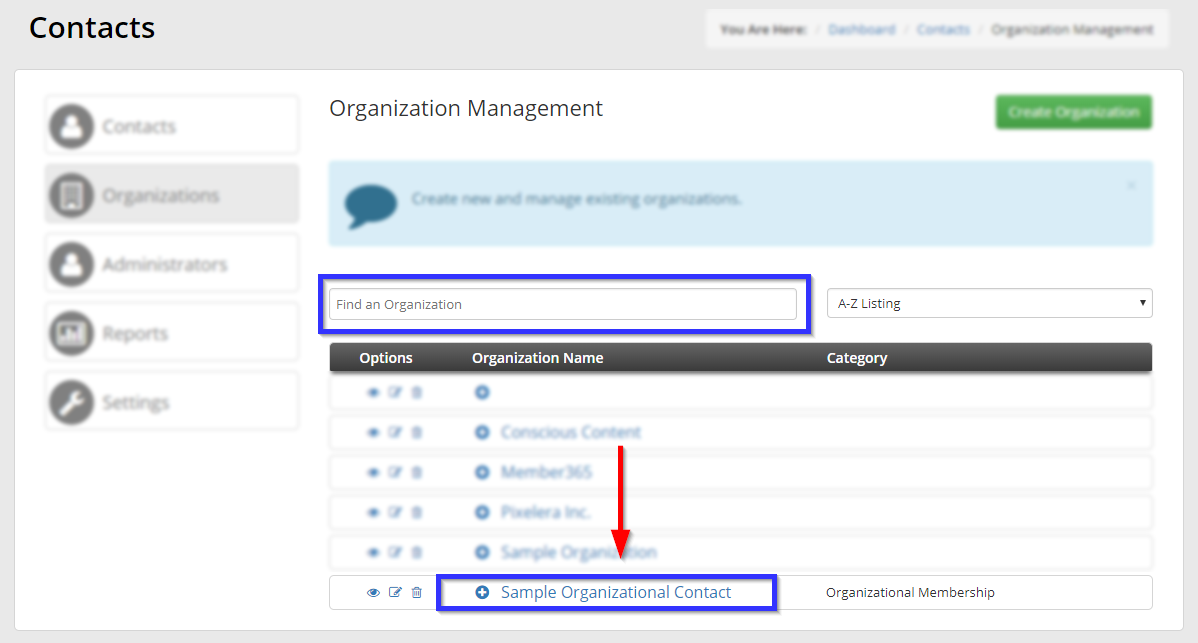
4. Locate the Organization whose Group Membership you are adding members to, then click its name. Use the search bar to filter results if necessary.
Adding Employee Accounts
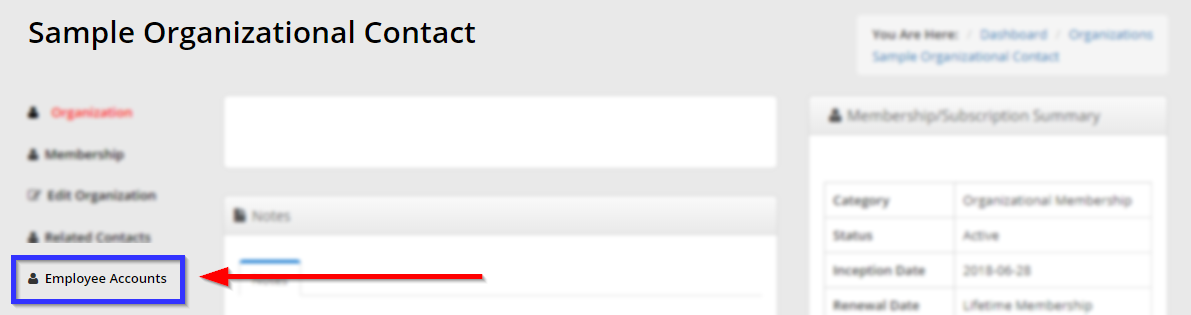
5. On the left-hand side, click ‘Employee Accounts‘.
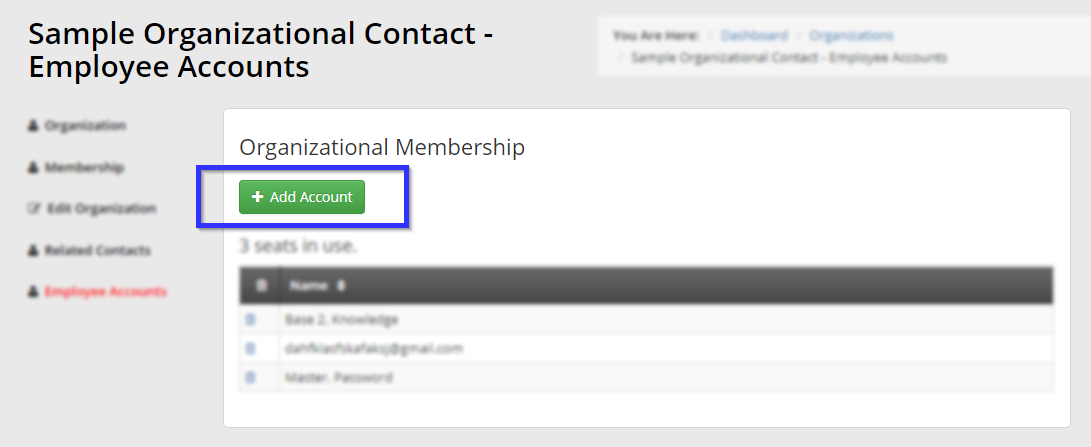
6. Click ‘Add Account‘.
7. The ‘Create Employee Account’ page will appear.
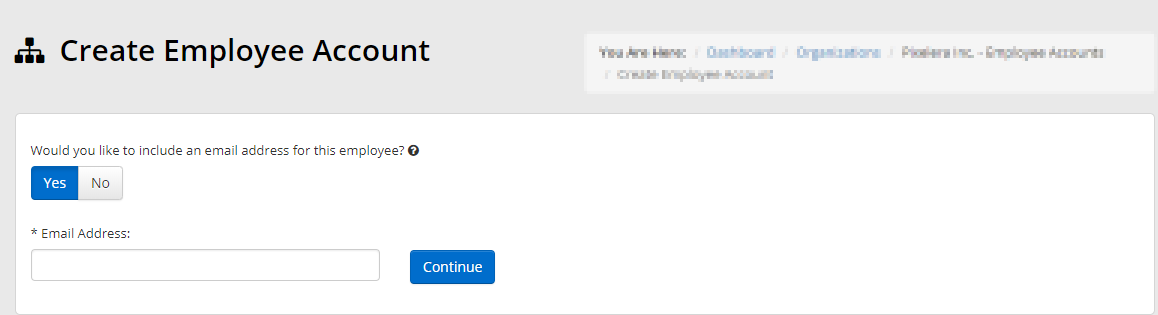
8. You are creating a new Employee Account: they will be added to the membership automatically. Including an email address is therefore optional.
9. Click ‘Continue’ to proceed. You will be brought to a page to configure this new member’s contact information.
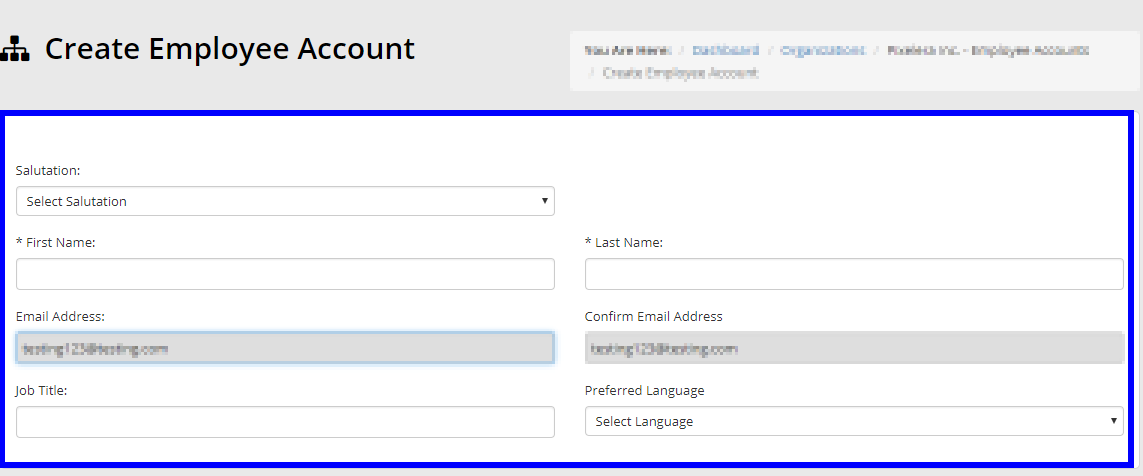
10. To prevent new group members from needing to sign up on their own, fill out as much of their contact information as you can.
11. Choose whether or not you want the new member linked to the organization.
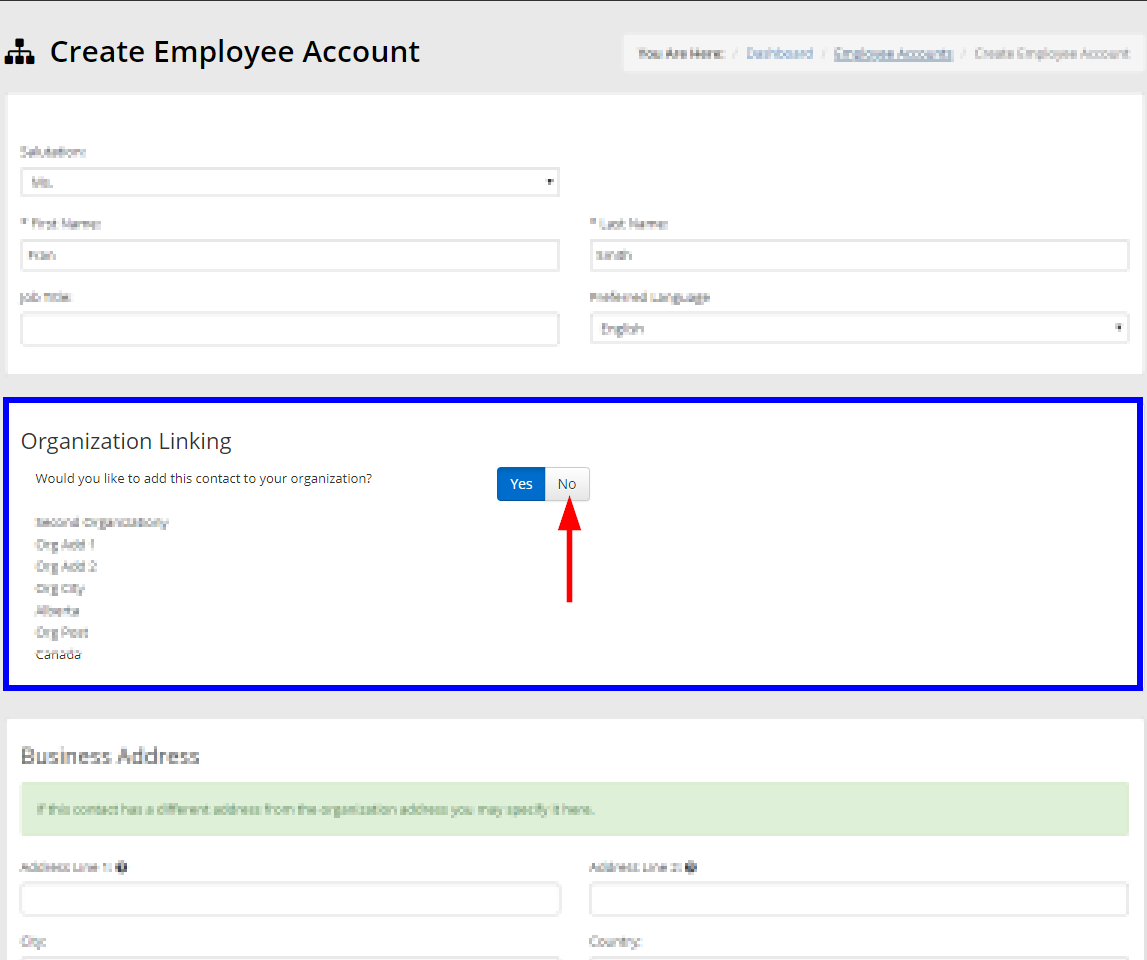
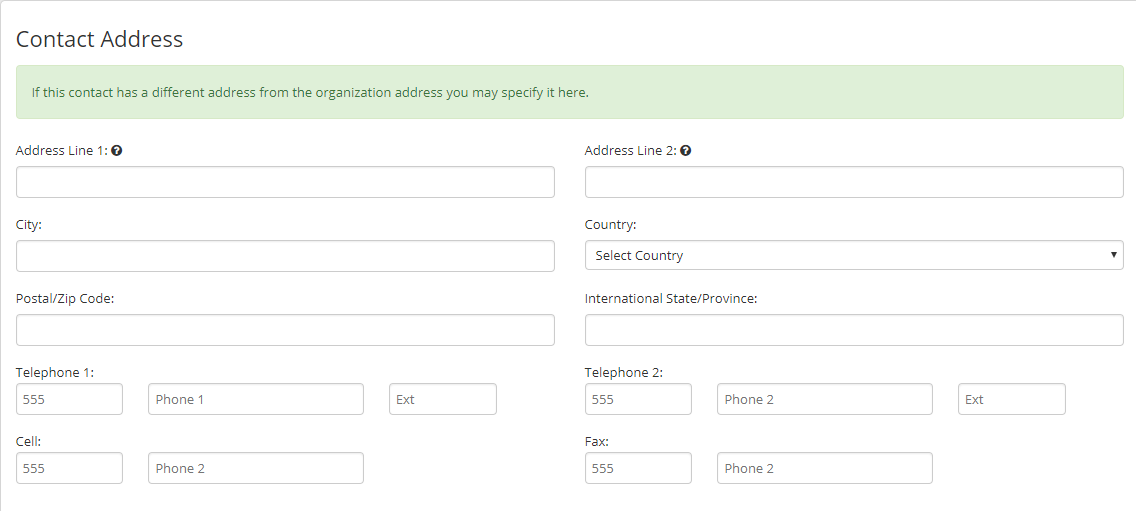
12. If you selected ‘No’ above, populate this new member’s Address details as necessary.
13. Choose whether or not the new Employee Account will have Member Portal Access.

14. When satisfied, click the ‘+ Add Employee’ button at the bottom of the page. The new member will be added as an Employee Account to the Group Membership.

Since you have filled out their contact information already, the new member has been added immediately. They will not need to complete any additional configuration or sign-up on their end.
Method 2: Through the Impersonate Tool
The Primary Contact of an Organization’s Group Membership can add Employee Accounts from their Member Portal.
As an administrator, you can add members to the group for them using the Impersonate tool. Below are the steps to impersonate a Primary Contact, and to add Employee Accounts to their Group Membership as they would.
Impersonating the Primary Contact
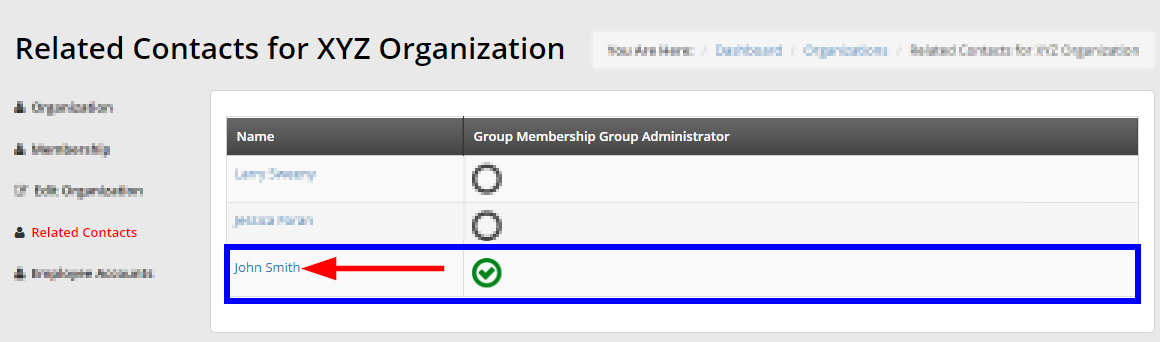
1. Consult this Knowledge Base article to determine the Primary Contact for an Organization’s Group Membership.
2. From the Related Contacts page, click the name of the Organization’s Primary Contact.
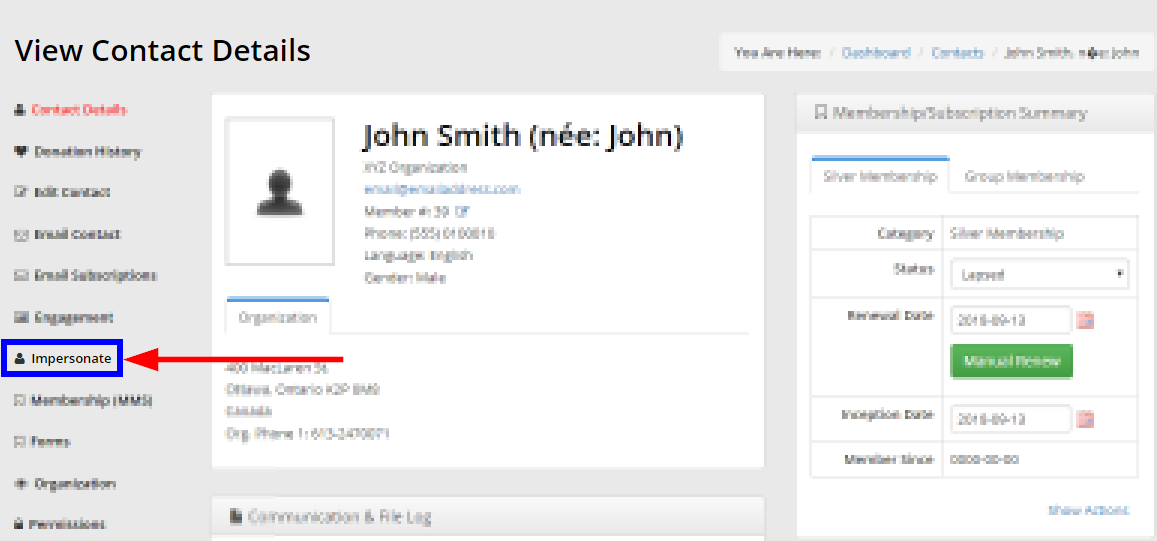
3. From the Contact Record, click ‘Impersonate’ on the left side of the page.
Adding Employee Accounts
4. Now that you are Impersonating the member, consult this Knowledge Base article to learn how to add Employee Accounts as a Primary Contact.
5. When you are done Impersonating, click the ‘Back to CRM’ link at the very top of the page to return to your Administrator Dashboard.
![]()
Congratulations, you now know how to add Employee Accounts to a Group Membership!