Member365 supports a range of configuration options for sending out automated event reminders to registered attendees. Here’s how to access and manage them.
Finding Event Reminder Settings
1. From your administrator dashboard, click ‘Events’ in the top toolbar.
![]()
2. In the ‘Event Management’ row, click ‘Manage‘

3. Using the search bar or list, select the event you would like to manage reminders for.
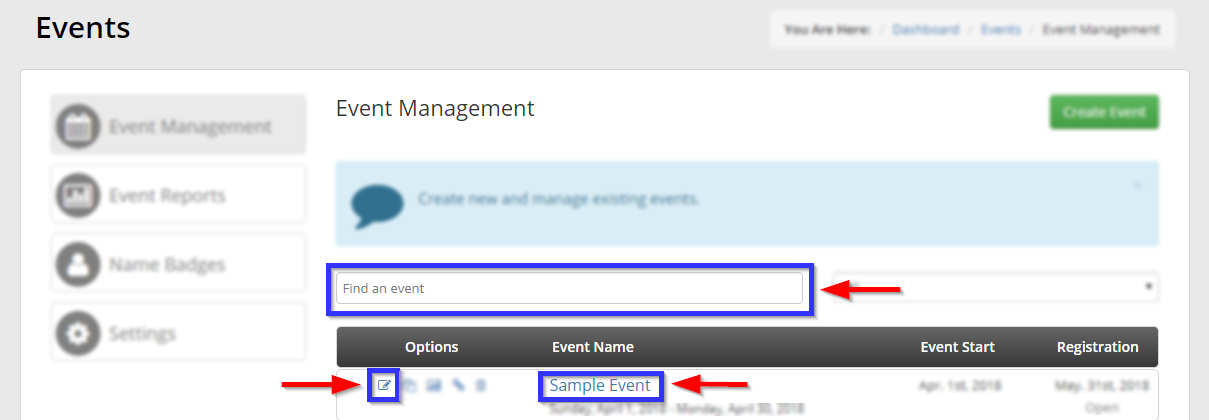
4. From the available tabs, click ‘Reminders‘

Managing Reminders
5. To add a reminder, click the blue ‘+Add’ button.
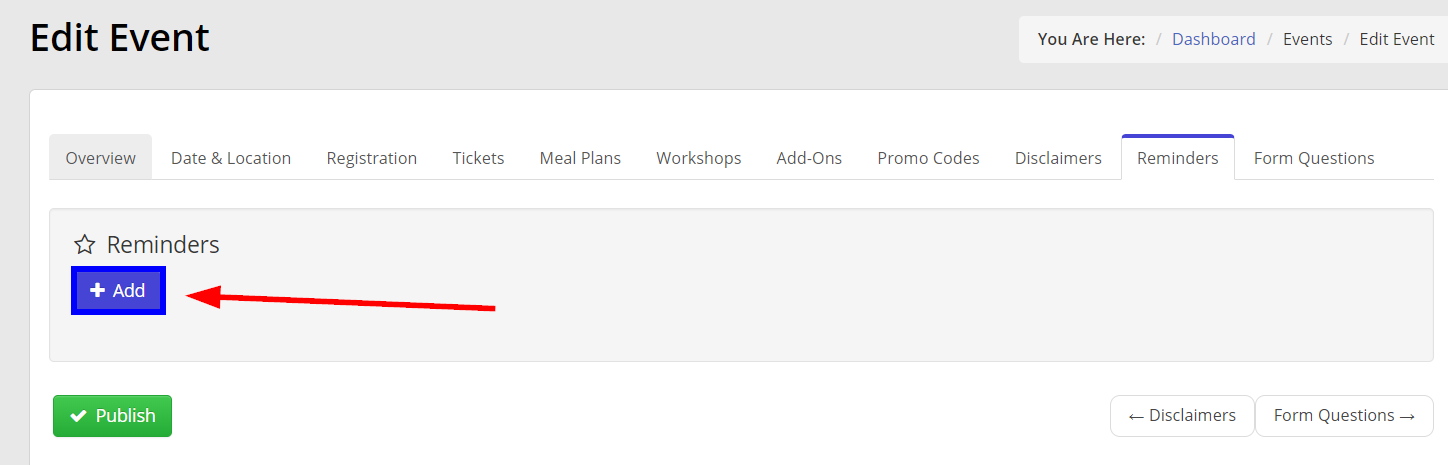
6. This will open a dialogue allowing you to configure your reminder. You can find an explanation of the available settings below:
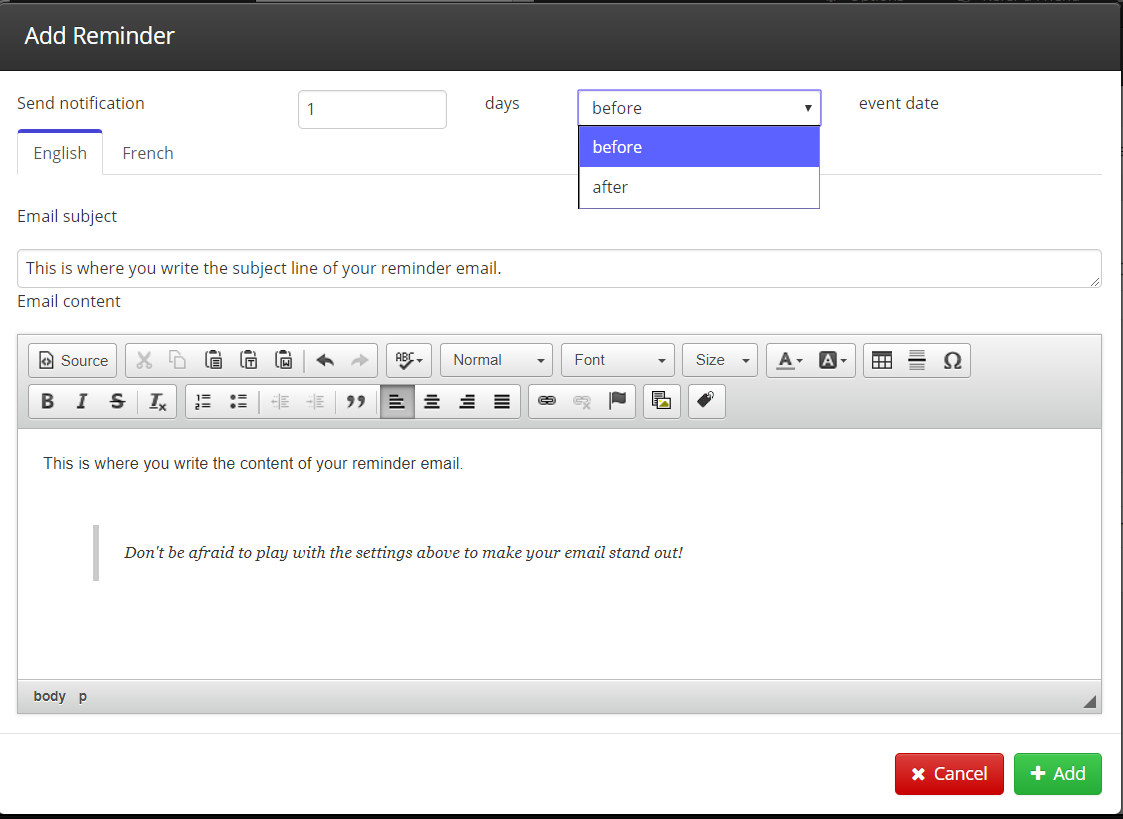
Send Notification Settings
These fields will allow you to configure when your reminder email is sent out. Sending an email before an event is a standard tactic to drive event engagement, but Member365 also allows you to set reminders after an event has begun to continuously drive engagement for multi-day events.
Email Subject
This field allows you to input the subject line of your email, and though simple, is the most important field for writing a successful reminder email. You can learn some tips and tricks on how to write an effective one by checking out our article ‘How to Write an Effective Email Subject Line’
Email Content
This field is where you write the content for your email. In it’s toolbar, you’ll find a range of tools you can use to create an email with a unique aesthetic to match your brand and make your message memorable.
Getting The Most Out of Event Reminders
Event reminders are a tremendously powerful tool to drive event engagement. Taking time and energy to write strategic reminders before, during, and even after events can go a long way to driving the success of your events!