This article will guide you through creating and configuring event add-ons — that is, extra options you wish to provide for event guests, but ones you do not wish to include in a basic ticket.
Accessing Event Configuration
1. Log in to your Member365 Administrator Dashboard.
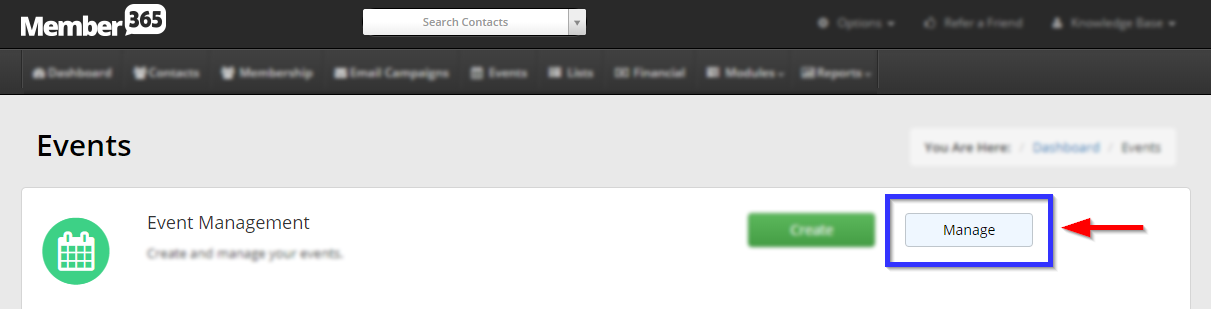
2. On the top bar, click ‘Events‘.

3. Next to ‘Event Management’, click ‘Manage‘.
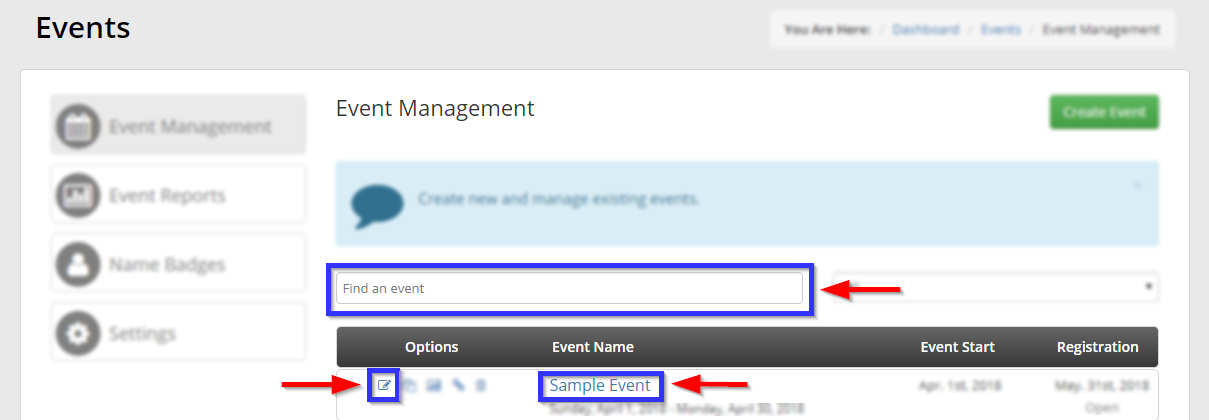
4. Find the event by typing its name into the search bar or finding it in the list, and then select its name or the pencil icon next to it.
Adding an Add-On
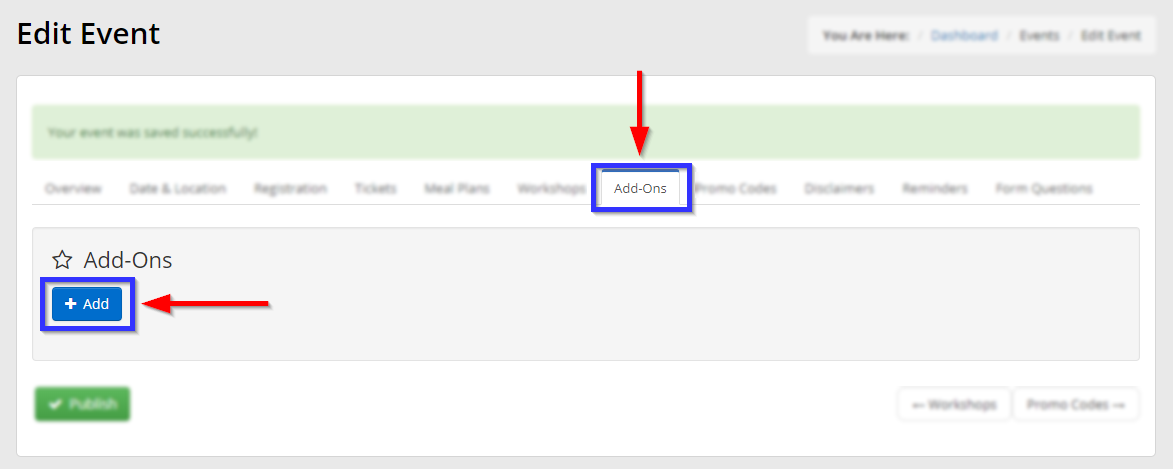
5. Click the ‘Add-Ons‘ tab, then click ‘Add‘.
6. In the new window, enter information about your add-on in the appropriate field:
Name: Provide a name for the add-on you are creating.
Description: Describe the add-on you are offering.
Fee: Apply a fee for the item, if required.
Groups: Apply to a specific group using the drop down menu.
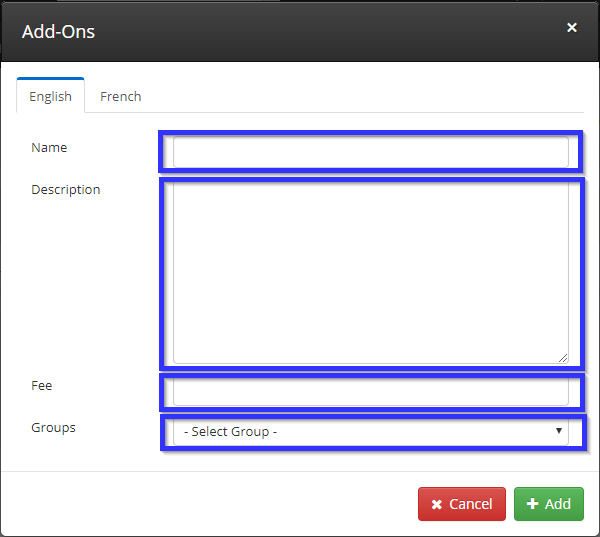
7. When you are done, click ‘Add‘.
8. In event configuration, click ‘Publish‘.
Congratulations, you have created a new add-on for this event!