This article will guide you through the first steps of creating a new directory. For a more in-depth guide on all of your options, we’ve created a guide that explores all of your configuration choices; you can find it by clicking here.
Creating a New Directory
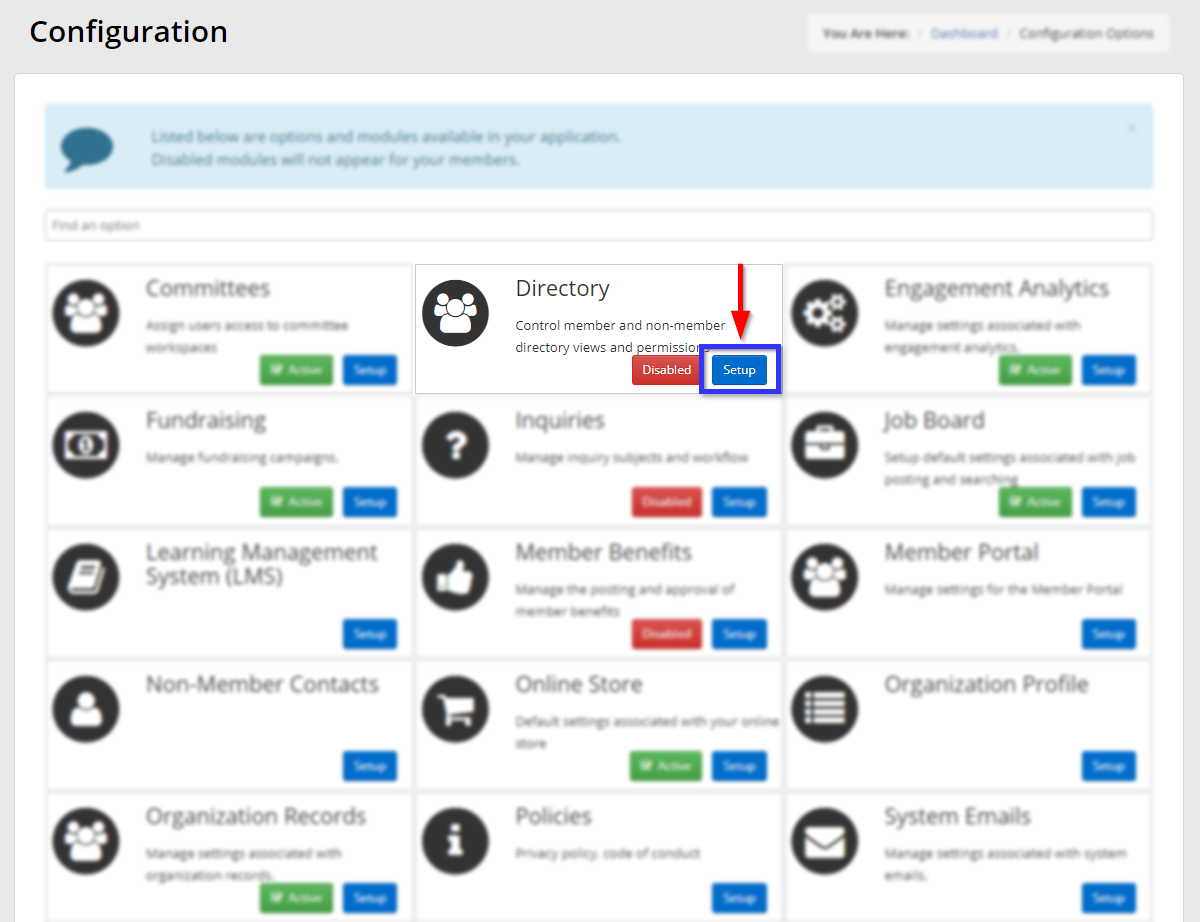
1. On the top bar, click ‘Options‘, and then click ‘Configuration‘ from the drop-down menu that appears.

2. In the section marked ‘Directory’, click ‘Setup‘
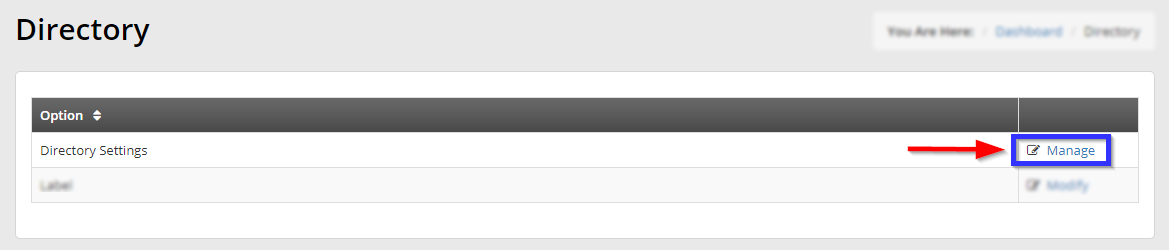
3. Next to ‘Directory Settings‘, click ‘Manage‘.
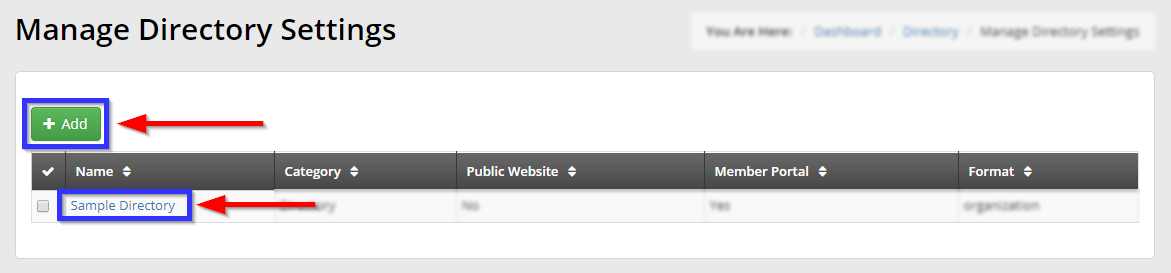
4. Click the name of the directory you would like to configure, or click ‘Add‘ to create a new one.
The next part of the article will describe the functions of each tab, going from ‘Setup‘ on the left through to ‘Rules‘ and ‘Field Permissions‘.
Setup
The Setup tab configures your directory’s basic information. You can configure details like your directory’s name, and set its basic options.
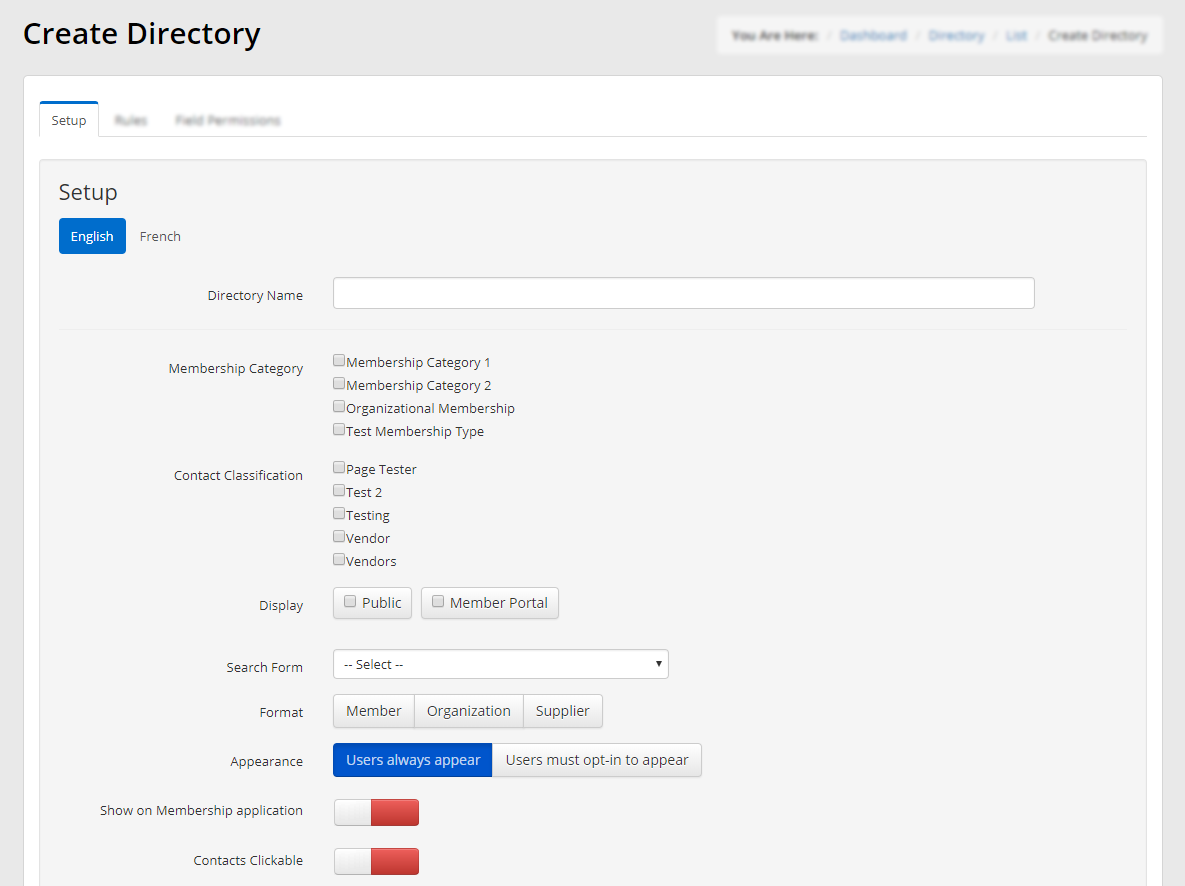
- Directory Name
- Set the directory’s title.
- Membership Category
- Check the boxes that correspond to the membership categories you would like to include in this directory.
- Contact Classification
- The ‘Contact Classification’ options that appear here are your Contact Demographics. If you have not set any contact graphics up yet, you can do so by following this guide.
- Display
- Select whether the directory is available in your member portal, in your public website, or in both.
- Search Form
- Select the form that is used to search this directory.
- Format
- Set the directory format:
- Member: The directory will automatically display all included members or contacts.
- Organization: The directory will automatically display the organizations represented within your membership.
- Supplier: This option is specific to several specialized instances of Member365. If you have not been instructed to use this option, ignore it.
- Appearance
- Users always appear: Members and Contacts will always appear in this directory.
- Users must opt-in to appear: Members in this directory must choose to be included in this directory.
- Show on Membership application
Have the directory form to appear on the membership and renewal application for members to update as needed.
Contacts Clickable
Allow the user to click the individual in the directory to see additional information about that person such as the directory form answers and additional contact information.
Show Directory to All Members
When ON (green), all members will see the directory. When OFF (red), only members selected can see the directory.
Show Directory to All Contact Classifications
When ON (green), all contacts with that Contact Demographic will see the directory if they have portal access. When OFF (red), only contact with that Contact Demographic selected can see the directory if they have portal access.
- Saving Your Directory
Once you are satisfied with the directory settings, scroll down and click ‘Save‘.
Congratulations, you have created a directory!