This article will guide you through creating and adding content to a Portal badge in the Member Portal.
Accessing the Member Portal
You must access the member portal while logged into your administrator account.
1. Log in to your Member365 Administrator Dashboard, and then look at your browser’s web address. Delete everything after the “.com”, and tap the ‘Enter‘ key to visit this new URL. The web address that results should look like “https://yoursitehere.member365.com/sharingnetwork/dashboard”.
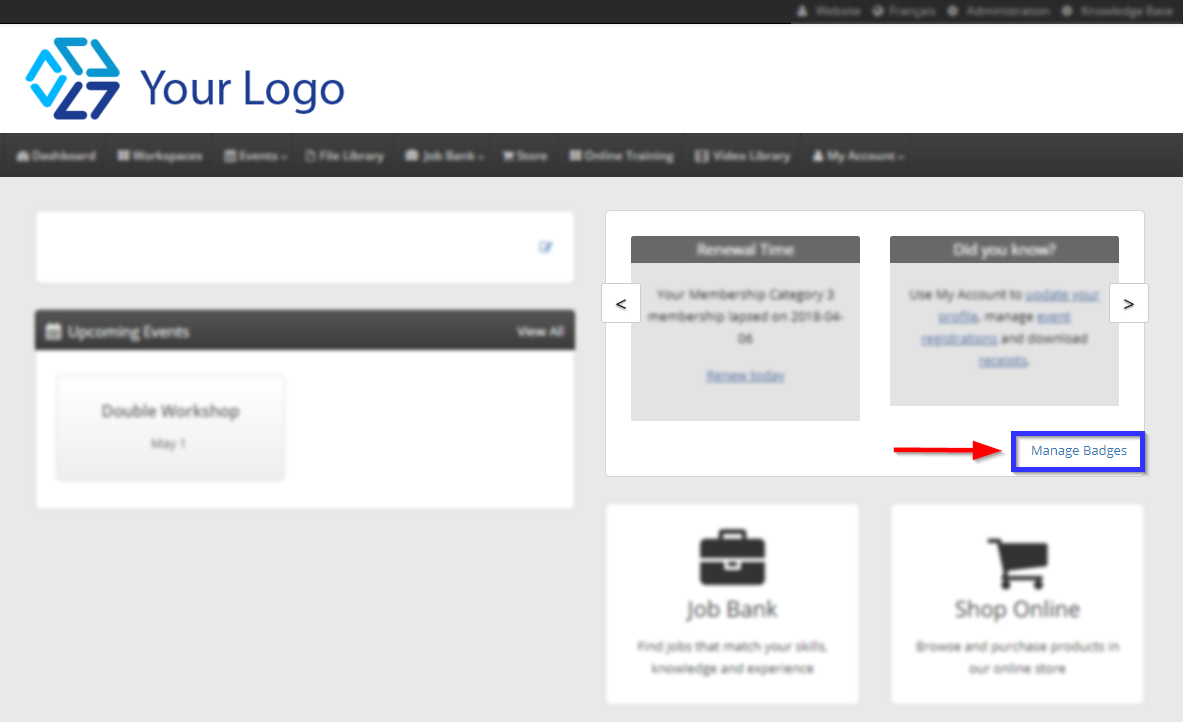
2. Once you have logged in to the Member Portal, look at the badges box on the right and click the ‘Manage Badges‘ link in its bottom-right corner.
Creating and Editing a New Badge
3. On the ‘Manage Dashboard Badges’ page, click ‘Create‘.
![]()
4. You will arrive at the ‘Create Dashboard Badge’ interface. Enter a name for it, add any content or links you would like, and proceed through the rest of the customization options to change the colour, size, background image, and when you would like the badge to appear or stop appearing.
![]()
Setting Badge Visibility
5. Return to the top of the page and click the ‘Access‘ tab.
![]()
6. You will arrive at a page where you can configure which membership categories, demographics or specific contacts can see this badge. Use the buttons to navigate between these categories, and click the checkboxes to enable visibility for a given group. Selecting no specific groups or contacts will allow all users to see the badge.
![]()
7. Click ‘Save‘ when you are done.
Congratulations, you have created and configured a new Member Portal badge!