This article will detail the steps required to create a Promo Code for your Event.
Registrants can use one Promo Code when they pay, deducting either a flat rate or a percentage from the entire bill depending on the configuration you’ve set!
Accessing Event Configuration
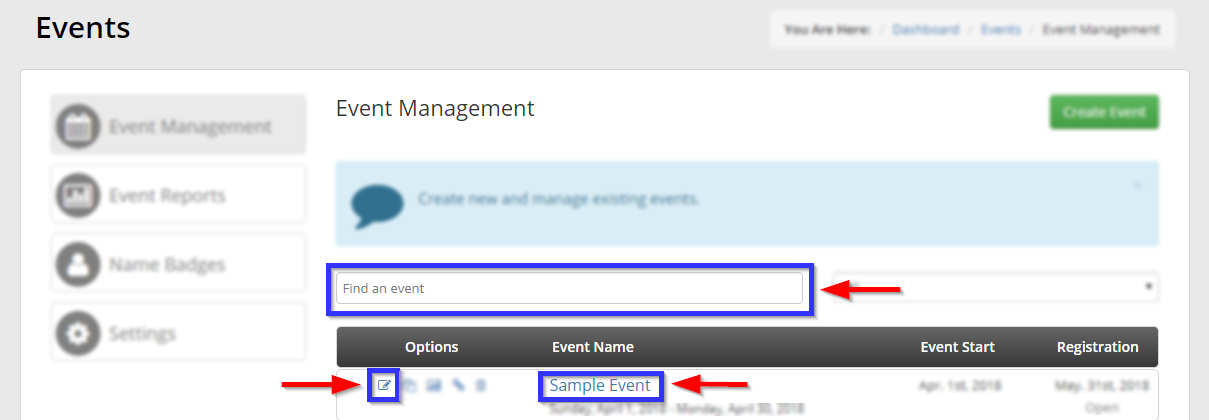
1. From the Member365 Administrator Dasbhoard, click ‘Events’ at the top of the screen.

2. On the page that follows, click ‘Manage’ next to ‘Event Management’.

3. Locate the Event for which you wish to create a Promo Code, using the search bar if necessary, then click its name.
Creating a Promo Code
4. Click the ‘Promo Codes‘ tab.

5. Under ‘Promo Codes’, click ‘Add‘.

6. Configure your Promo Code by filling out the ‘Add Promotional Code’ window that appears. Remember to click ‘+ Add’ when you are satisfied.
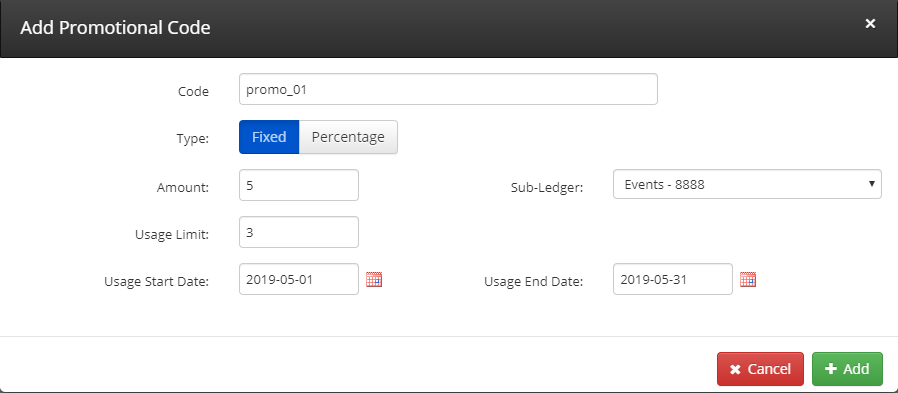
Code – This is what your registrants will enter when paying to apply the Promo Code. Enter a unique string as necessary.
Type – Will the Promo Code deduct a flat rate off of the purchase, or a percentage off of the purchase?
Amount – For the ‘Fixed’ option, specify the exact dollar value that a usage of this Promo Code will serve as a discount. For the ‘Percentage’ option, specify what percentage will be deducted from the invoice’s sum total.
Sub-Ledger – Simply for reporting purposes. Choose which ledger the Promo Code’s discount will be saved to in your accounting records.
Usage Limit – How many registrants can apply this Promo Code before it becomes unavailable? Leave this field blank if you want your Promo Code’s usage to be unlimited.
Usage Start/End Dates – Use the Calendar Icons to specify the window of time during which this Promo Code can be used.

7. Your new Promo Code will display in the list. Edit or delete this new Promo Code if necessary by clicking the corresponding icons. Click ‘+ Add’ if you wish to create another Promo Code.
When satisfied, click ‘Publish’ at the bottom of the screen to save your new Promo Codes and confirm all your changes.
Congratulations, you now know how to create and configure Promo Codes for an Event!