This article will describe how to create a new organization.
Accessing the Organization Creation Interface
1. Login to your Member365 Administrator Dashboard.
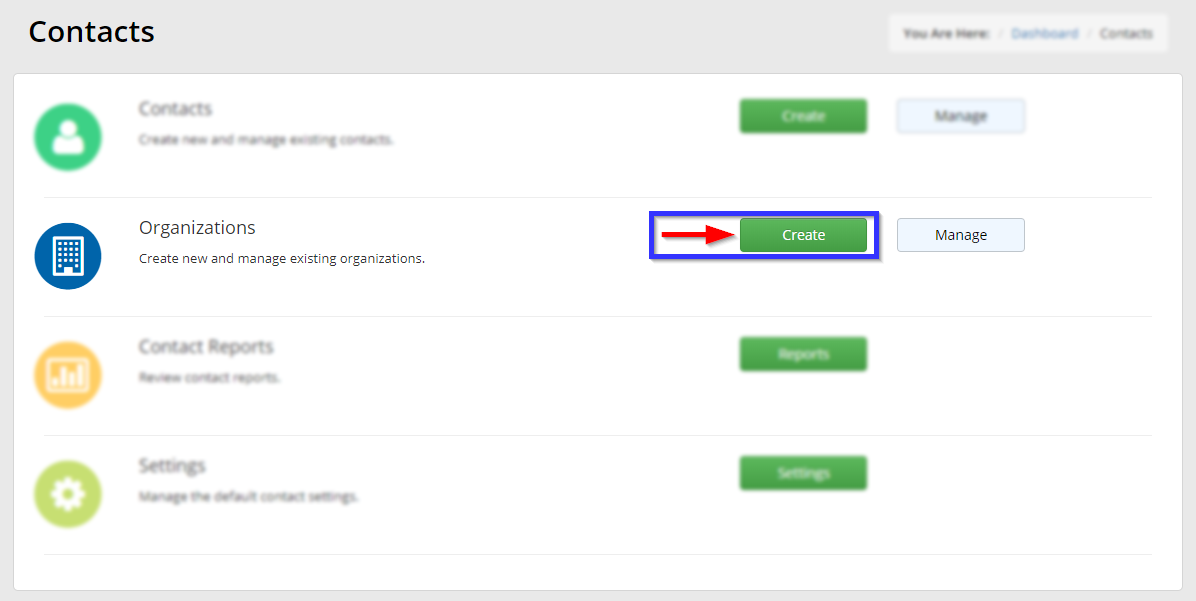
2. In the bar at the top, click ‘Contacts‘.

3. Next to ‘Organizations’, click ‘Create‘.
Adding Basic Organization Details
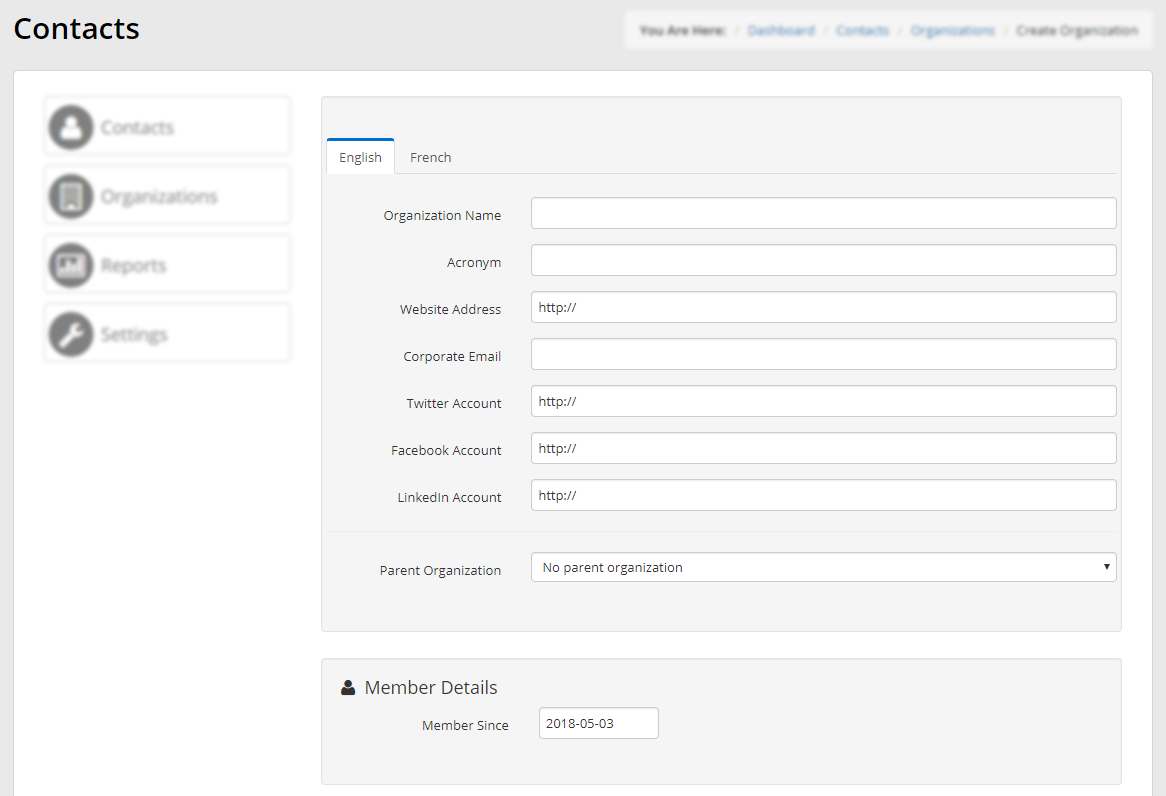
4. You will be presented with a page where you can enter basic details for the new organization. Enter these details into the fields shown below:
Adding an Address
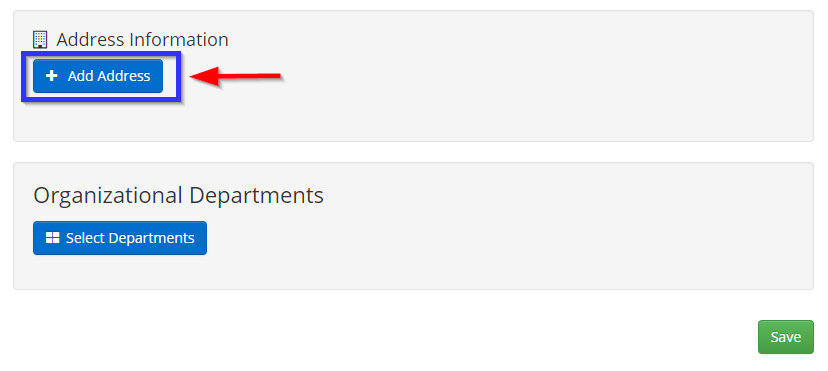
5. To add an address for this organization, scroll down and click ‘Add Address‘.
This will bring up a dialogue box where you can enter an address and more specific contact information.
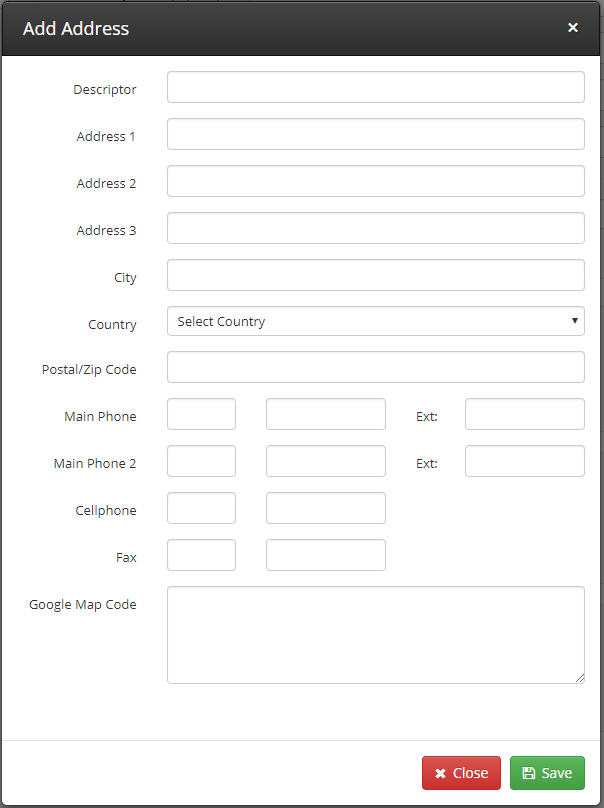
Click ‘Save‘ when you are satisfied.
Adding Departments
6. Below the ‘Add Address’ button, you will see a button labelled ‘Select Departments‘.

Click this button to bring up a dialogue box. Click ‘Add Department‘ in this window to expand it to the view seen below:
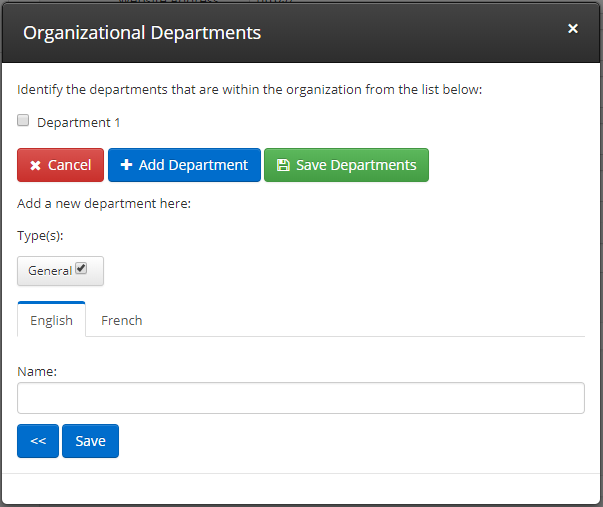
Entering a department name under ‘Name‘ will allow you to save the name of that department so that it can be added for any organization you add: for instance, if you enter ‘Finance’ and then click ‘Add Department’, a checkbox with the name ‘Finance’ beside it will appear where you currently see ‘Department 1’, allowing you to easily add a finance department to any organization you add in the future. Select the checkboxes next to as many departments as are applicable to this organization, and then click ‘Save Departments‘.
7. Once you are satisfied, scroll to the bottom and click ‘Save‘.
Congratulations, you have added a new organization!