To create a Membership Category in Member365, follow these step-by-step instructions!
Navigate To ‘Membership Categories’
1. Log into your Member365 administrator dashboard.
2. Navigate to the top toolbar, and click ‘Membership‘
![]()
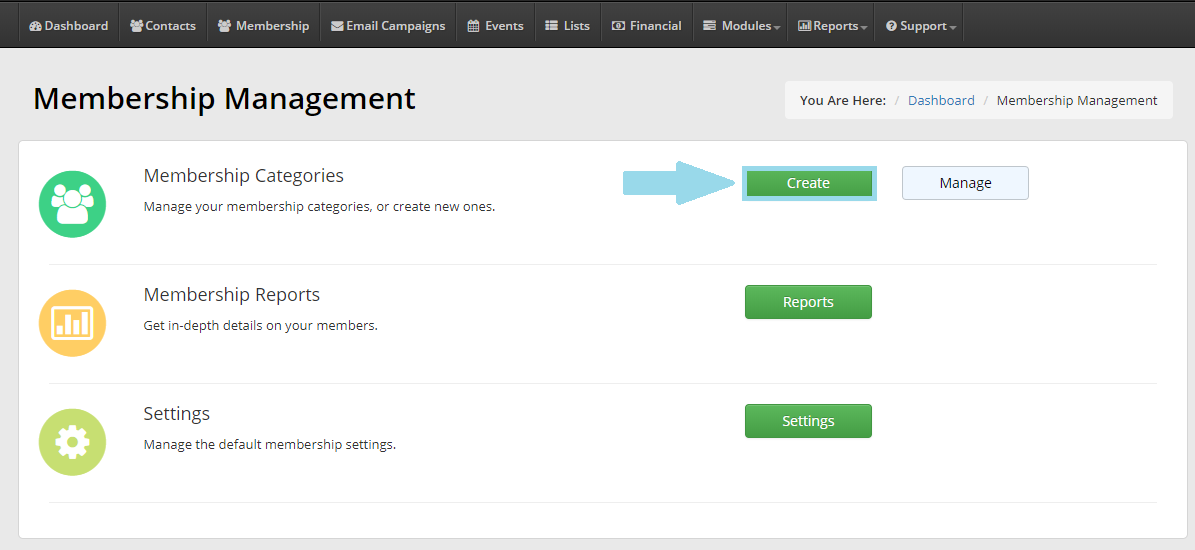
3. This will bring you to the membership management dashboard. Click the green ‘Create’ button in the Membership Category section.
Inputting Basic Membership Category Details
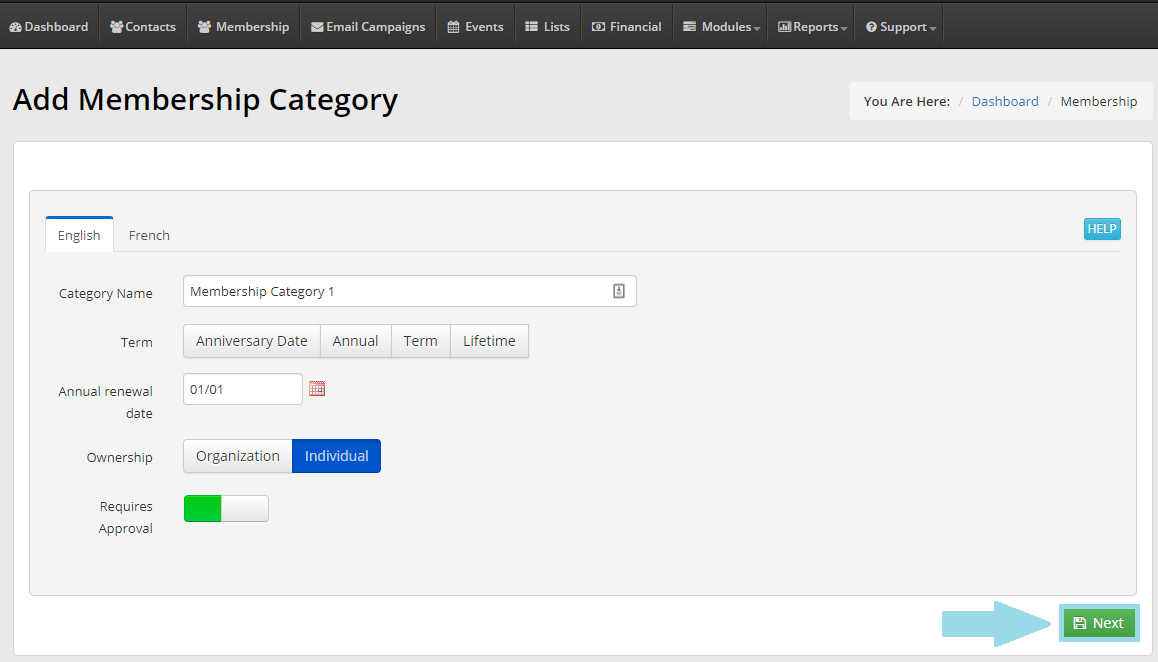
4. The next screen will allow you to define some of the details regarding your Membership Category. We’ll step through each of the options.
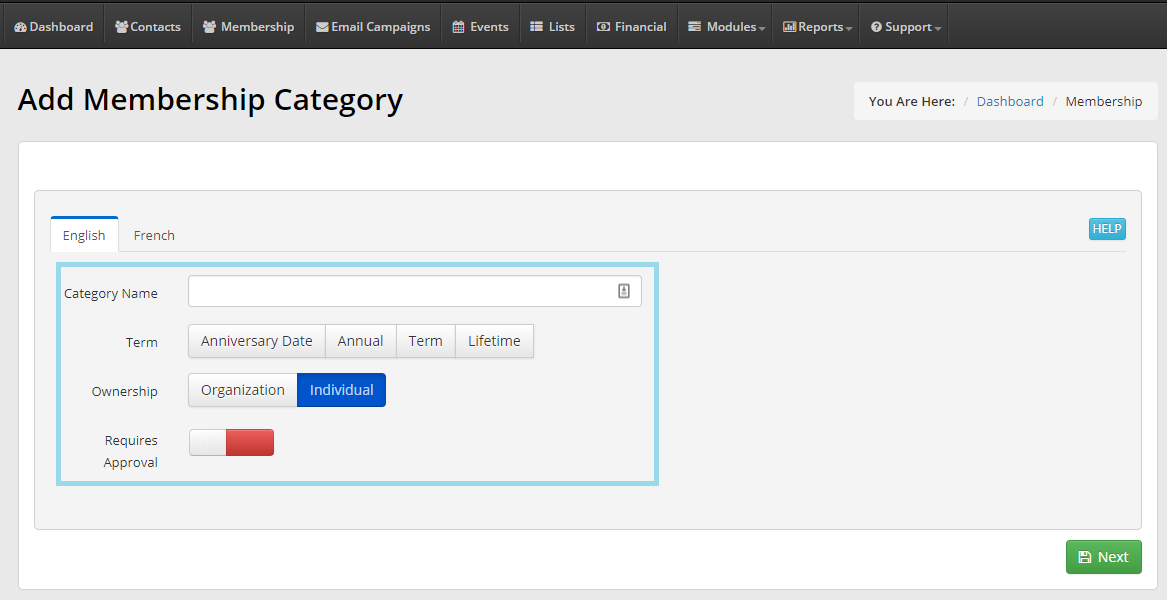
Category Name: This is the name of your Membership Category.
Term: This setting allows you to set your membership terms policy for renewal purposes.
- ‘Anniversary Date’ will set a member’s renewal date to 365 days after becoming a member.
- ‘Annual” will set renewal dates for all members in this category to any date you specify.
- ‘Term‘ allows you to define a custom membership term, in months. Set from 1 month to 120!
- ‘Lifetime‘ means that members in the category you are creating won’t be required to renew their memberships.
Ownership: This setting will allow you to set this Membership Category for organizations, or individuals. Set this according to your needs!
- ‘Organization’ will designate your Membership Category as for organizations (like member businesses).
- Setting ‘Group Membership’ to green will allow members in this category to create Employee Accounts to their membership, granting them access to your Member Portal.
- ‘Individual’ will designate this Membership Category for individual members.
Requires Approval: Setting this toggle to green will mean that membership in this category will require new prospects to apply and submit to an approval process.
5. Once you’ve defined all the details for your new Membership Category, click the green ‘Next’ near the bottom of the page.
Membership Category Description
After step 5, you’ll find yourself on the ‘Manage Membership Category’ dashboard. Here, you can manage advanced configuration options for your Membership Category. Below, we’ll guide you through the settings necessary to create your new Membership Category.
6. On this screen, you’ll see a large field called ‘Apply Description’. In it, briefly describe the nature of your new membership category.
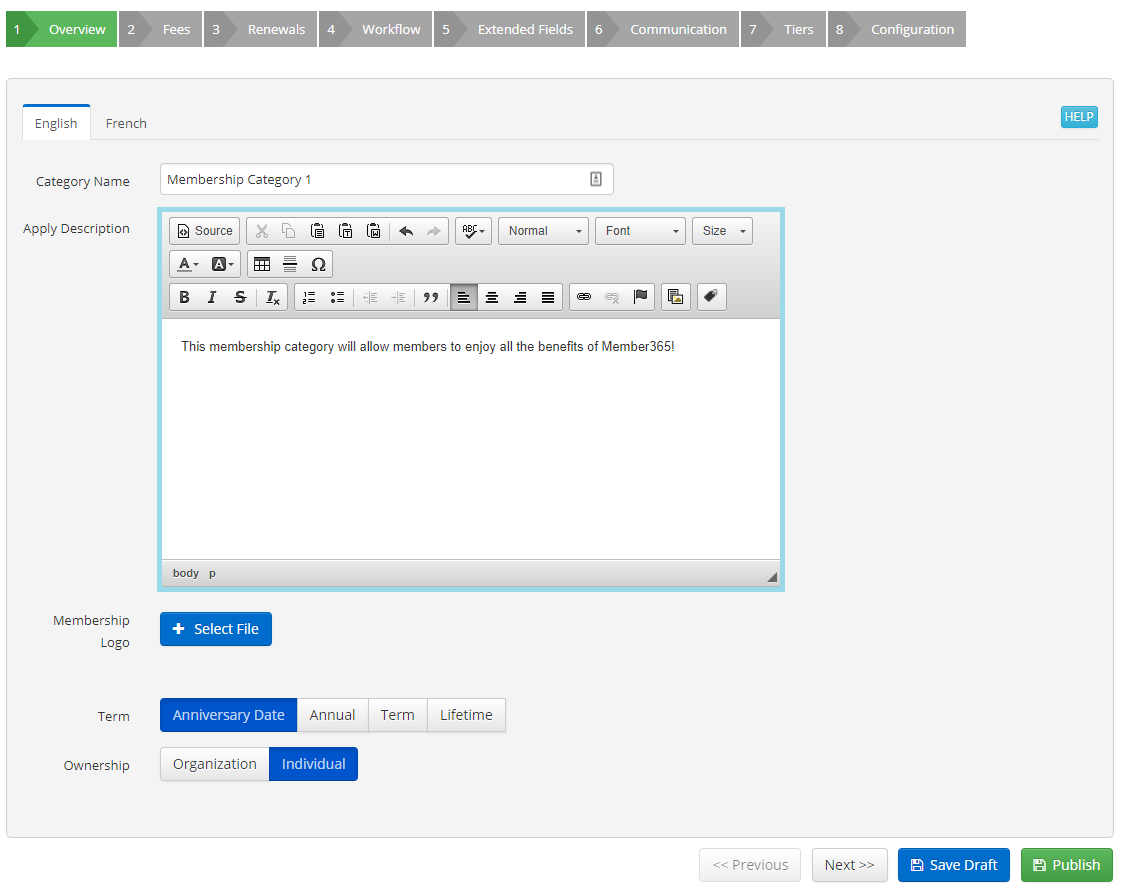
7. At the bottom of the screen, click the grey ‘Next’ button.
Setting Fee’s
8. This page allows you to set and manage fees for your membership category. For your basic category, simply input a flat fee and choose a payment method.
NOTE: If your membership category requires more advanced fee configuration, you can learn more about this page here.
9. Once you’ve configured your fee structure, click the grey ‘Next’ button once again.
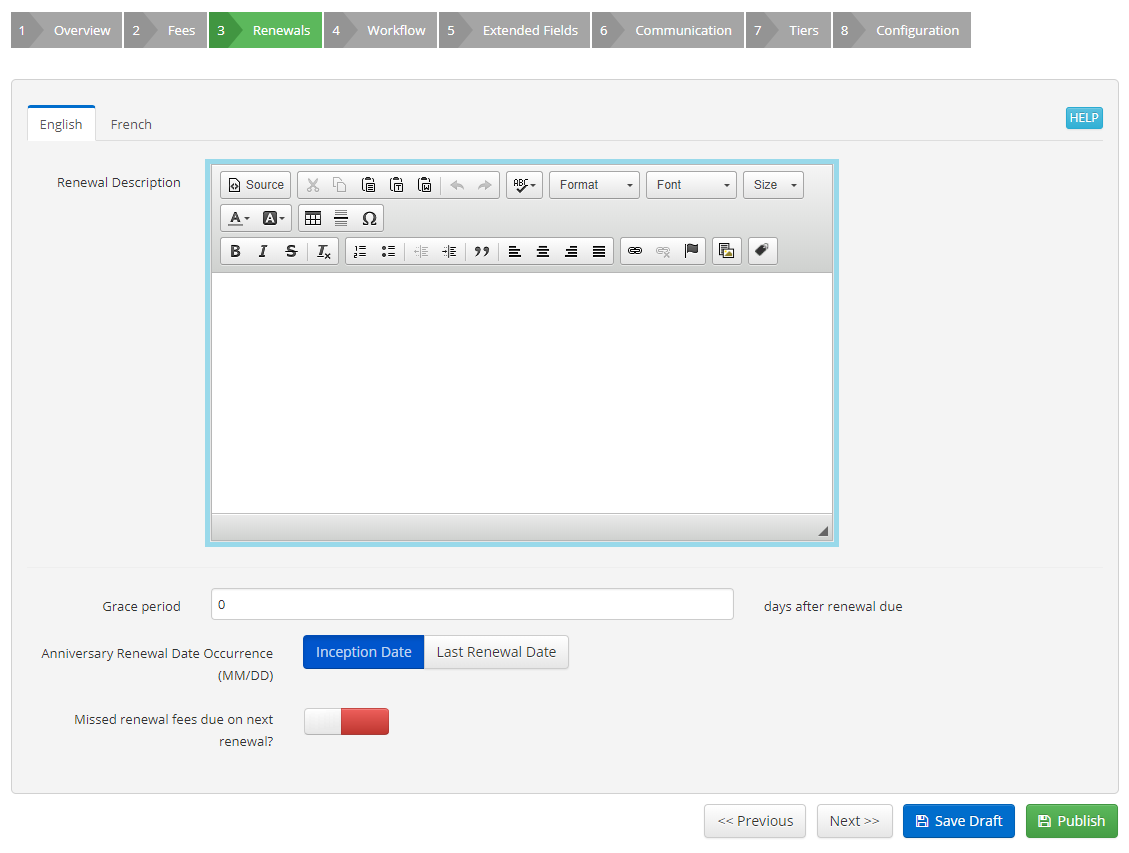
Configuring Renewals
This page allows you to manage your renewal details
10. In the ‘Renewal Description’ field, input a brief description of everything a member needs to know to renew their membership. In the fields below, you can further specify renewal details.
11. Once you’ve completed step 10, Click the green ‘Publish’ button at the bottom of the page, and you’re done!