This article will guide you through copying the default ‘Welcome’ email and applying it to a membership category.
Accessing Your Current Welcome Email
1. Log in to your Member365 Administrator Dashboard.
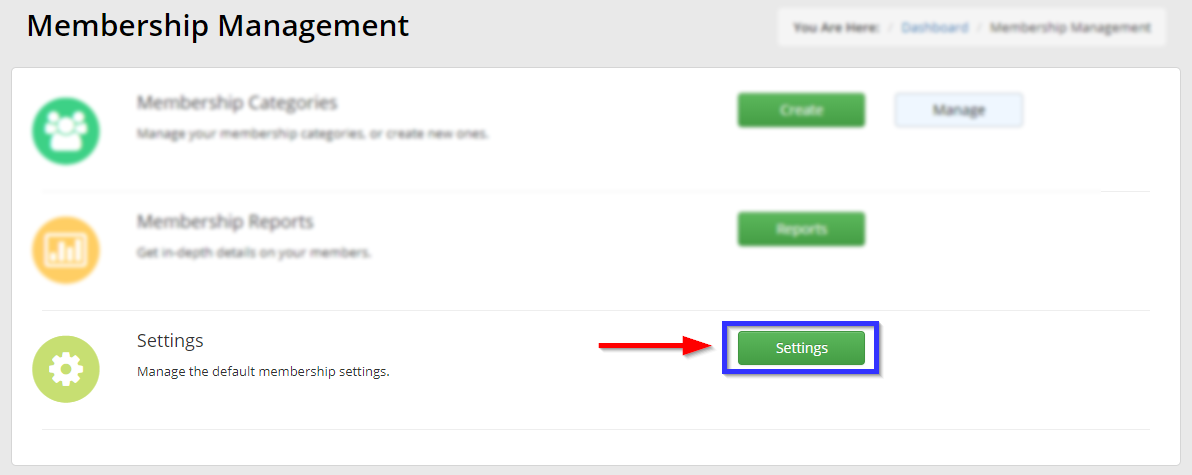
2. On the top bar, click ‘Membership‘.

3. Click ‘Settings‘.
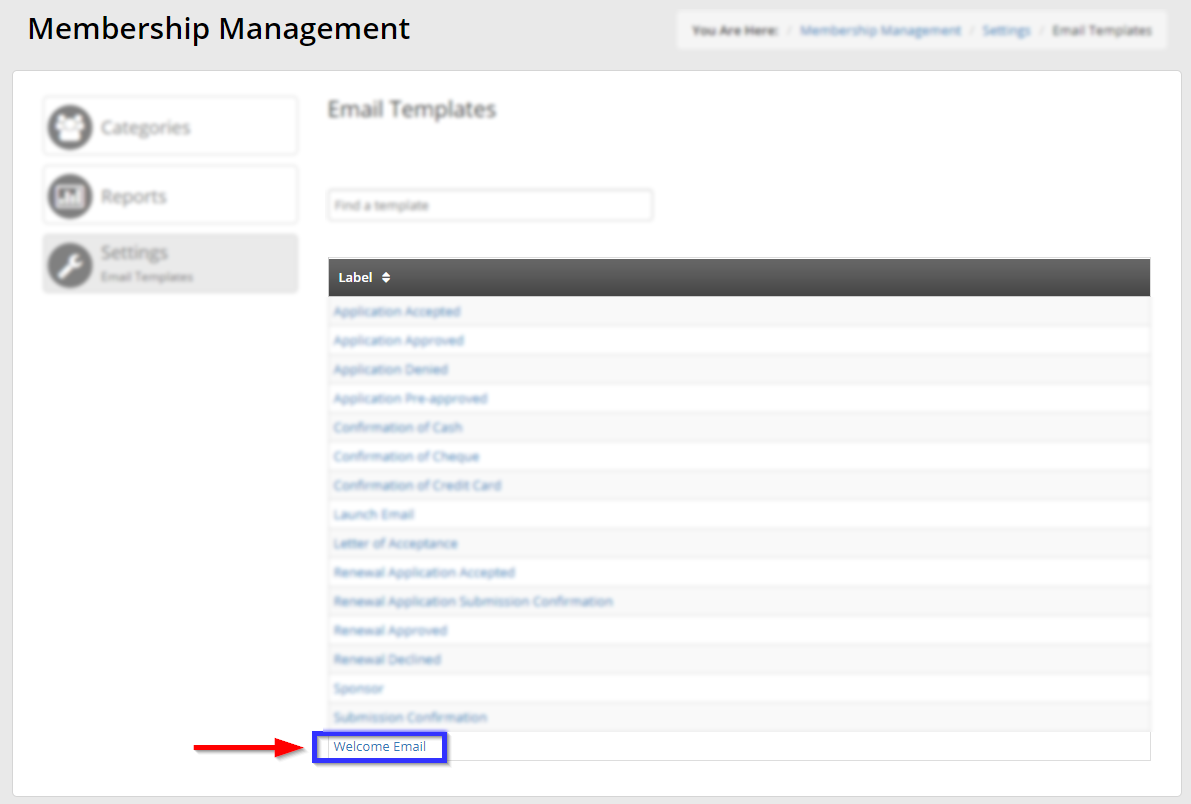
4. Click ‘Email Templates‘.

5. In the list of templates, click ‘Welcome Email‘.
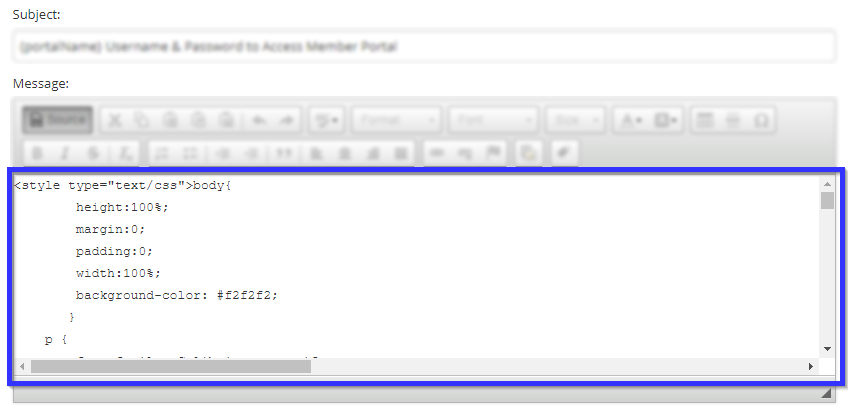
6. Above the Rich Text editor, click ‘Source‘.
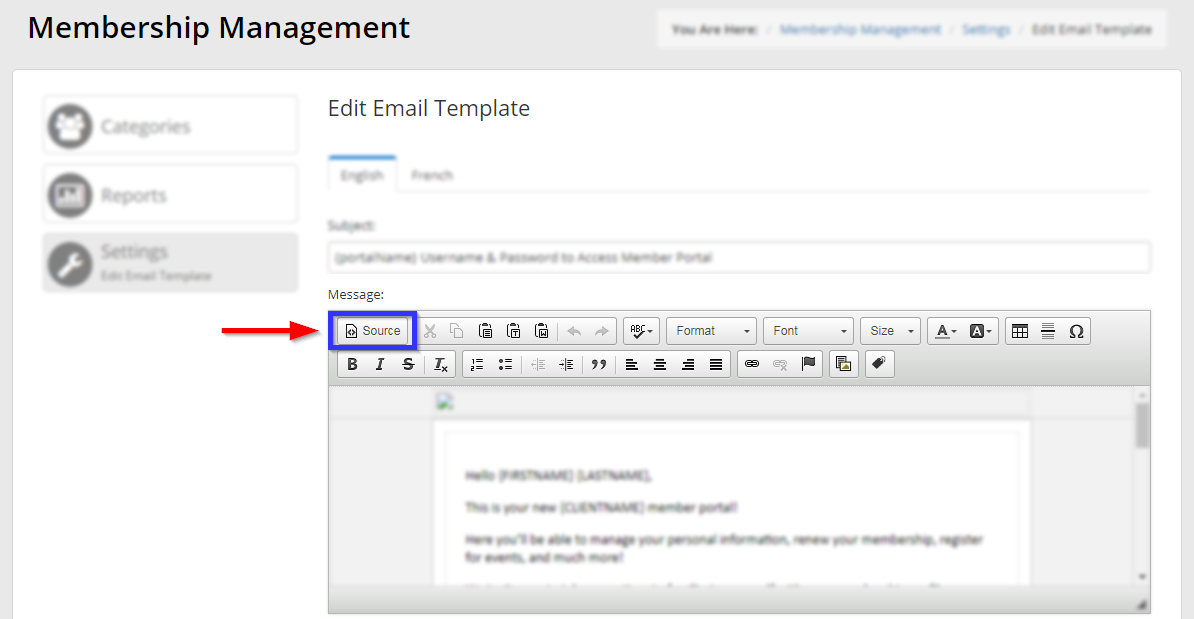
7. Copy all of the text in the editor’s text field.
Copying the Email Template to a Membership Category
8. On the top bar, click ‘Membership‘ again.
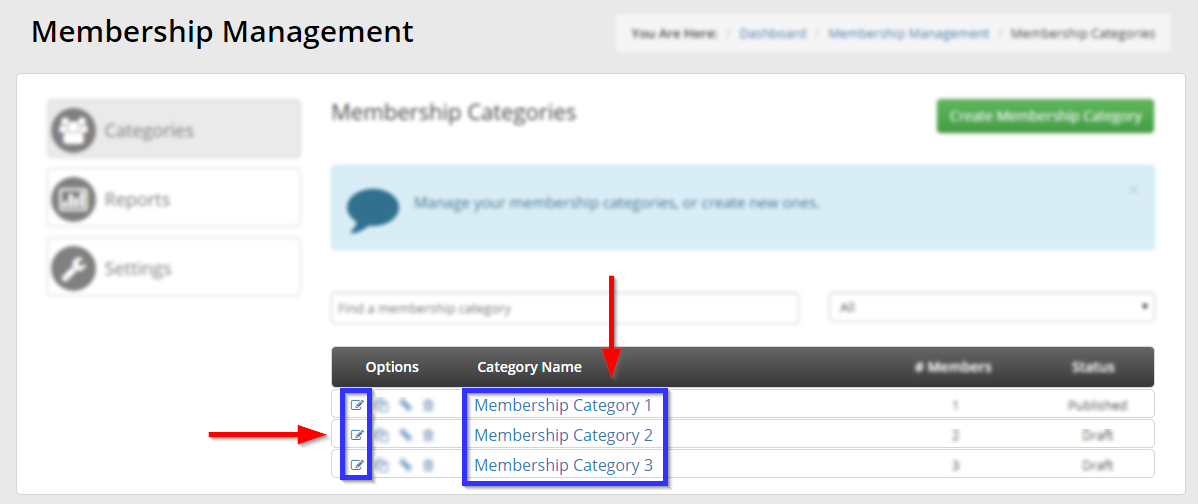
9. Find the membership category you would like to edit, either by finding it in the list or by entering its name in the search bar, and click either its name or the pencil icon to the left of its name.
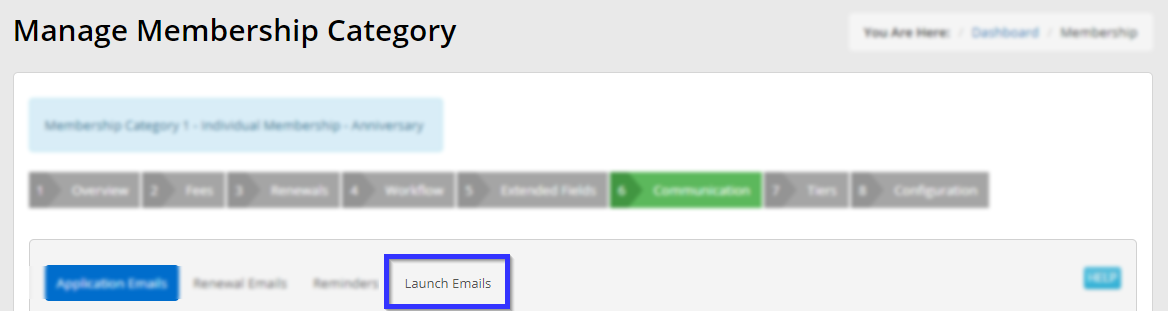
10. Click the ‘Communication‘ tab.

11. Click the ‘Launch Emails‘ sub-tab.
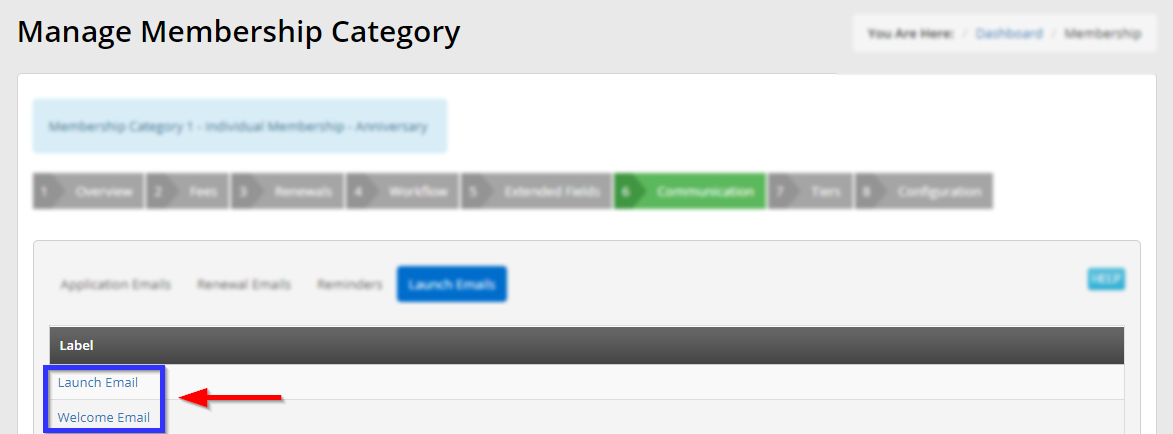
12. Click whichever category, ‘Launch Email’ or ‘Welcome Email‘, you would like to edit. If you see neither, skip this membership category and proceed to the next one.
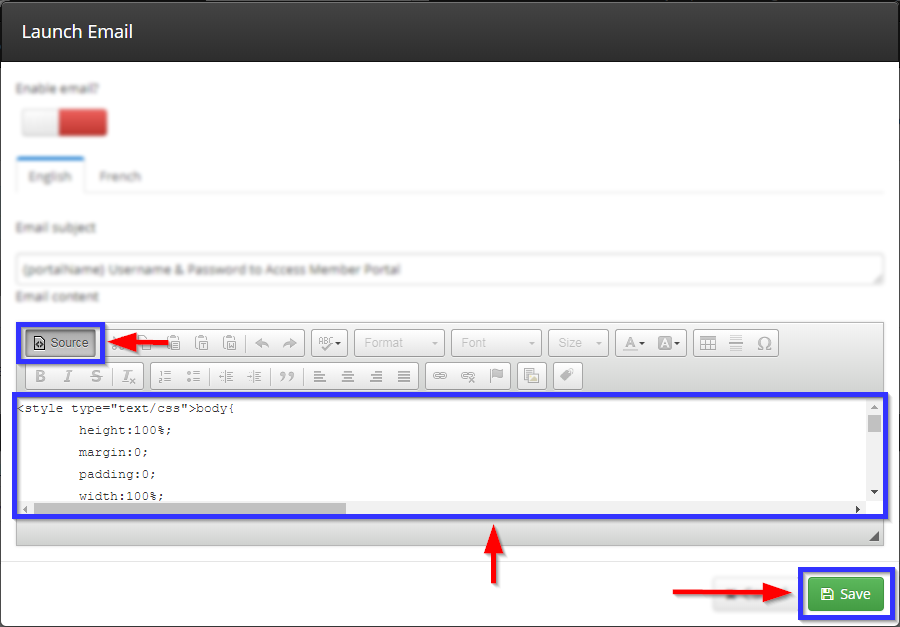
13. In the window that appears, click ‘Source‘, paste the text you copied earlier into the rich text editor’s text field, and click ‘Save‘.
14. Repeat steps 12 and 13 with the category you didn’t choose, if you wish.
Congratulations, you have copied over your ‘Welcome’ email to this membership category!