This article will show you how to customize the Approval Workflow for a Membership Category’s incoming Membership Applications and Renewals!
Edit the Membership Category
Each Membership Category has its own Approval Workflow. The order in which you charge fees, and grant portal access, must be specified in the settings of each Membership Category itself.
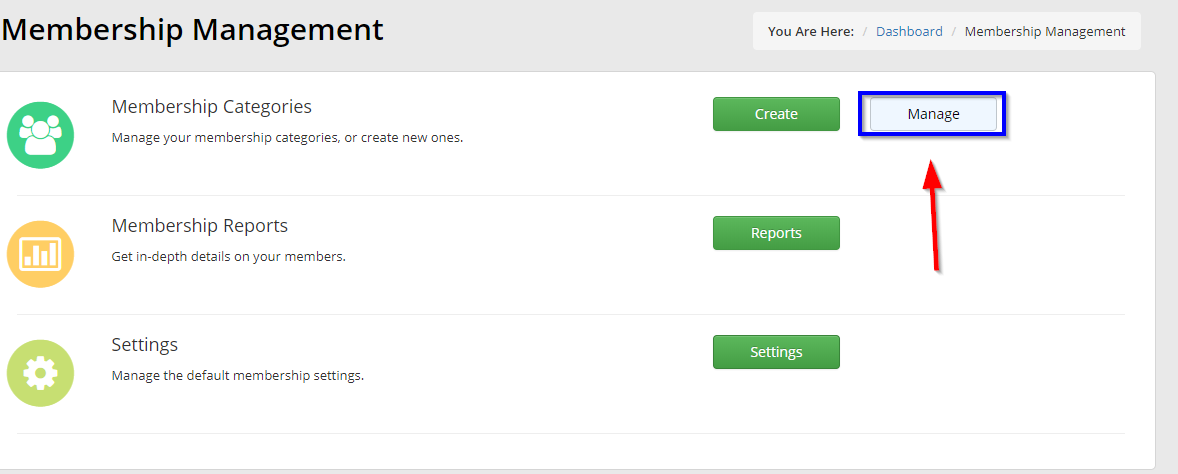
1. From the Member365 Administrator Dashboard, click ‘Membership’ at the top of the page.

2. On the page that follows, click ‘Manage’ next to ‘Membership Categories’.
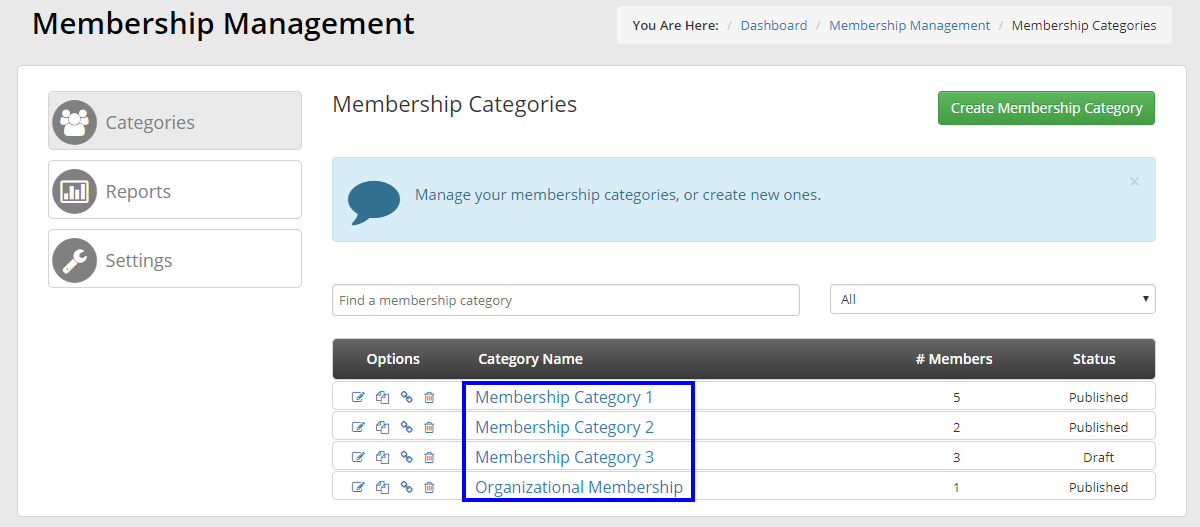
3. Locate the Membership Category whose settings you wish to edit, using the search bar if necessary, then click its name.
Enable Approval
If your Membership Category does not ‘Require Approval’, then all incoming Applications and Renewals will be Approved automatically following a successful submission of payment.
4. Click the tab labeled ‘Configuration’, then click ‘Membership’ from the list of sub-tabs that appears.

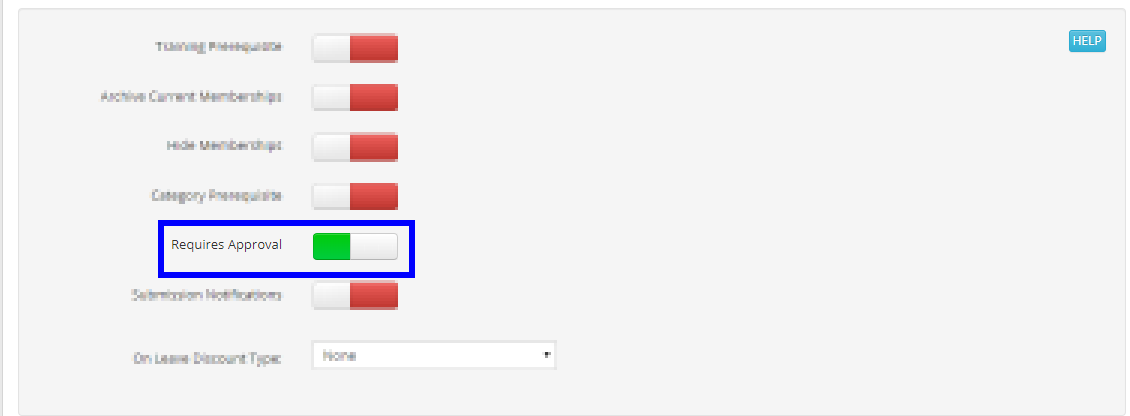
5. Scroll down to the series of options, and locate the toggle for ‘Requires Approval’. Turn this toggle OFF or ON as necessary.
Configure the Review Process
If you choose for this Membership Category to require approval, you can then customize the review and approval workflow.
6. Turning ON the toggle in Step 5 will cause a tab labeled ‘Workflow’ to appear. Click this new tab.
![]()
Collect Payment
For every Membership Category that requires approval in Member365, you can choose when to charge its Membership Dues! There are two options: BEFORE the application is approved, or AFTER the application is approved.

If you want to charge an Application Fee to all prospective Members, even if they’re denied, choose With Application.
If denied Members should not be charged anything, then choose After Approval.
Member Portal Access
If you want to grant prospective Members Portal Access right away – before they are officially approved – then you can configure that workflow as well!

Choose whether you want applicants to receive login details to the Member Portal once they pay their Membership Dues, or once their application has been approved.
Approve Renewals
Do you want to approve both Applications and Renewals using the workflow you’ve configured, or should only new incoming Applications be subject to review?

Save your Changes
To save the approval and review workflow for this Membership Category, click the ‘Publish’ button at the bottom of the screen to confirm everything you have configured.

Repeat the steps in this article for every Membership Category whose approval workflow you wish to configure!