This article will cover the ‘Registration’ tab, seen when configuring your Events in Member365.
Accessing Event Configuration
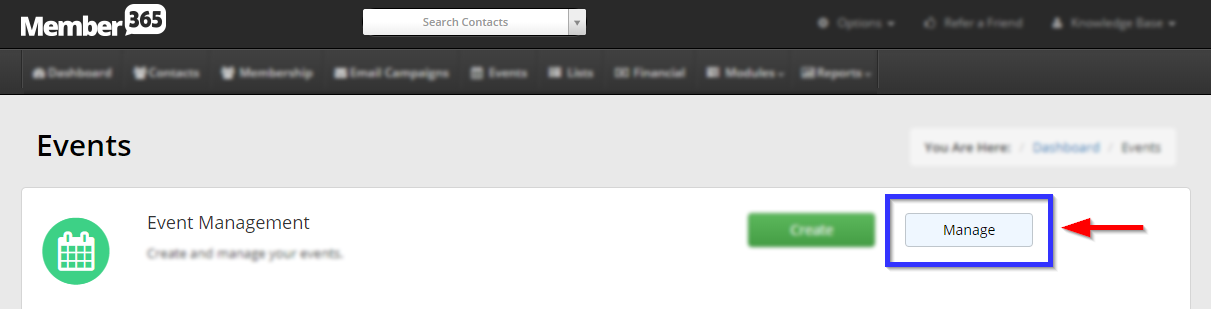
1. From the Member365 Administrator Dashboard, click ‘Events‘ at the top of the page.

2. On the page that follows, click ‘Manage’ next to ‘Event Management’.
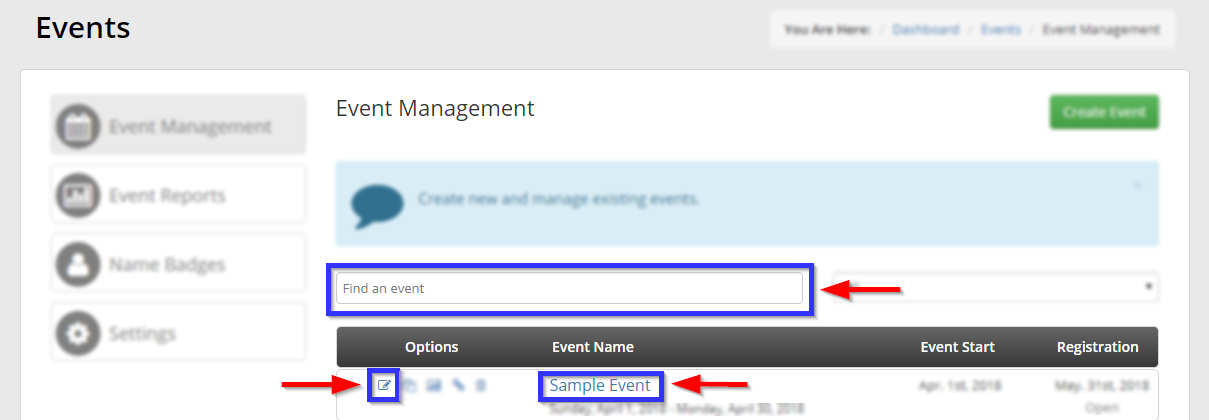
3. Locate the Event you wish to edit, using the search bar if necessary, then click its name.
Configuring Event Registration
4. Click the ‘Registration‘ tab.

Basic Event Registration
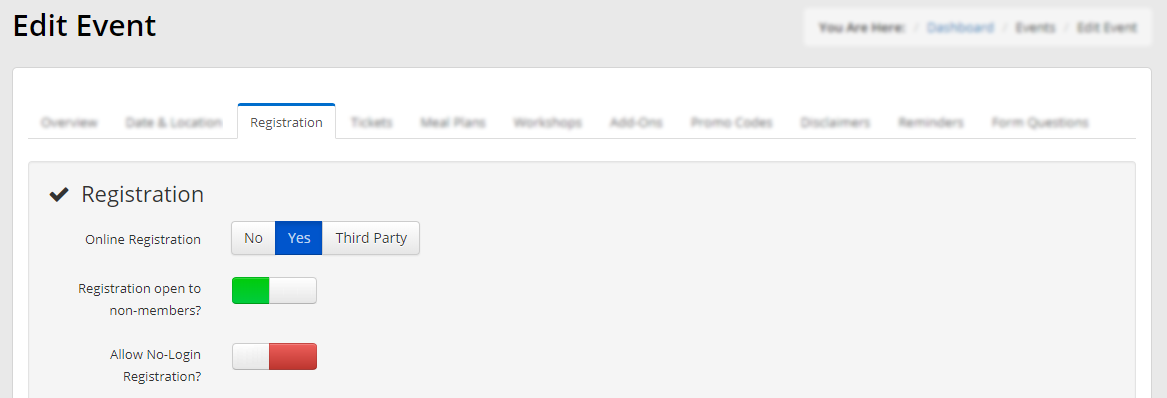
Online Registration: Set to ‘No‘ to disable online registration, and set to ‘Yes‘ to enable online registration. Choosing ‘Third Party‘ will cause a new text field to appear, where you may enter the URL to access event registration through a third-party site.
Registration Dates
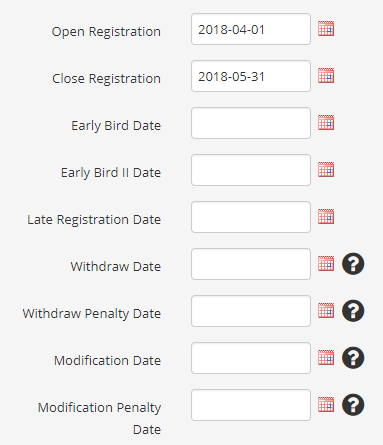
Open Registration: Nobody can register for the event before the Open Registration Date.
Close Registration: Nobody can register for the event after the Close Registration Date.
Early Bird Date: Contacts who register before the Early Bird Date will be charged the Early Bird Fee.
Early Bird II Date: Contacts who register after the Early Bird Date, but before the Early Bird II Date, will be charged the Early Bird II Fee.
Late Registration Date: Contacts who register before the Close Registration Date, but after the Late Registration Date, will be charged the Late Registration Fee.
Withdraw Date: Registrants cannot withdraw their tickets after the Withdraw Date.
Withdraw Penalty Date: Registrants will be charged the Withdrawal Fee if they withdraw after the Withdraw Penalty Date.
Modification Date: Registrants cannot modify their tickets after the Modification Date.
Modification Penalty Date: Registrants will be charged the Modification Fee if they modify their registration after the Modification Penalty Date.
Email Confirmation

Click ‘Manage‘ to bring up a rich text editor, which you can use to create an email confirmation message.
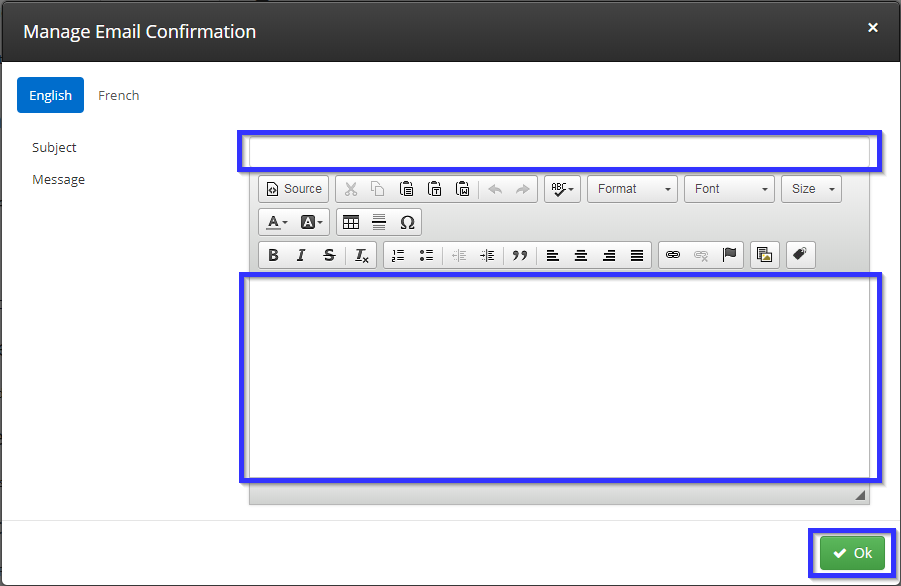
Enter a subject line and the body of the message in the two text boxes indicated, and then click ‘Ok‘. This email will send to your contacts when they register for the Event.
Certificates

Show all Certificates: Enable this toggle switch to allow attendees to view all certificates associated with this event.
Event Certificate(s): Use this drop-down to select certificates to associate with this event.
Attendance

Attended by Default: Enable this setting to cause registrants to be listed as having attended immediately upon registration. This toggle relates to the Event Reporting; continue reading here if you are not familiar with Event Attendance in Member365.
Audience

Display Inside All Workspaces: Select this option to make the event visible to members in any workspace. Members who are in no workspaces, however, will not see the event on their Event Calendar.
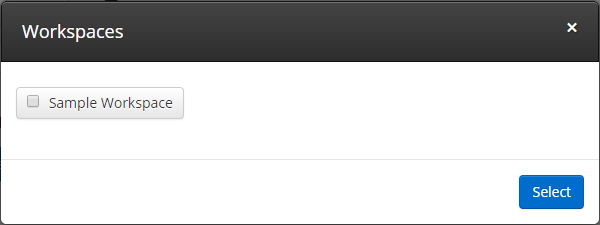
Display Inside Specific Workspaces: Select this option to make a pop-up window appear; in this window, you can choose which workspaces will have access to this event from their Member Portals. Click ‘Select‘ to confirm. This option is good when you are creating a Private Event.
Display Inside General Event Calendar: Select this option to make the event visible in the general event calendar; all contacts with Member Portal Access will see the event upon logging in. Two additional toggles will become available:
- Publish to Public Event Calendar: Enable this toggle to add the event to your Public Event Calendar.
- Create a Portal Account for Non-Members: Enable this toggle to create a Portal Account for Non-Members when they register.
Public Link
The Public Link can direct anyone to the registration page for your event.

Congratulations, you have configured this event’s registration settings!