Member365 tracks the engagement of your Contacts automatically. When a Contact completes an Action in the system, their Engagement Score is adjusted accordingly.
The weight of Actions can be changed, so that some things earn more Engagement Points than others. You can also change what level of activity constitutes a Contact with Low Engagement, and other Engagement Analytics Settings by following the steps in this article!
Engagement Analytics Configuration
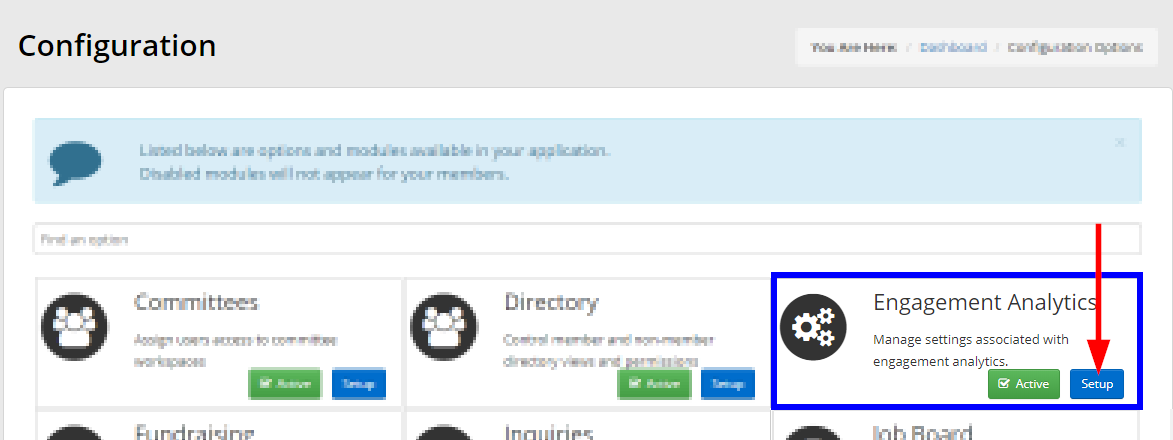
1. From the Member365 Administrator Dashboard, click ‘Options’ at the top of the screen.

2. Click ‘Configuration’ on the drop-down menu that appears.

3. From the list of configuration options, click ‘Setup’ in the box for ‘Engagement Analytics’.
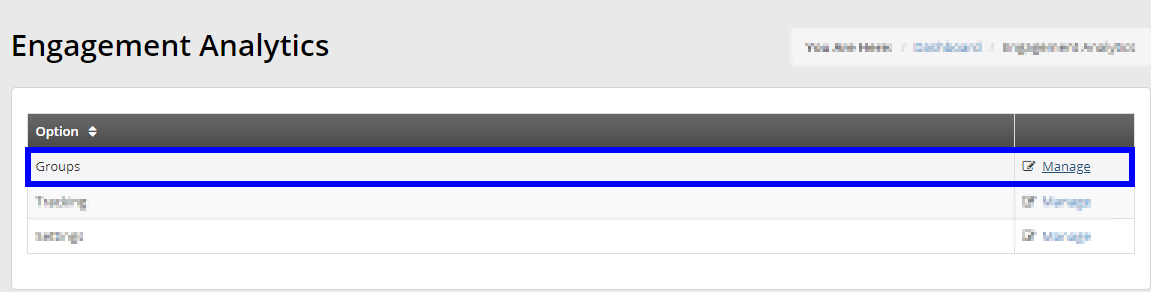
Engagement Analytics Groups
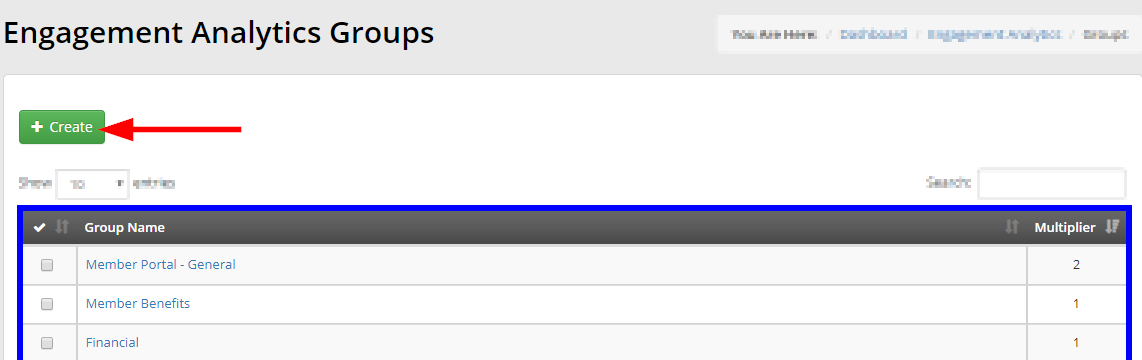
Actions in Member365 are predefined, but you can classify the “type” of Action by assigning it to a ‘Group’.
Each Engagement Analytics Group has a name and a corresponding multiplier. The multiplier defines how many Engagement Points a Contact would earn if the complete an Action in that group!
Click ‘+ Create’ to define a new Analytics Group, or click an existing Group to edit its name or multiplier.
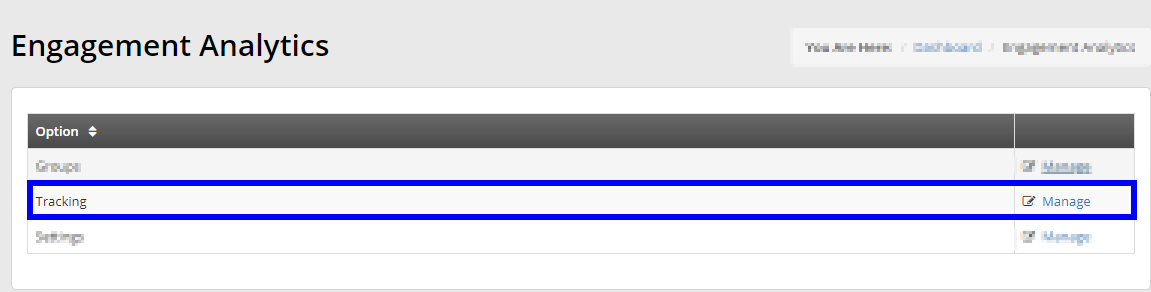
Engagement Analytics Tracking
We have defined our Action Groups and multipliers. The next step is to assign the predefined Actions to our Groups!
Every potential Action is already defined in Member365; you cannot edit the ‘User Action’ column. You can, however, customize how many points each Action earns by editing the ‘Group’ and ‘Unique’ columns!
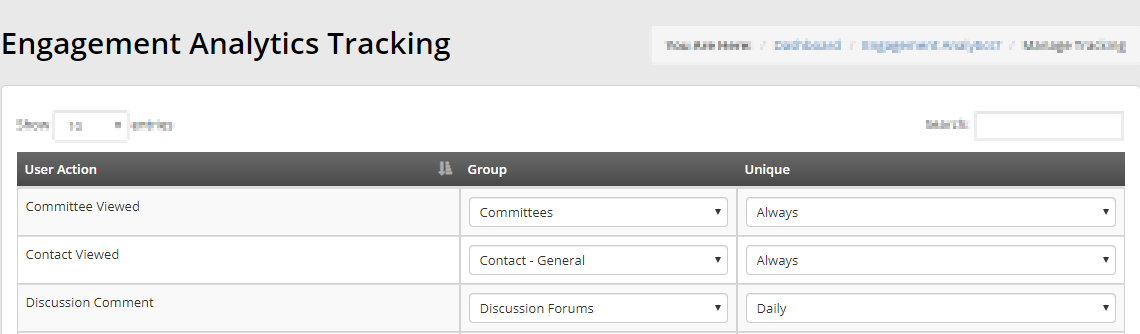
Use the first drop-down menu to assign each Action to a ‘Group’ from the previous sub-header. We defined our multipliers when we edited our Engagement Analytics Groups, so assign your Actions accordingly!
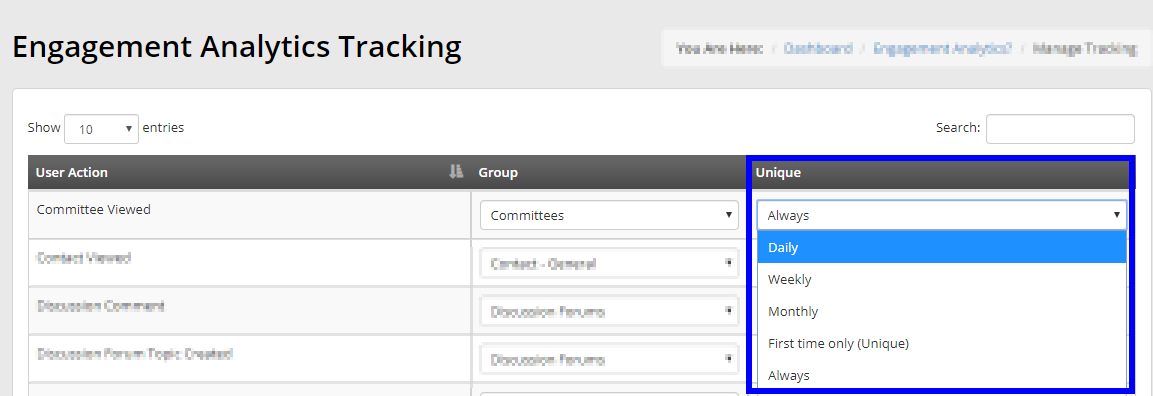
The second drop-down menu defines how often each Action will earn the Contact Points. For example, maybe you don’t want to grant someone Engagement Points every single time they access the Member Portal: the ‘Unique’ column will determine how many times an Action can earn someone points.
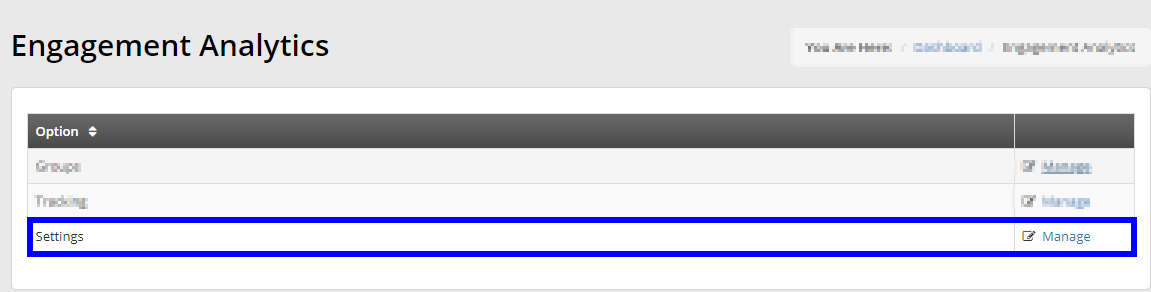
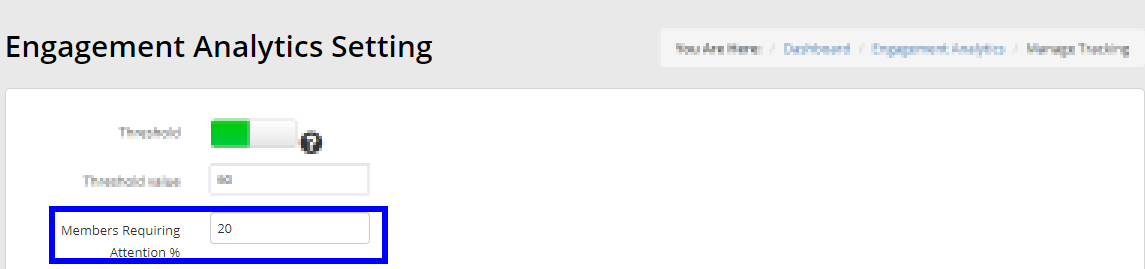
Engagement Analytics Settings
If you want to introduce a maximum amount of Engagement Points – so that high-activity Contacts don’t skew your data – or if you want to define exactly what constitutes a ‘Low-Engagement Member’, then edit the final series of options!
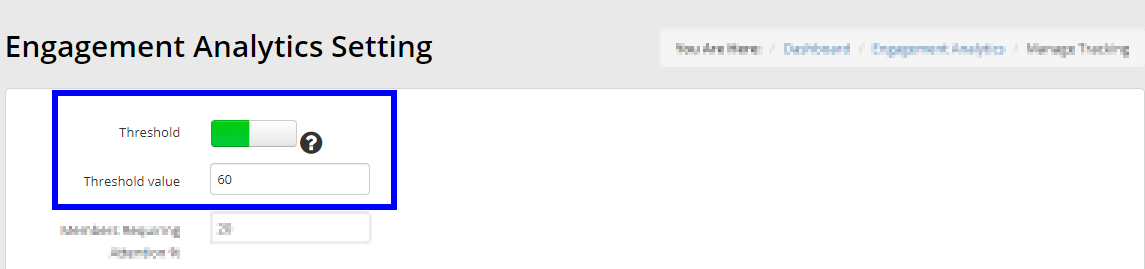
You can enable a ‘Threshold’ if you would like to specify a maximum Engagement Score for your Contacts. This allows you to cap Engagement Scores so that your Average Engagement is not thrown off by outliers!
Adding a Threshold is optional, and you can leave the toggle OFF if you do not want to cap your Engagement Scores.
Enter a value for your ‘Members Requiring Attention %’ field. Each Contact’s Engagement Score will be compared to the Average Engagement Score of all your Contacts.
Remember to click ‘Save’ at the bottom of the page to confirm your changes.
Congratulations, you now know how to customize the way your Member Engagement is tracked!