This article will guide you through changing the ticket type assigned to an event registrant.
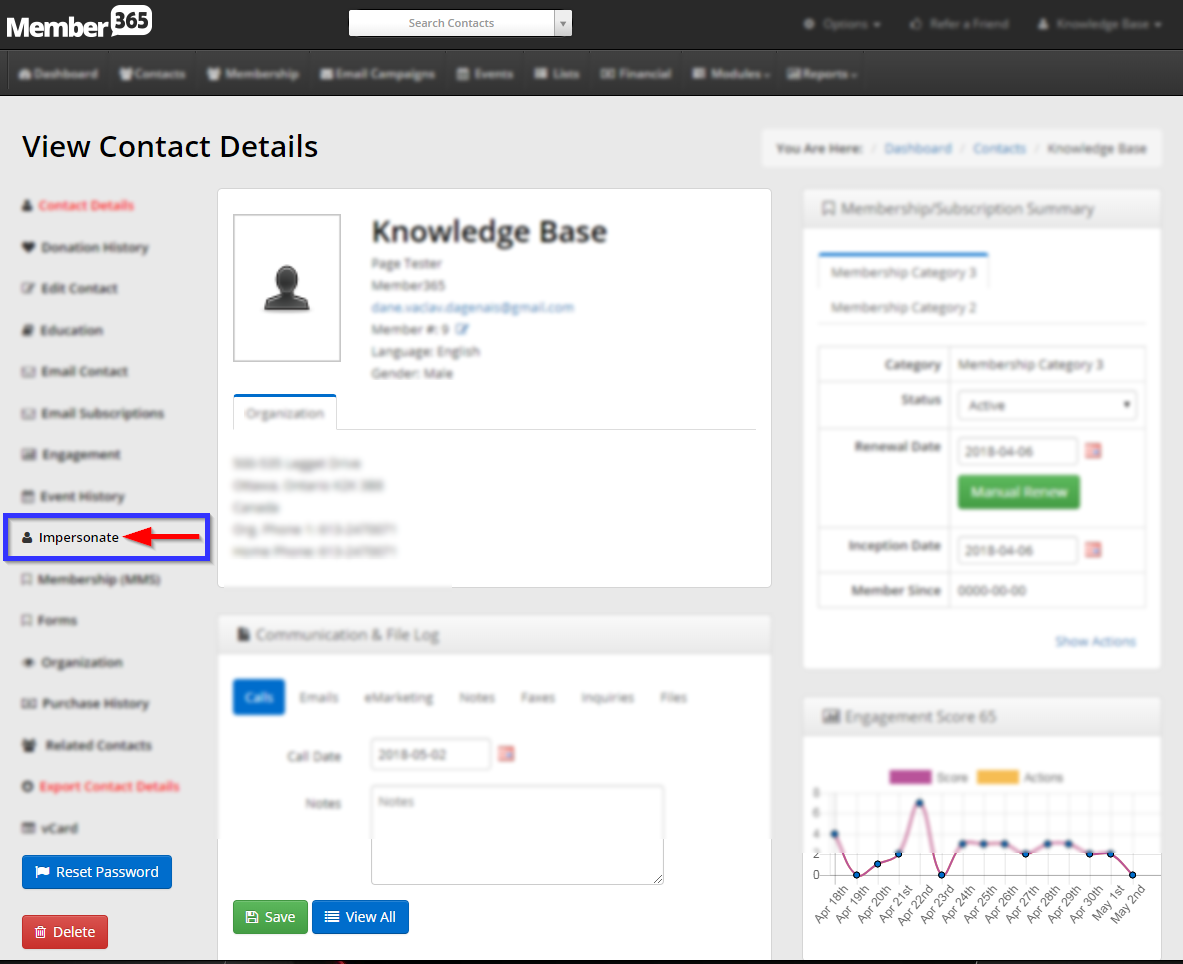
Impersonating a Contact
1. Log in to your Member365 Administrator Dashboard.
2. Click the ‘Search Contacts‘ bar and enter the name of the contact to whom you would like to assign an event registration. Click their name once it appears.

3. On their contact profile, click the ‘Impersonate‘ button on the left-hand side; click ‘Continue‘ in the prompt that appears.
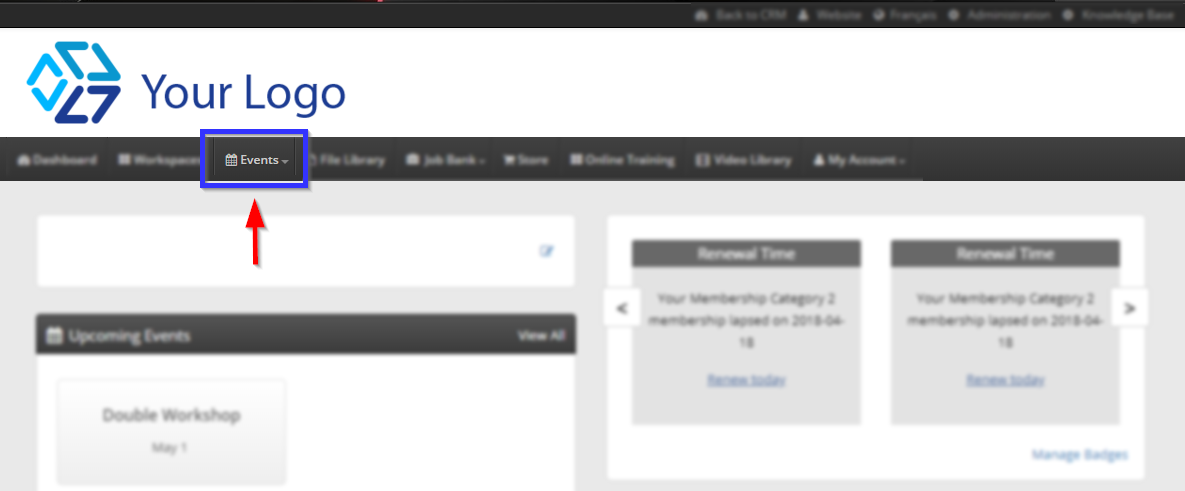
Assigning a Ticket
4. In the Member Portal, click ‘Events‘.
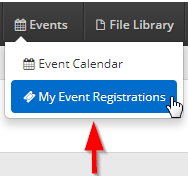
5. In the drop-down menu that appears, click ‘My Event Registrations‘.
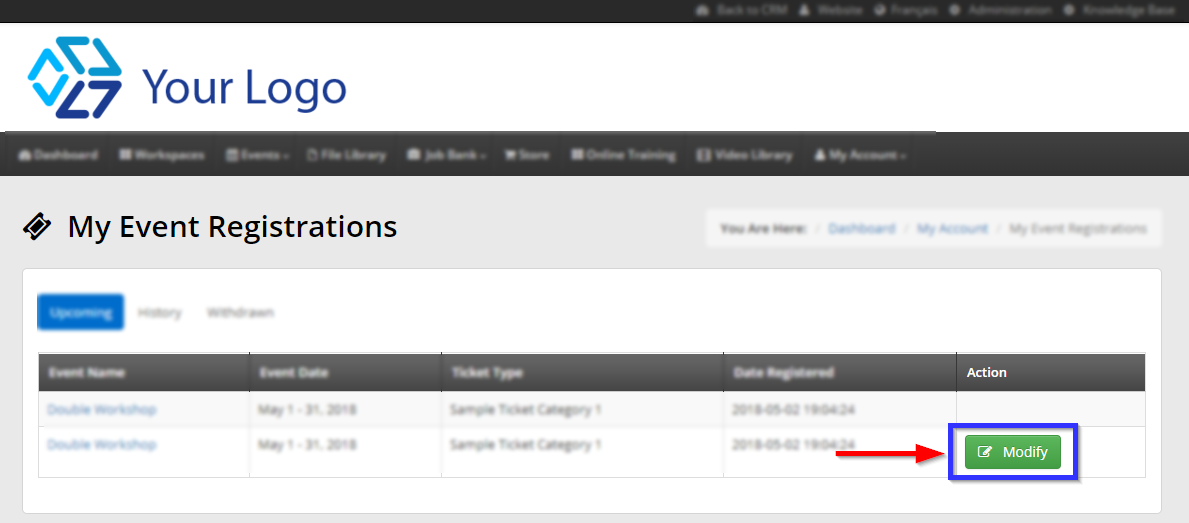
6. Find the event in the list of registrations, and in the ‘Action’ column, click ‘Modify‘.
Choosing a New Ticket Type
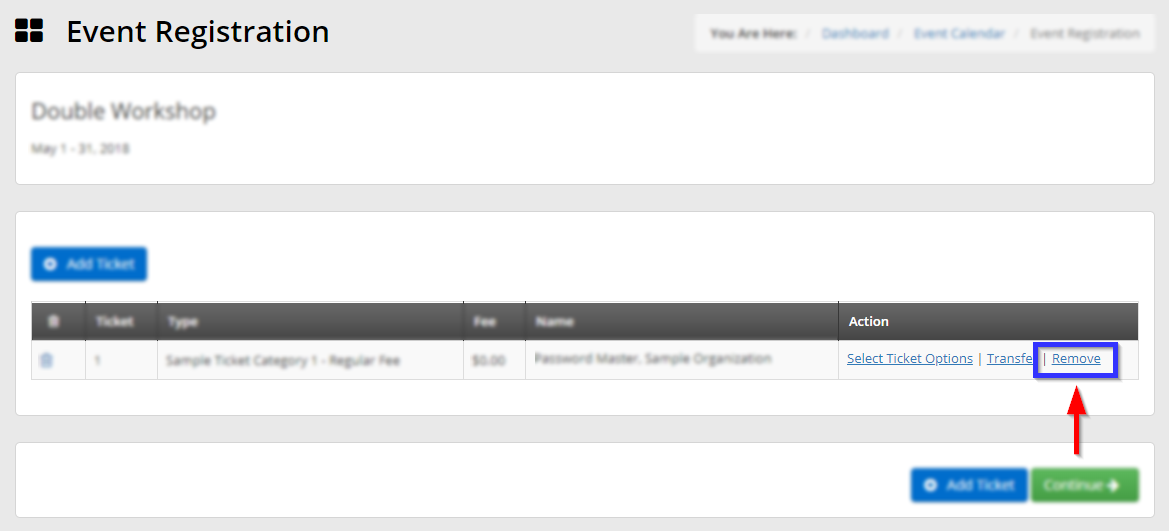
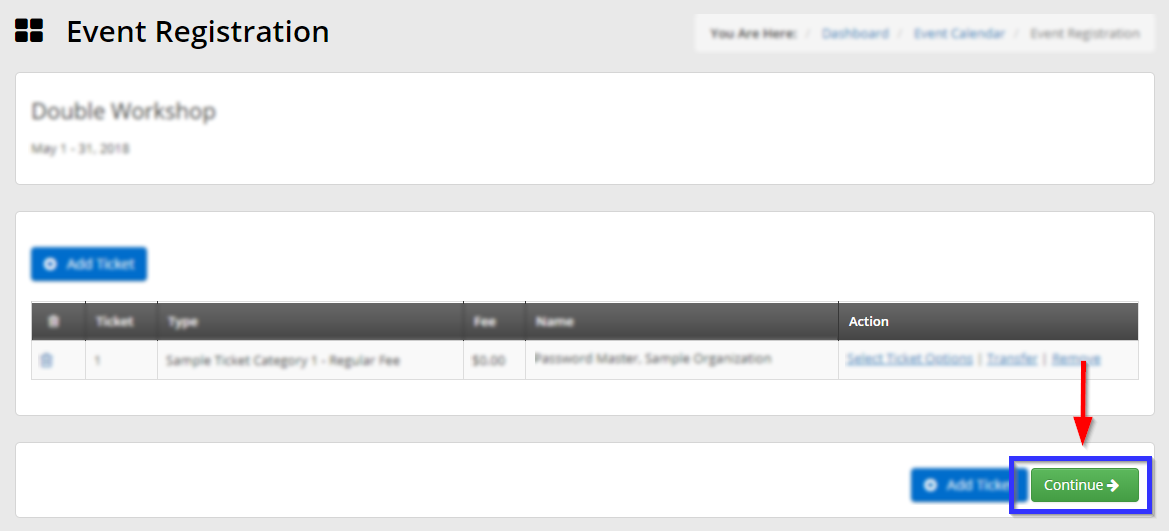
7. Find the name of the ticket type you wish to remove, under the ‘Type’ column, and click the ‘Remove‘ button in the ‘Action’ column. Click ‘Confirm‘ in the window that pops up.
8. Click ‘Add Ticket‘.
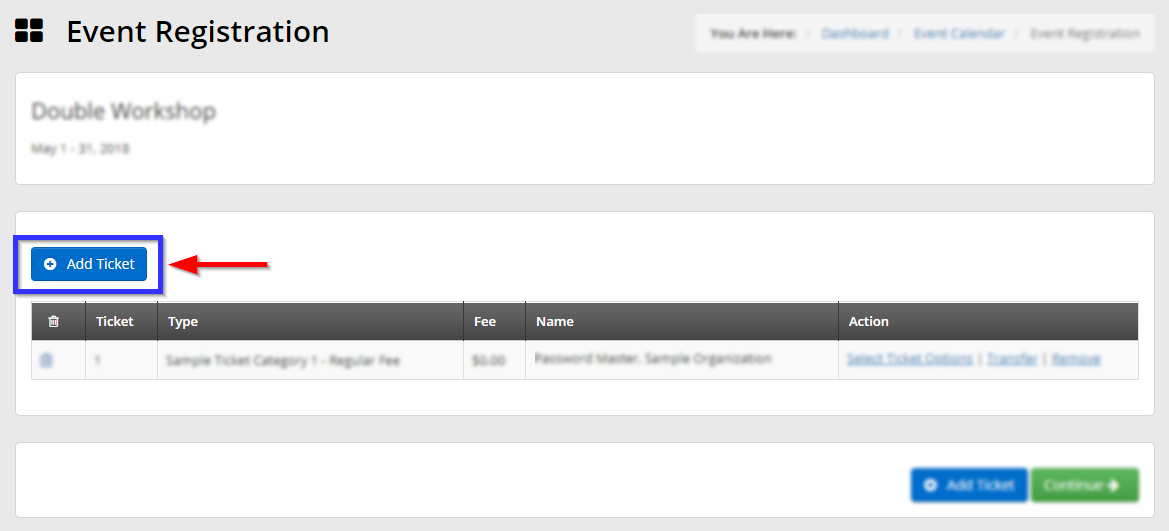
In the window that pops up, click the button labelled ‘Select‘ next to the name of the ticket type you would like to assign.
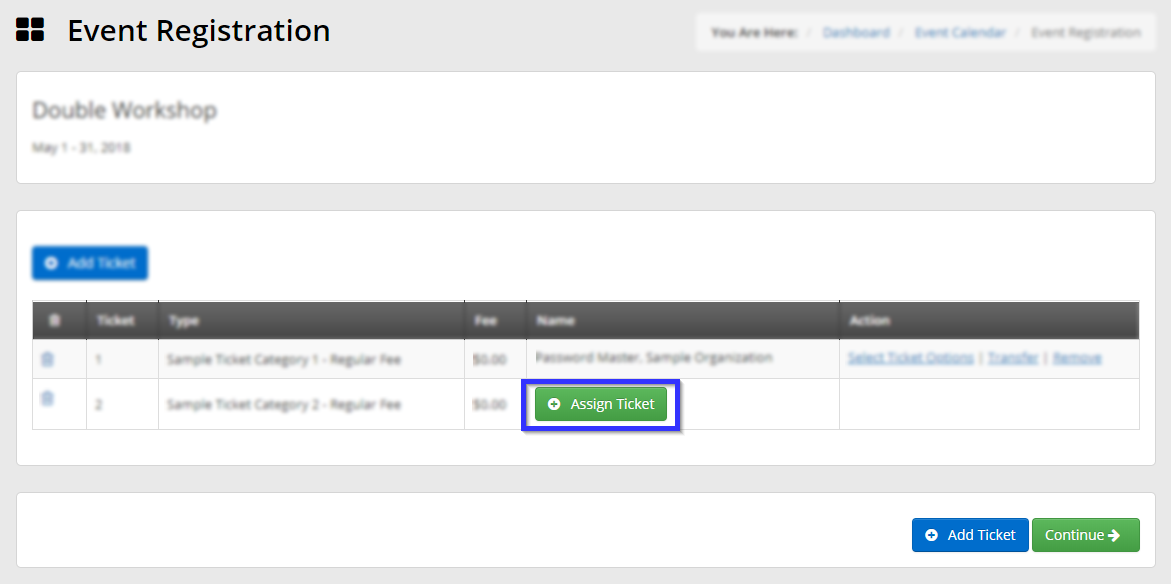
9. Next to the name of the ticket type you have added, click the ‘Assign Ticket‘ button.
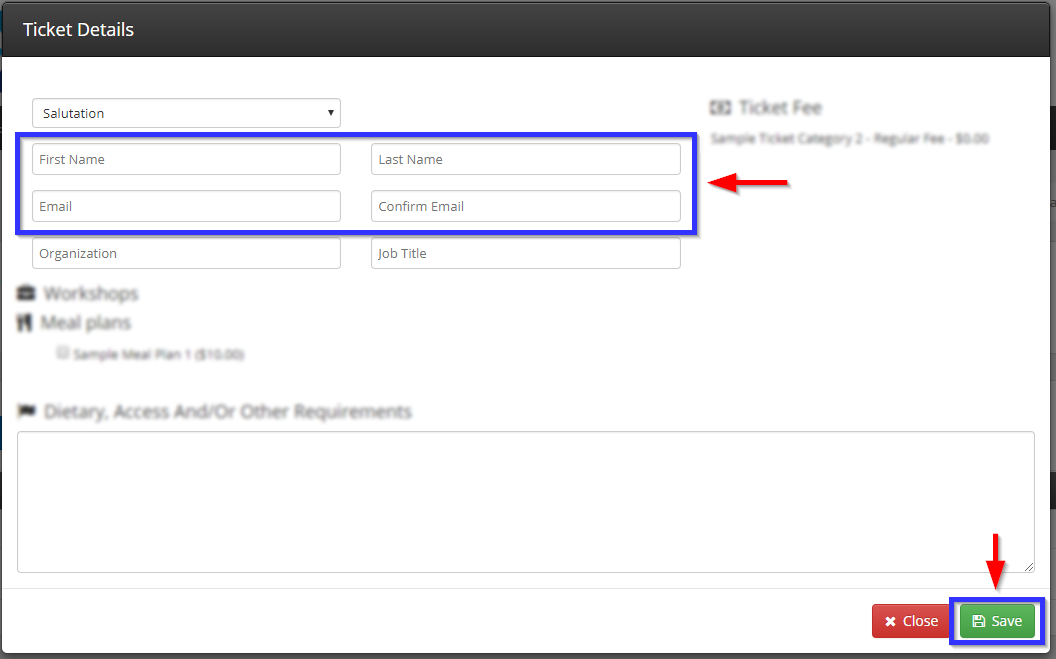
10. In the new ‘Ticket Details’ window, fill out at least the four fields indicated (first and last name, email address, confirmation of email address) and mark any workshops, meal plans or other extra features, and then click ‘Save‘.
11. Back at the Event Registration page, click ‘Continue‘.
You will be presented with a link to download your newly-revised invoice.
Congratulations, you have changed this registrant’s ticket type!