This article will describe how to assign unassigned event registrations to specific contacts.
Impersonating a Contact
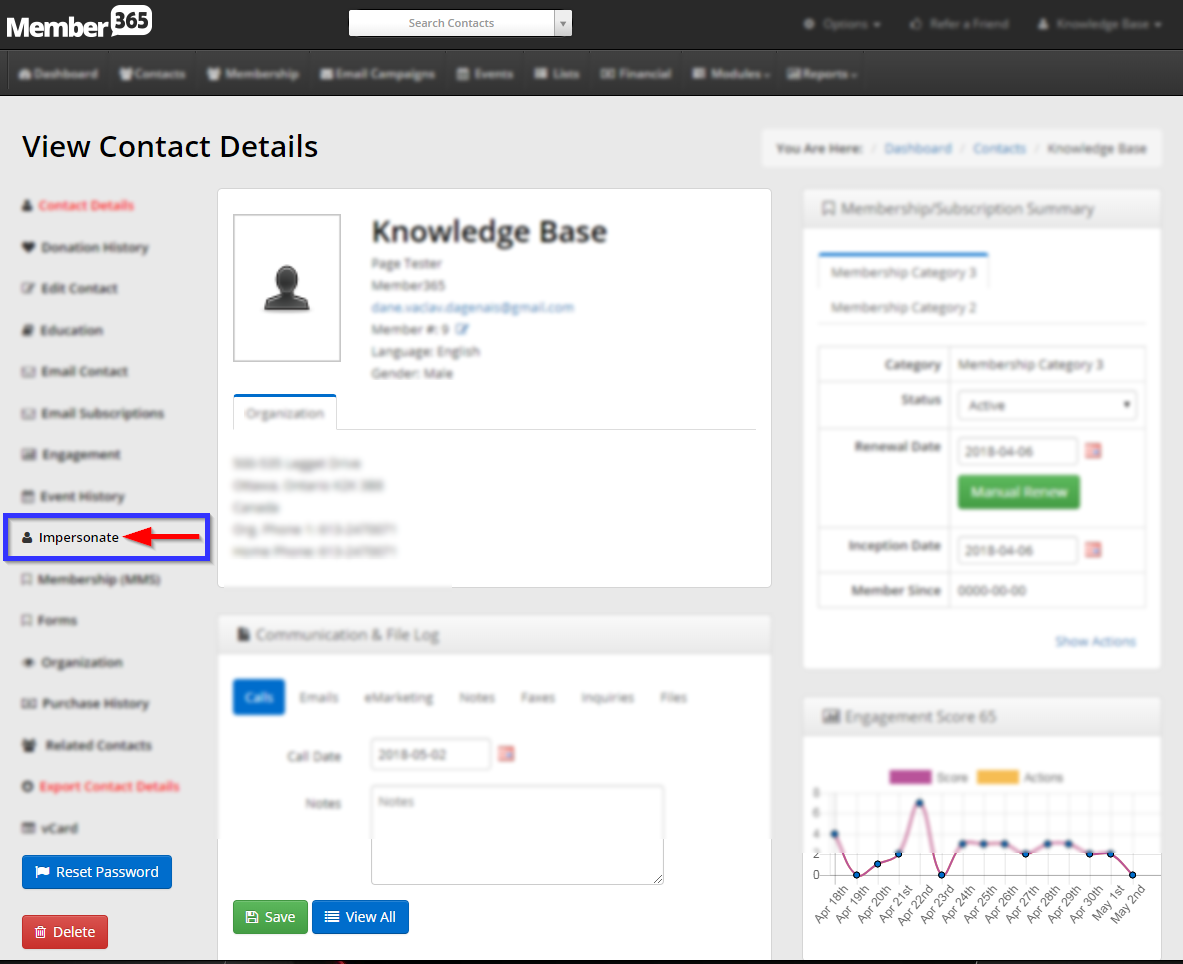
1. Login to your Member365 Administrator Dashboard.
2. Click the ‘Search Contacts‘ bar and enter the name of the contact to whom you would like to assign an event registration. Click their name once it appears.

3. On their contact profile, click the ‘Impersonate‘ button on the left-hand side; click ‘Continue‘ in the prompt that appears.
Assigning a Ticket
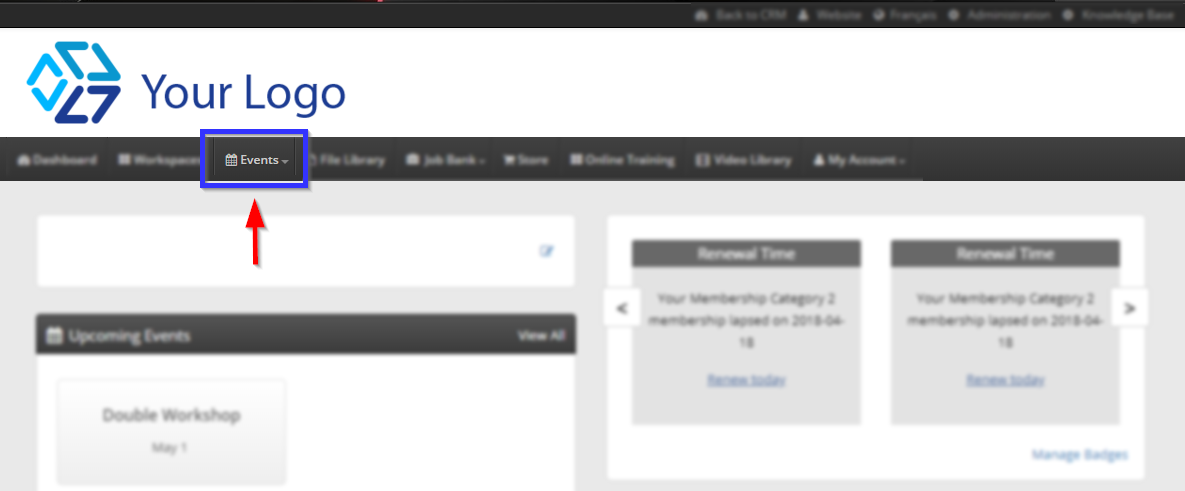
4. In the Member Portal, click ‘Events‘.
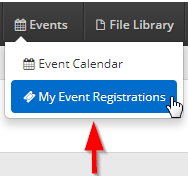
5. In the drop-down menu that appears, click ‘My Event Registrations‘.
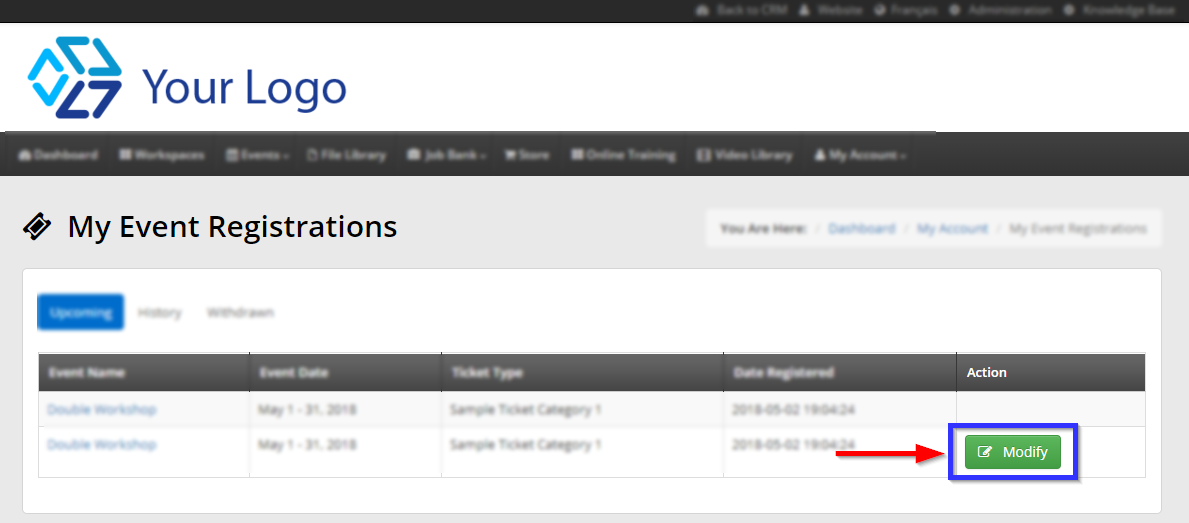
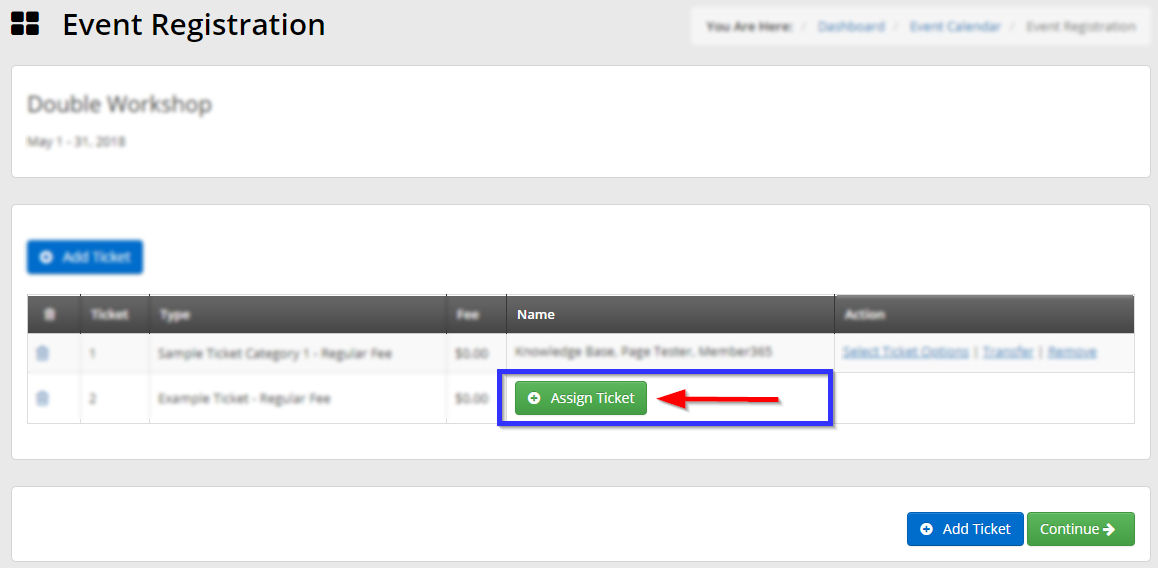
6. Find the event in the list of registrations, and in the ‘Action’ column, click ‘Modify‘.
7. Find the unassigned ticket in the list, and in the ‘Name’ colum, click ‘Assign Ticket‘.
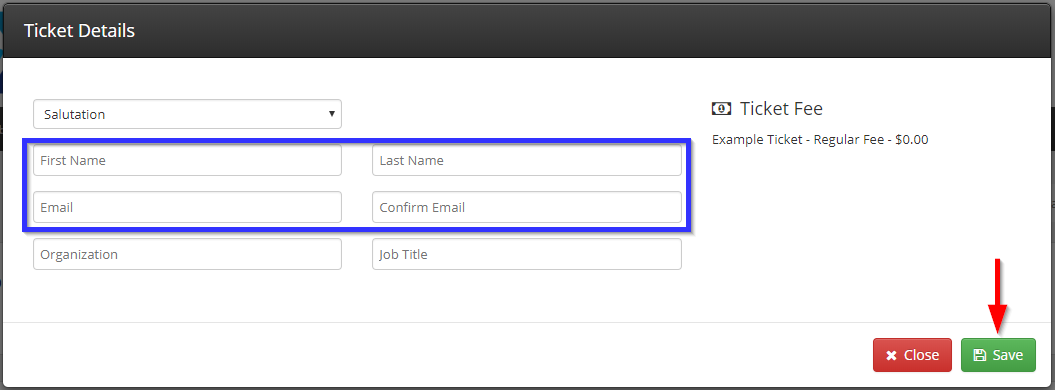
8. In the dialogue box that appears, enter (at minimum) your contact’s first and last name and their email address in both boxes where it is requested in order to assign the ticket, then click ‘Save‘.
9. Once you have returned to the screen pictured in step 7, click ‘Continue‘ in the lower-right corner to save your work and complete ticket reassignment.
Congratulations, you have assigned an unassigned event registration!