This article will guide you through adding an assignment to an LMS course that involves a file you upload to the system for the user to use in completing the assignment: this may be a PDF, an audio file, or any other self-contained exercise that the user must download.
Accessing Course Configuration
1. Log in to your Member365 Administrator Dashboard.
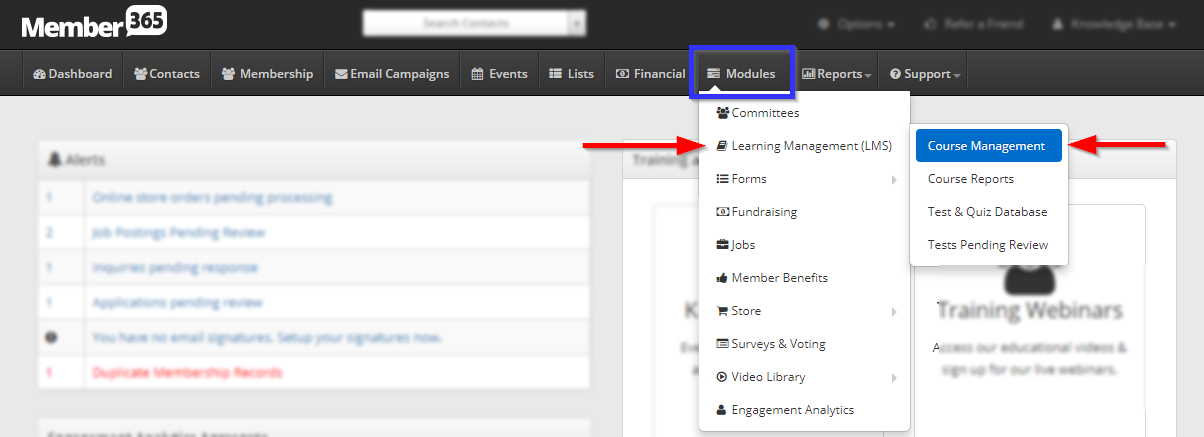
2. On the top bar, click ‘Modules‘, then hover over ‘Learning Management (LMS)‘ and then click ‘Course Management‘.
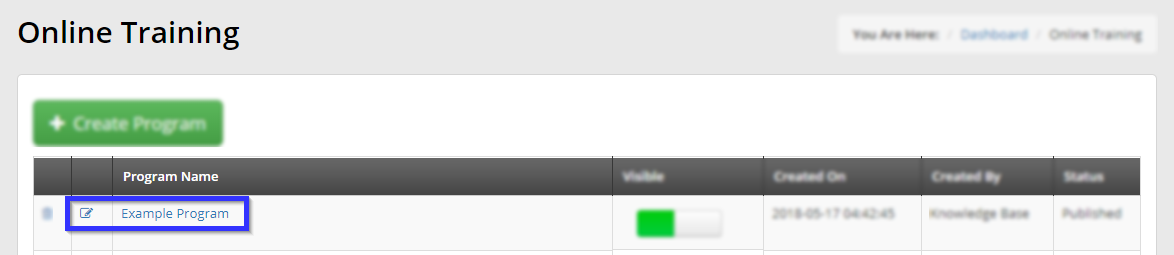
3. Click on the name of the course to which you would like to add an assignment.
4. Click the ‘Assignments‘ tab.
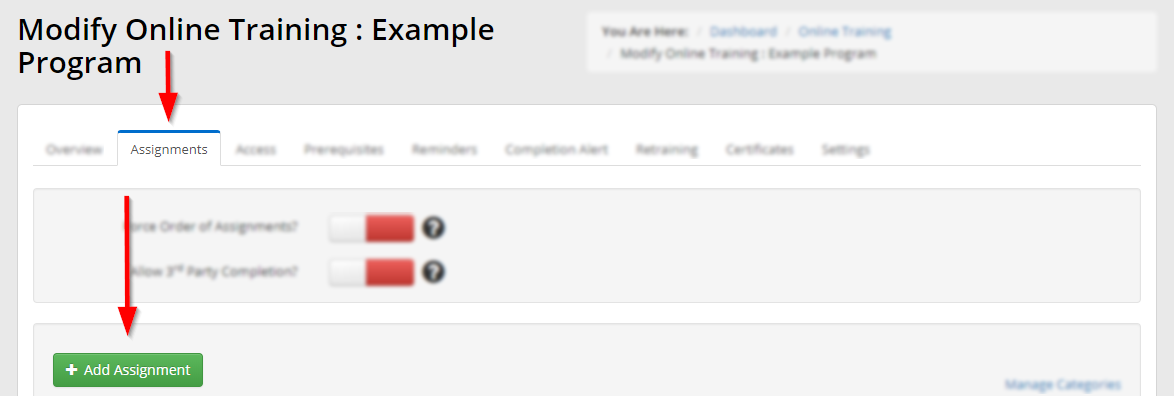
5. Click ‘Add Assignment‘.
Adding an Assignment
6. In the window that appears, you will be in the ‘File Download‘ tab by default. Enter a name for this assignment, and use the text editor to add instructions to the user taking the test.
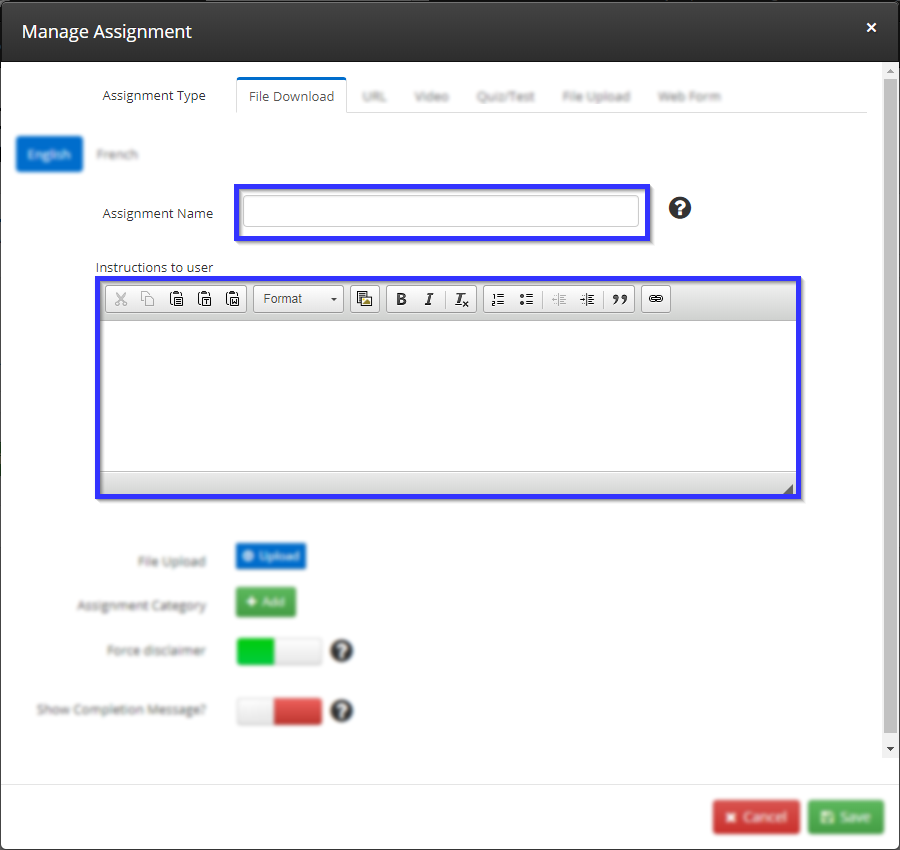
7. Click the button marked ‘Upload‘ and navigate to the file on your computer that you would like the user to download for this assignment.
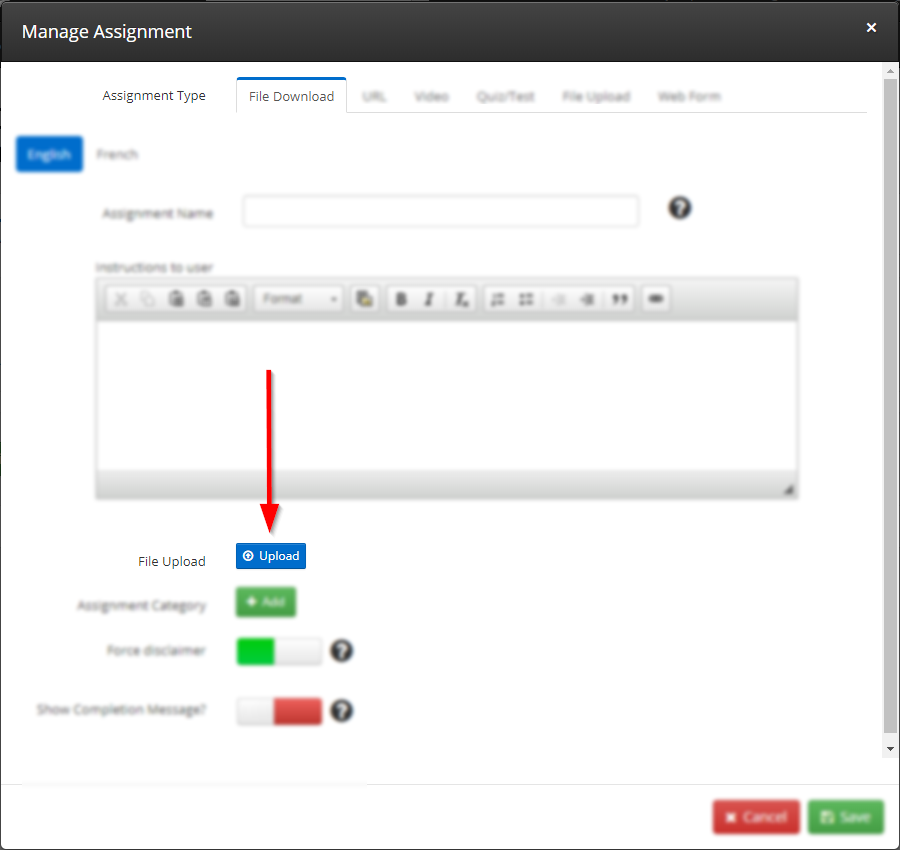
8. There are three remaining options in this window:
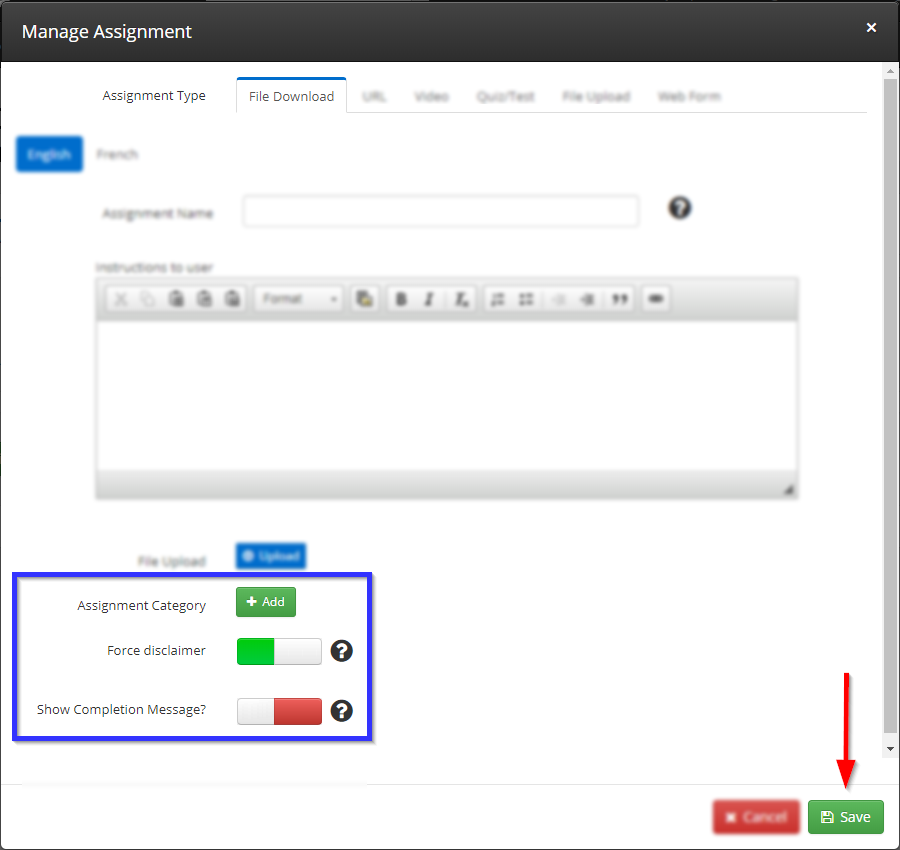
The ‘Assignment Category‘ feature is optional, and will only affect what you see on the administrator interface once you have added an assignment.
Turn the ‘Force Disclaimer‘ option to the left (green) position to force users to agree to a disclaimer that certifies that they have completed this assignment.
Turn the ‘Show Completion Message‘ toggle to the left (green) position to cause a new text editor to appear; enabling this toggle and entering a message into this text editor will cause the user to see this message once they have submitted the assignment.
9. Click ‘Save‘ once you are satisfied.
10. If you are done working on this course, scroll down and click ‘Update‘ to save your work.
Congratulations, you have added an external file as an assignment in this course!