This article will allow you to provide Members the option to add their birthdays during the application process. Members can choose to add their birthday after the fact through their own profile options, but in order to add it to the application, it must be added via the Extended Field option.
This article will first describe how to create a new membership form and add an extended field where Members can enter their date of birth, and then it will describe how to add the same option to an existing form.
Adding an Extended Field to a Membership Category’s Application Form
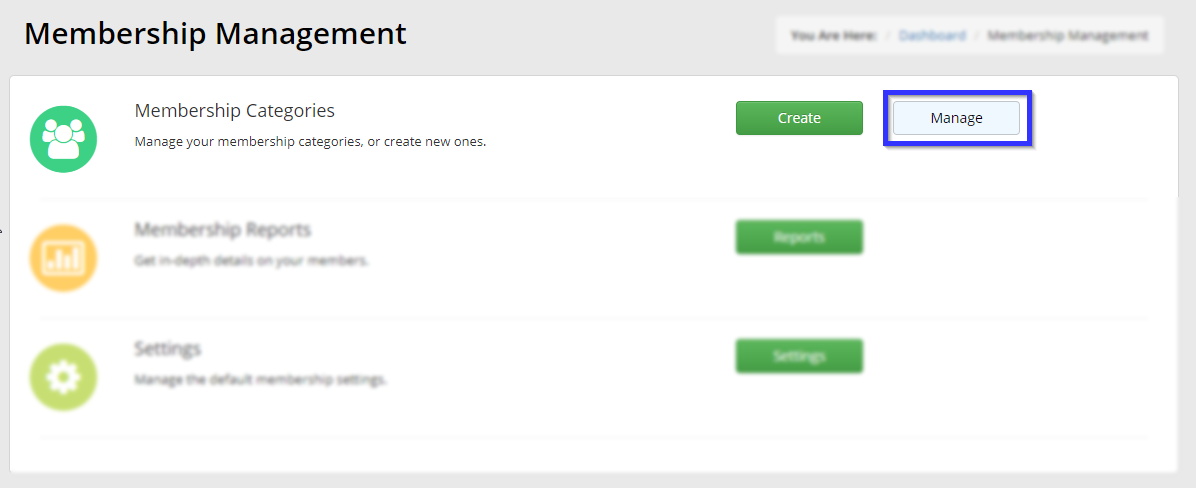
1. Login to the Member365 admin dashboard.
2. From the bar at the top of the dashboard, click on “Membership”.

3. In the section labelled “Membership Categories”, click “Manage”.
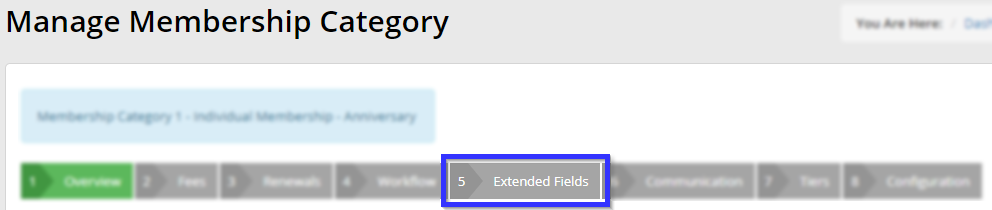
4. Click the name of the membership category whose application process is meant to include a birthday field.

5. Click the tab labelled “Extended Fields”.
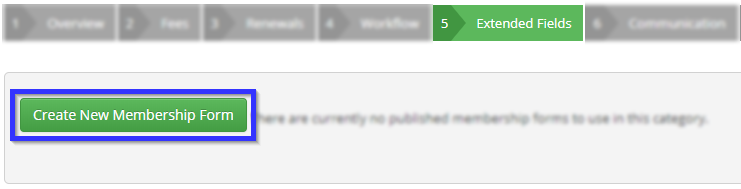
6. Click the button labelled “Create New Membership Form”. This will cause the Extended Field form to open in a new browser tab.
Creating a New Membership Form
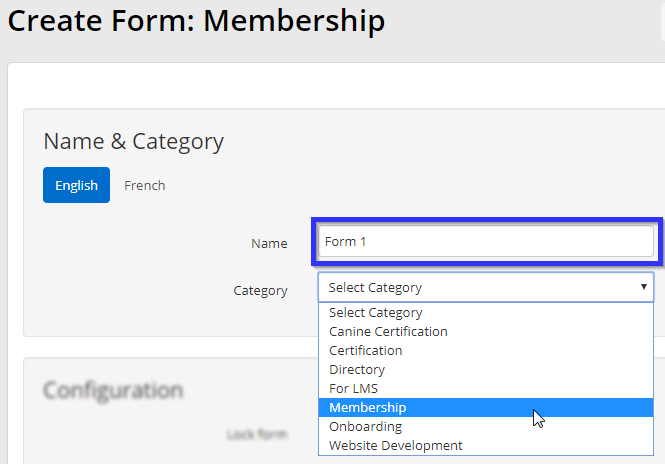
7. In the new browser tab, find the section labelled “Membership” and click “Create”.
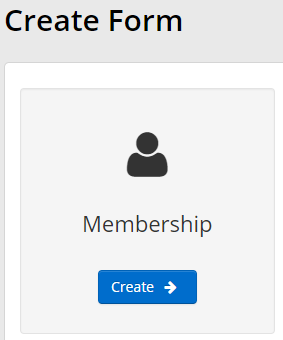
8. Enter a name for this form; this name will not be seen by the Member when they apply, and is for your use only. Select “Membership” in the drop-down box labelled “Category”; ignore the drop-down box labelled “Sub-category” that appears afterwards.
Adding Date Selection to an Extended Field Form
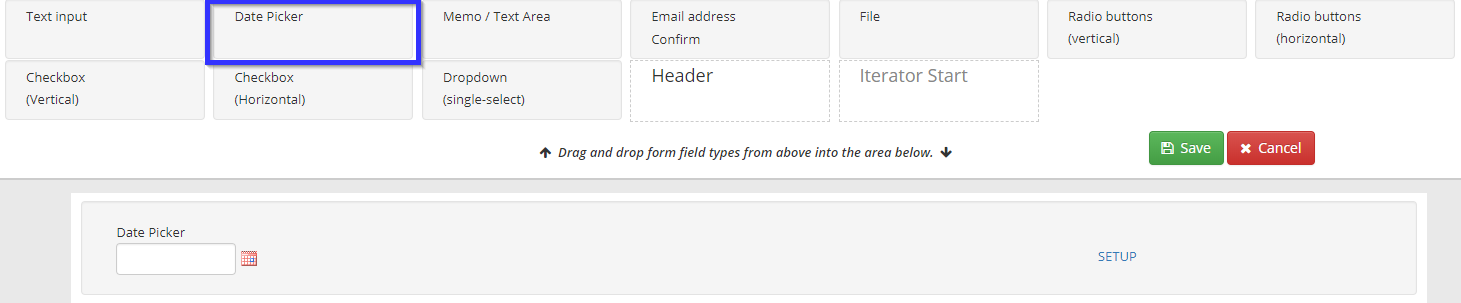
9. Click “Launch Form Question Editor” in the bottom left to open the Extended Field Form editor.
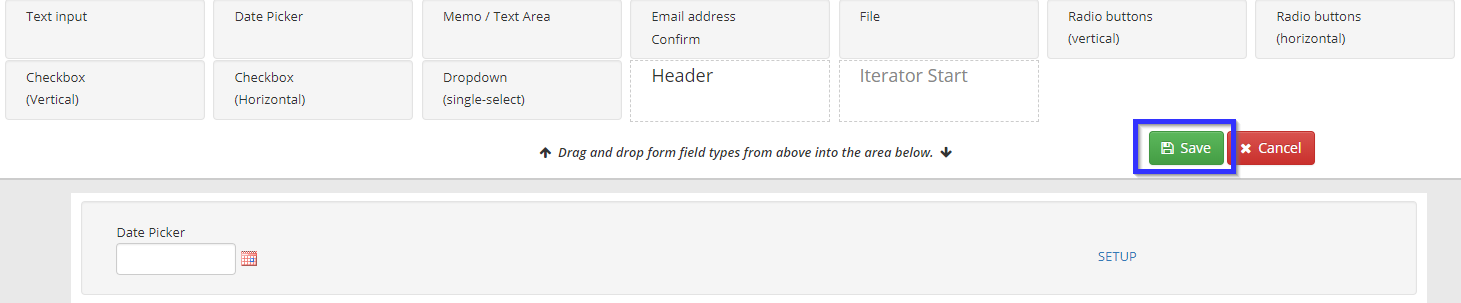
10. Click “Date Picker” from the options at the top of the editor, hold down the button, and drag the button to the empty space at the bottom, where it will become a much larger box. In the picture below, the module has already been added at the top of the blank space.
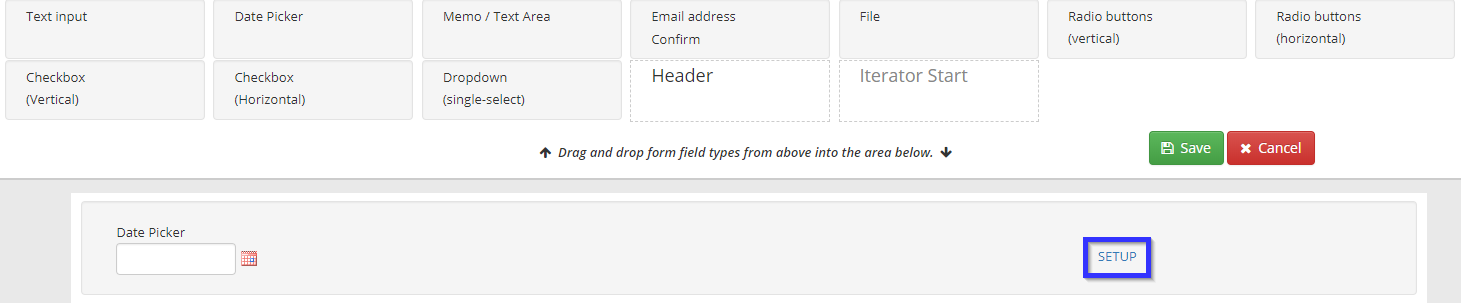
11. Click “Setup” on the right side of the newly-added section.
12. In the box that appears, enter the label that the Member will see (in this case, “Date of Birth” or something similar) into the indicated text box, and then click “Save Question”.
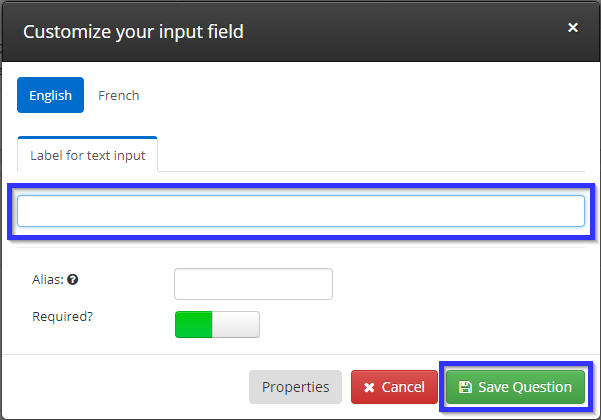
13. In the Extended Field Form editor, click “Save” to save your work.
14. You should now be in the same menu as you were in step 8; click “Publish” here to save your new form.
15. Go back to the original browser tab (where you carried out step 6) to see a list of forms you have created. If you do not see your new form, refresh the page and select the “Extended Field” tab again; you should see a drop-down box that now lists your form under the name entered in step 8.
16. Click “Publish” in the bottom-right to save this form.
Adding Birth Dates to an Existing Extended Field Form
If you already have an Extended Field Form and wish to allow selection of a date of birth in it, follow these steps:
1. From the admin dashboard, select “Modules”.

2. In the drop-down box that appears, hover the cursor over “Forms”, then click “Manage”.
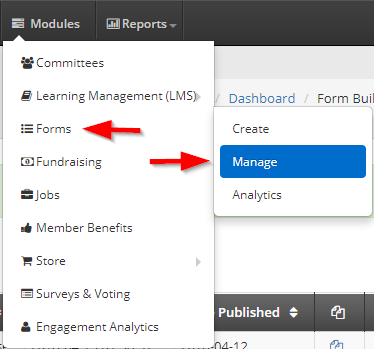
3. Find the form you wish to edit in the list, and click its name to edit it.

4. Follow steps 9 to 13 in the previous section (beginning by clicking “Launch Form Question Editor”) to add a date selection field to the form.
5. Click “Publish” in the bottom-right corner to save your work.
Congratulations, you have enabled date of birth selection to a membership application! Remember that the forms you create must be enabled for each specific membership category whose applications you wish to update; repeating steps 1-5 from the first section of this page will allow you to add your new form to a specific membership category by selecting that category in step 4.