Within the Committee feature, you can create roles for your members and then assign members to these roles. This article will guide you through creating or removing Committee roles: note that this process creates roles that can be used by any of your organization’s Committees, as opposed to creating a set of roles specific to one Committee.
Accessing Committee Configuration
1. Log in to your Member365 Administrator Dashboard.
2. On the top bar, click ‘Options‘, then ‘Configuration‘ from the drop-down menu that appears.

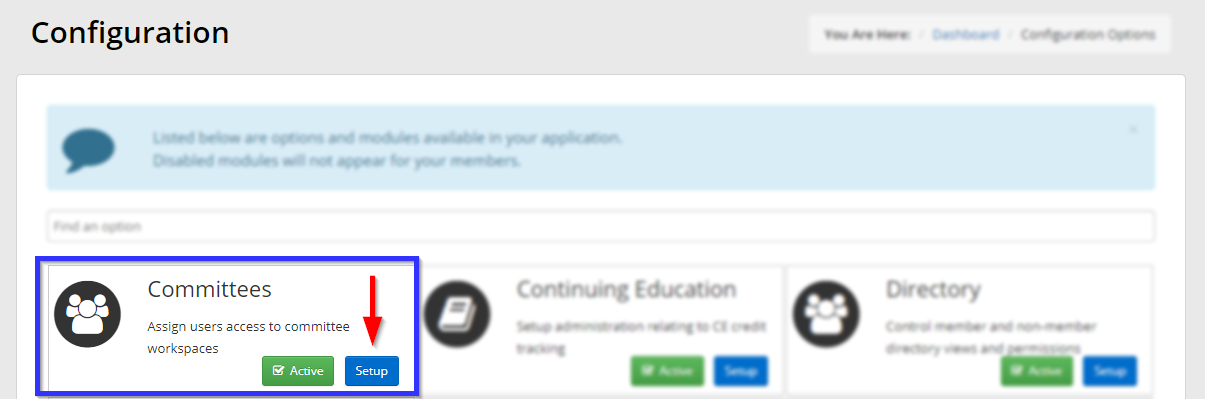
3. In the ‘Committees’ section, click ‘Setup‘.
Setting Committee Roles
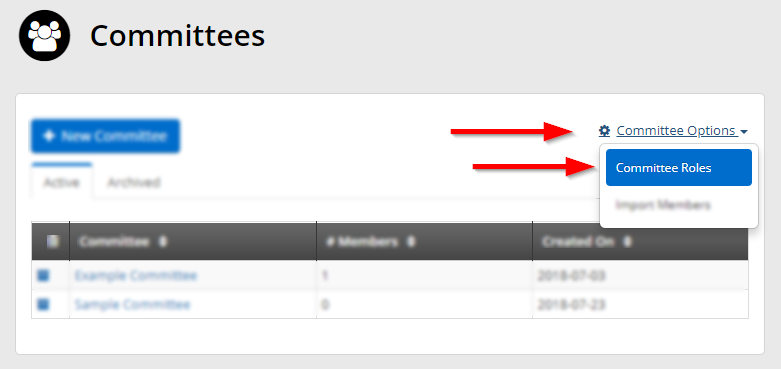
4. On the right, click ‘Committee Options‘ and then click ‘Committee Roles‘ in the drop-down menu.
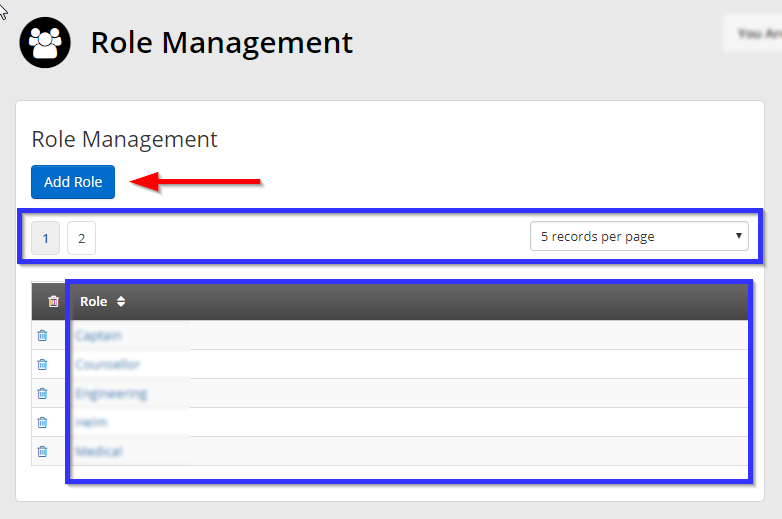
5. Use the page numbers and the drop-down option concerning how many roles you want to see per page in order to check if the role you want to add already exists. If it does not appear in the ‘Role’ column, click ‘Add Role‘.
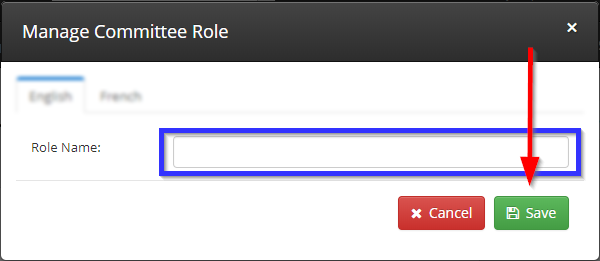
6. In the window that appears, enter the name of the new role into the ‘Role Name‘ box and then click ‘Save‘.
Congratulations, you have created a new Committee role!