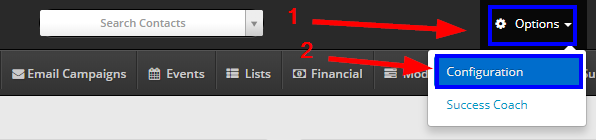
1. From your Member365 administrator dashboard, click ‘Options‘, and from the drop-down menu, click ‘Configuration‘.
2. Navigate to ‘Member Benefits’ and click ‘Setup’.
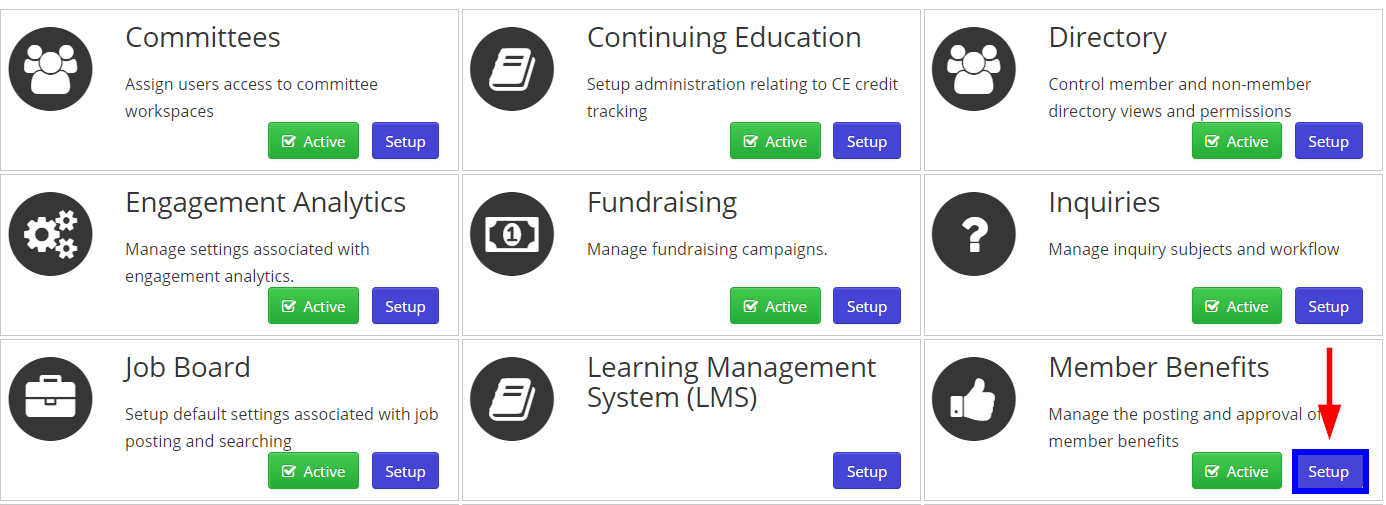
Step two will bring you to the configuration options for your Member Benefits module. Below, you can find instructions to step through every option.
Post Duration
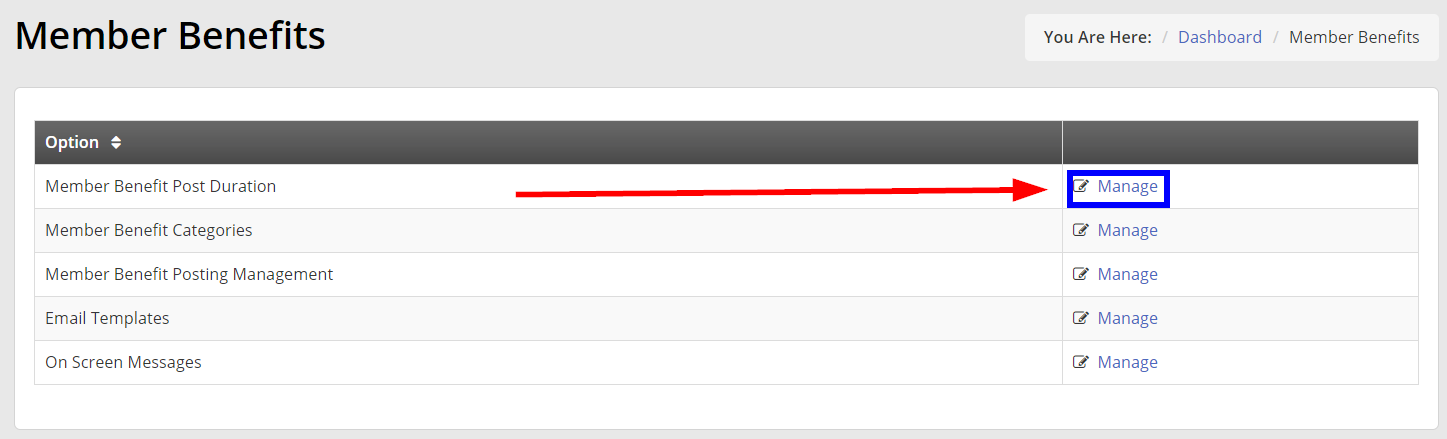
3. Click ‘Post Duration‘. This will bring you to a page allowing you to configure how long Benefits posted by Members remain available in Member365.
Shorter post duration’s can be helpful to keep your Member Benefit ‘economy’ dynamic. Having to post and re-post benefits on a predictable basis keeps Members aware of their benefits, and offers them the opportunity to routinely update and refine them.
Longer post duration offers the advantage of stability to your roster of Member benefits. Not requiring consistent updates to benefits typically means that more benefits remain available to members, and they remain available for longer periods.
You can come back to this screen at any time to edit and optimize post duration for your Member Benefits.
Member Benefit Categories
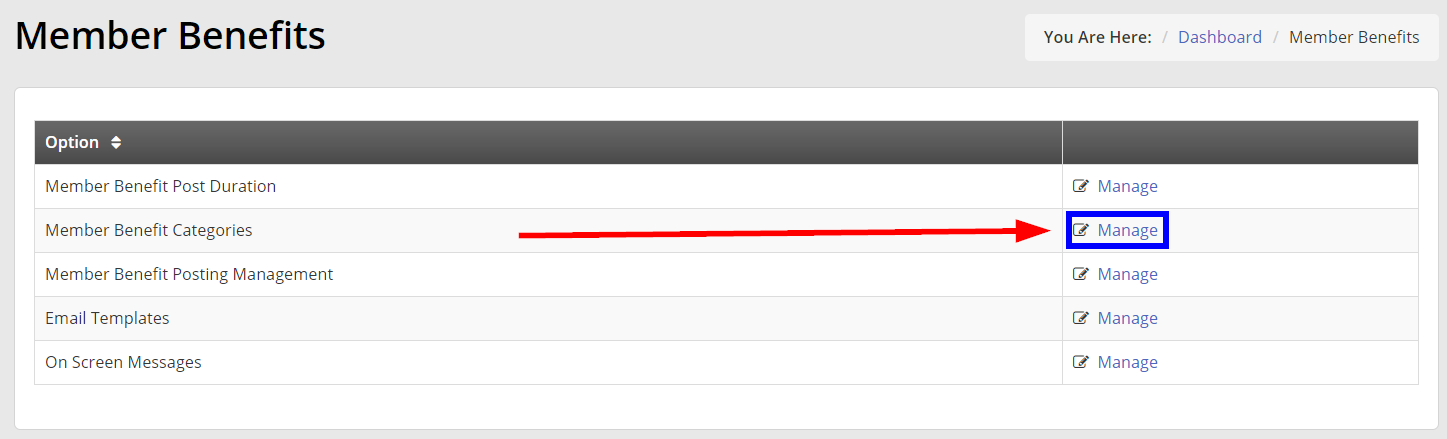
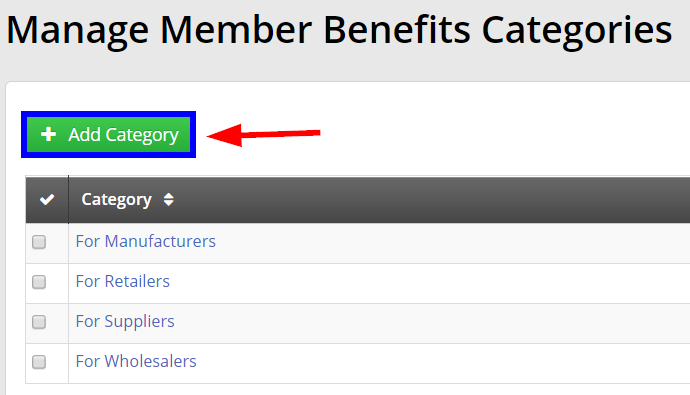
4. From the Member Benefits Configuration options, click ‘Member Benefit Categories‘.
This screen will allow you to create categories for your benefits by clicking ‘+ Add Category‘.
Member Benefit Categories help your members organize their posts, and find them more easily. Here, we’ve provided an example. Member Benefit Categories can be changed at any time, so feel free to edit yours as needed.
Member Benefit Posting Management
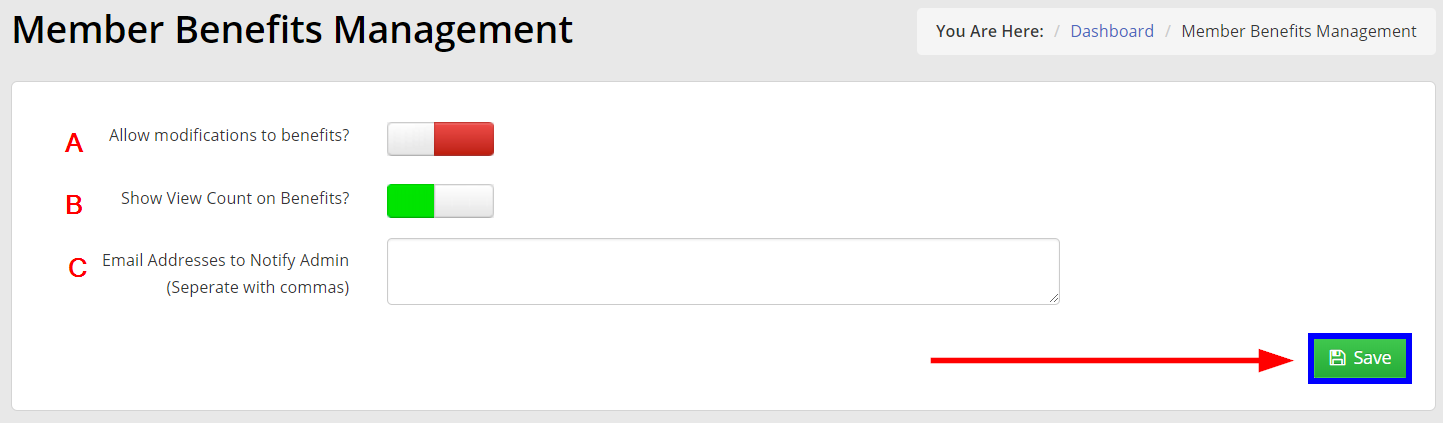
5. From the Member Benefits Configuration menu, click ‘Manage‘ beside ‘Member Benefit Posting Management‘. This screen will allow you control:
A. If Members can edit their benefits after posting
B. If views are counted and displayed on benefit posts.
C. If notifications are sent to administrators when benefits are posted/edited.
Member Benefit Email Templates
6. From the Member Benefits Configuration menu, click ‘Manage’ under ‘Member Benefit Email Templates’.
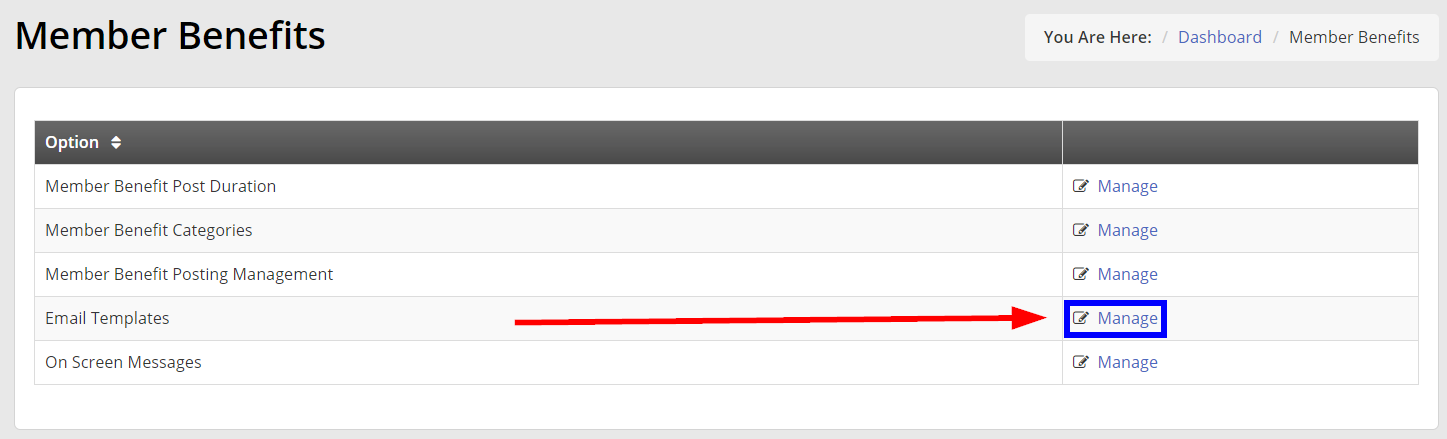
These templates contain the content that Member365 automatically emails to members and administrators when engaging with the Member Benefits module. Member365 includes content by default, so editing these is not necessary, but is available here if needed.
On Screen Messages
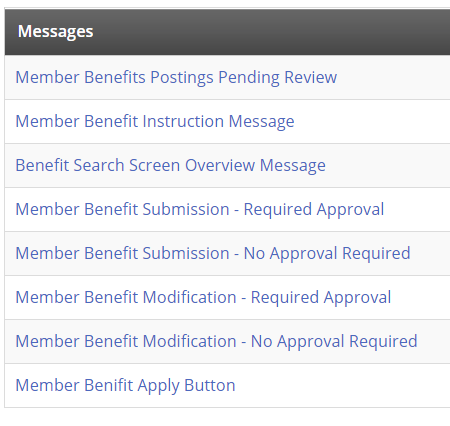
7. From the Member Benefits Configuration menu, click ‘Manage‘ under ‘On Screen Messages’.
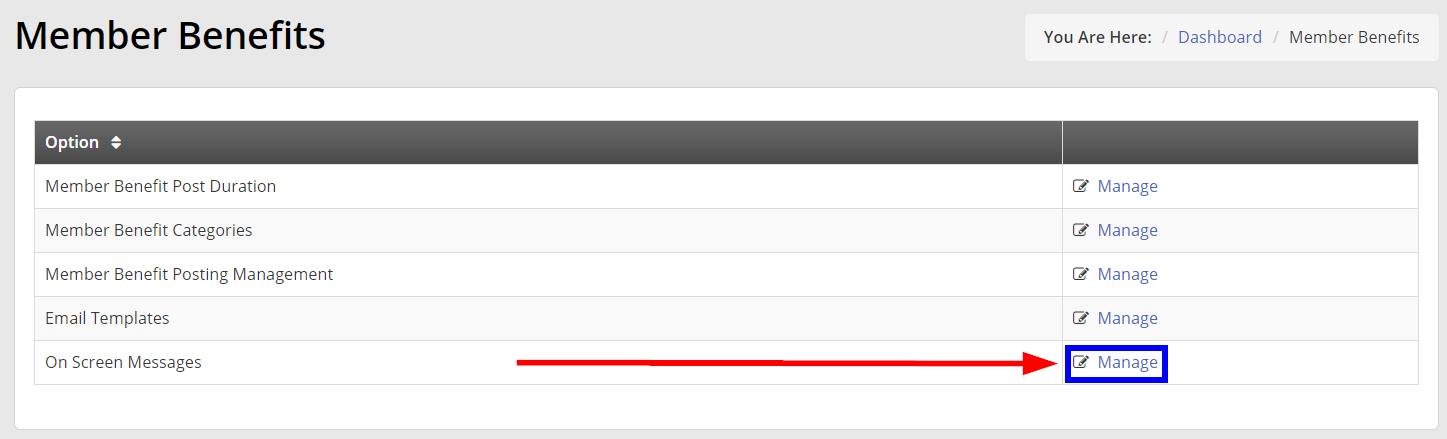
Like step 6 above, clicking this option will bring you to a page offering you the ability to adjust content displayed to members when engaging with Member365’s Benefit Module. Unlike step 6, the content here is displayed to users on-page when interacting with the Member Benefits module through the Member Portal.
Finishing Touches
8. Return to the Main Configuration Menu by clicking ‘Options > Configuration’ once again.
9. Navigate to ‘Member Benefits‘, and ensure it is enabled by clicking the red ‘Disabled‘ button, if visible.

With step 9 complete, you’re finished configuring your Member Benefits Module! Remember that you can return to the Member Benefits configuration menu at any time to update and refine your configuration settings!